


19
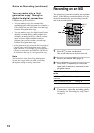
Recording on MDs
To change the trigger level for
Automatic Track Marking
Do the procedure below to change the signal level
that triggers Automatic Track Marking.
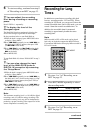
1While the deck is stopped, press MENU/NO twice.
“Setup Menu” appears in the display.
2Press ./> repeatedly (or turn ./> on
the deck) until “LS(T)” appears, then press YES (or
./> on the deck).
3Press ./> repeatedly (or turn ./> on
the deck) to select the level, then press YES (or
./> on the deck).
You can set the level at any value between
–72 dB and 0 dB, in 2-dB steps.
4Press MENU/NO.
z
Additional information on
Automatic Track Marking
• When recording from a CD player or MD deck
connected to the DIGITAL (OPTICAL) IN
connector, the entire material may be recorded as a
single track in the following cases:
— When you consecutively record the same track
two or more times using single-track repeat
play.
— When you consecutively record two or more
tracks with the same track number but from
different CDs or MDs.
— When you record tracks from certain CD or
multi-disc players.
In such cases, divide the track by editing function
(page 31).
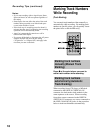
1 While the deck is stopped, press
MENU/NO twice.
“Setup Menu” appears in the display.
2 Press ./> repeatedly (or turn
./> on the deck) until “T.Mark”
appears, then press YES (or ./>
on the deck).
3 Press ./> (or turn ./> on
the deck) to select a desired setting, then
press YES (or ./> on the deck).
To Select
continued
Turn on Automatic
Track Marking
T.Mark LSync (factory
setting)
Turn off Automatic
Track Marking
T.Mark Off
4 Press MENU/NO.
“L.SYNC” lights up.
The deck marks a track number whenever the
input signal level drops to –50 dB (the
trigger level for Automatic Track Marking)
or below for at least 1.5 seconds and then
rises over –50 dB.