


18
US
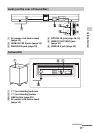
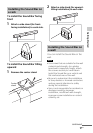
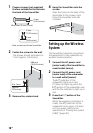
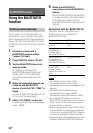
1 Prepare screws (not supplied)
that are suitable for the holes on
the back of the Sound Bar.
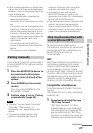
2 Fasten the screws to the wall.
The screws should protrude 6 to
7
mm (approx. 1/4 inches).
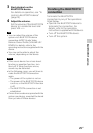
3 Remove the center stand.
4 Hang the Sound Bar onto the
screws.
Align the holes on the back of the
Sound Bar to the screws, then
hang the Sound Bar onto the
2 screws.
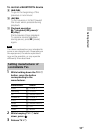
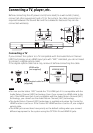
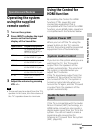
Setting up the Wireless
System
The Sound Bar transmits sound from
the equipment to the subwoofer by
wireless communication.
1 Connect the AC power cord
(mains lead) of the Sound Bar to
a wall outlet (mains).
2 Connect the AC power cord
(mains lead) of the subwoofer
to a wall outlet (mains).
The in
dicator of the
subwoofer lights up in red.
If it does not light up, press the
button of the subwoofer and
wait for the indicator to light up in
red.
3 Press the button of the
Sound Bar.
When the wireless connection is
made, the indicator of the
subwoofer turns green. If it does
not turn green, perform the
operations of “Linking the system
(LINK)” (page 30).
Hole on the back of the Sound Bar
4 mm
(3/16 inches)
More than 25 mm (1 inch)
5 mm
(7/32 inches)
9 mm
(3/8 inches)
680 mm
(26 3/4 inches)
6 to 7 mm
(approx.
1/4 inches)