


52
US
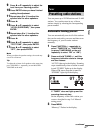
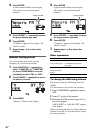
6 Press REC PAUSE/START.
“REC” lights up in the display.
Recording starts.
7 Start playing the source to be
recorded.
To stop recording
Press x.
Notes
• When you press REC PAUSE/START, the sound
field is automatically changed to LINK if the current
sound field is SBS MULTI, A.F.D. AUTO, PRO
LOGIC, PLII MOVIE, PLII MUSIC, V.M.DIM or
2CH STEREO and to HP 2CH if the current sound
field is HP VIRTUAL.
• You cannot listen to other sources while recording.
Tips
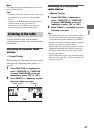
• When recording from the reverse side:
After step 1 of “Recording onto a tape manually”
(page 51), press TAPE A/B repeatedly until “TAPE
B” appears in the display. Press nN repeatedly
until the TAPE B reverse side indicator lights up to
start playback of the reverse side. Press x at the
point you want to start recording.
• When recording on both sides:
Be sure to start from the front side. If you start from
the reverse side, recording stops at the end of the
reverse side.
• When recording from the radio:
If noise is heard while recording from the radio,
move the respective antenna to reduce the noise.
• When recording from a disc onto a tape manually:
You can press . or > repeatedly to select the
tracks during recording pause mode (after step 4 and
before step 6 of “Recording onto a tape manually”
(page 51)).
• When recording from the tape:
If you set the direction to “j” (or “RELAY”)
when the tapes you use have different lengths, the
tape in each deck reverses independently.
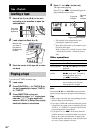
You can reinforce the bass and create a more
powerful sound.
The GROOVE setting is ideal for music sources,
and the V-GROOVE setting is ideal for video
sources (movie, etc.).
Press GROOVE on the unit repeatedly.
Each time you press the button, the display
changes cyclically as follows:
GROOVE ON* t V-GROOVE ON* t
GROOVE OFF
* The volume switches to power mode and the
equalizer curve changes.
Tips
• The default setting is “GROOVE ON”.
• “GROOVE” lights up in the display if “GROOVE
ON” is selected.
• “V-GROOVE” lights up in the display if
“V-GROOVE ON” is selected.
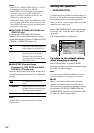
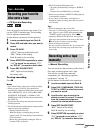
Use the buttons on the unit for the operation.
Turn OPERATION DIAL clockwise or
counterclockwise to select the preset effect
you want.
Preset effect options
Sound Adjustment
Adjusting the sound
Selecting the preset
effect
Effect Category
ROCK
POP
JAZZ
DANCE
SOUL
TECHNO
HIP HOP
Standard music sources
MP3 EQ MP3 audio tracks
FLAT Original music source
USER EQ 1
USER EQ 2
USER EQ 3
User equalizer setting