Settings and Adjustments
79
US
3 Press "/1 to turn the system on.
The system starts up with the updated
software.
You can update and improve the functions of the
system using an update disc provided by a Sony
dealer or local authorized Sony service facility.
1 Insert the update disc.
The display asks for confirmation.
2 Select [OK], and press .
Software update starts.
When updating finishes, “COMPLETE”
appears for 5 seconds in the front panel
display, then the system automatically turns
off.
3 Press "/1 to turn the system on.
The system starts up with the updated
software.
4 Press Z to remove the disc.
[Video Settings]
You can make the video settings according to
the type of connecting jacks.
x [TV Type]
You can select the aspect ratio of the connected
TV.
[16:9]
: Select this when connecting to a wide-
screen TV or a TV with a wide-mode function.
[4:3]: Select this when connecting to a 4:3
screen TV without a wide-mode function.
x [Screen Format]
You can select the display configuration for a
4:3 screen picture on a 16:9 wide-screen TV.
[Original]
: Select this when connecting to a TV
with a wide-mode function. Displays a 4:3
screen picture in 16:9 aspect ratio even on a
wide-screen TV.
[Fixed Aspect Ratio]: Changes the picture size
to fit the screen size with the original picture
aspect ratio.
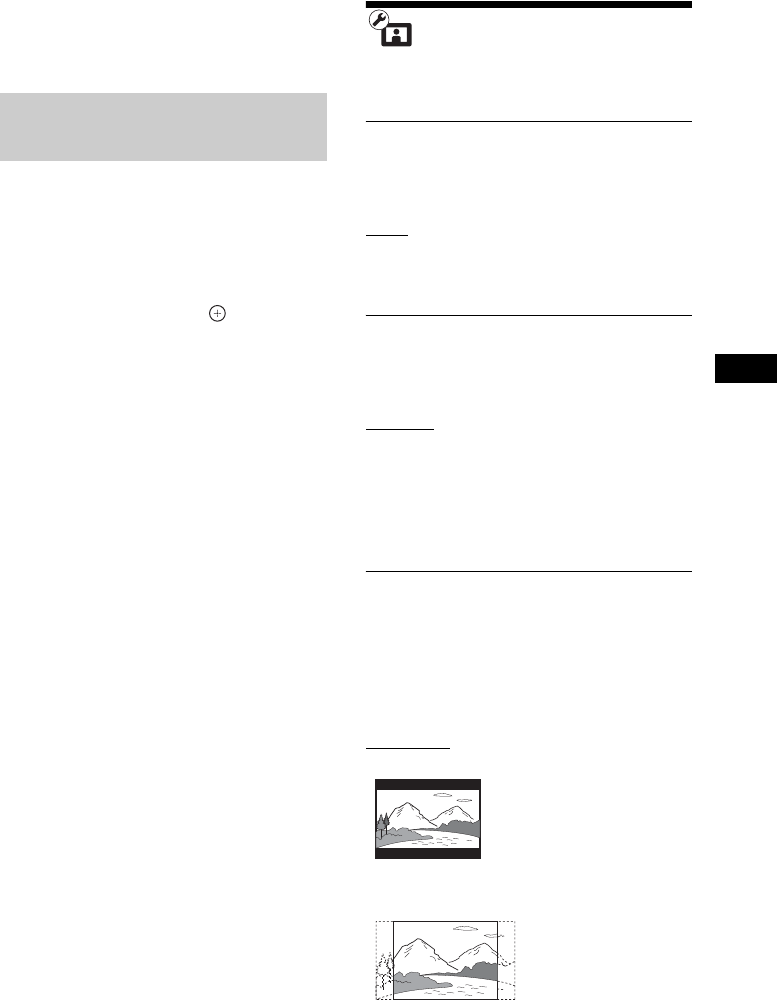
x [DVD Aspect Ratio]
You can select the display configuration for
playback of 16:9 screen pictures on a 4:3 screen
TV (selectable when [TV Type] is set to [4:3]
and [Screen Format] is set to [Fixed Aspect
Ratio]).
[Letter Box]: Displays a wide picture with black
bands on the top and bottom.
[Pan & Scan]: Displays a full-height picture on
the entire screen, with trimmed sides.
Updating the system’s
software using an update disc


