


19
WITHOUT A BACK BOX
1. Run wire to desired speaker locations. Mark stud bay for reference when returning to install
speakers.
2. We strongly recommend using construction adhesive to secure the drywall to the studs around the
bay the speaker will be mounted in. Use extra drywall screws to secure the drywall to the studs,
space the screws approximately 4"–6" apart.
CAUTION: The speaker opening must be smaller than the enclosure width (use the Retrofit
cut-out dimensions). Do not cut the drywall out to the width and height of the
enclosure sides or the Roto-Lock fasteners will not work.
3. After drywall is installed and ready for speakers follow retrofit instructions on page 19.
CREATE OPENINGS (RETROFIT)
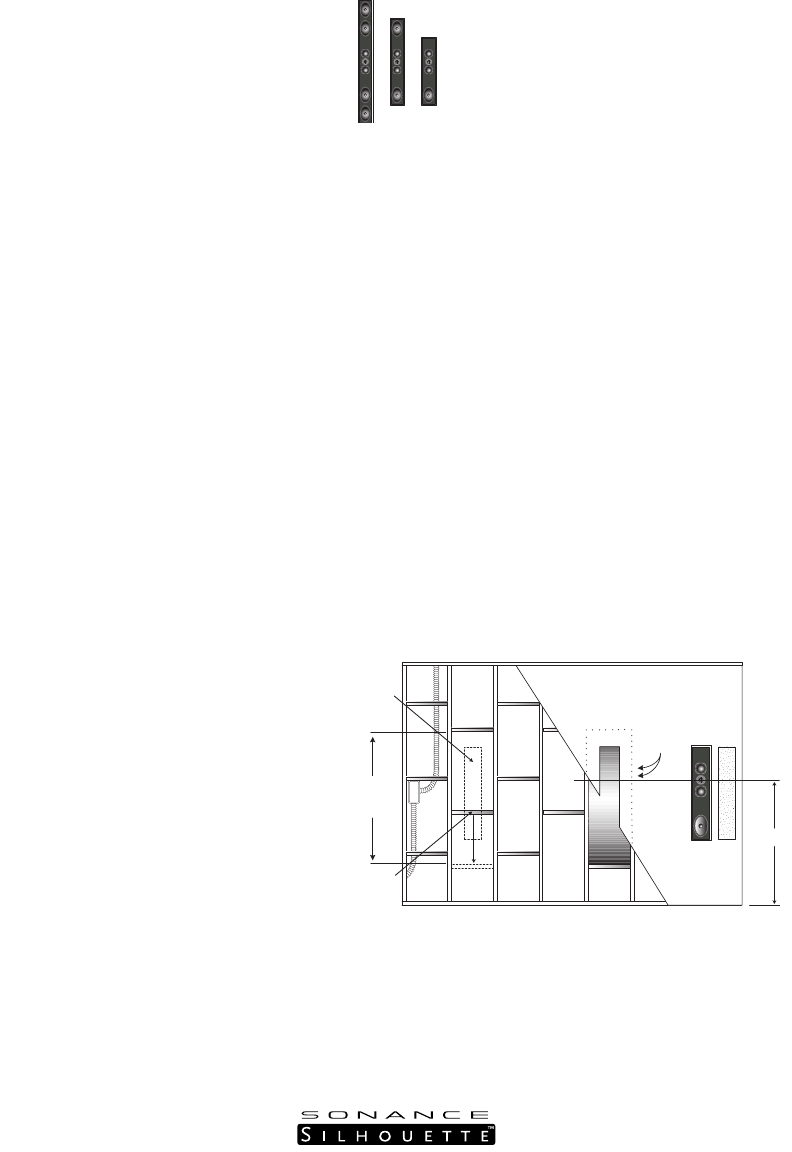
Survey proposed sites and look for installation obstacles, e.g., plumbing, wiring, and other fixtures.
Access the attic or crawl space to check routing of air ducts and available mounting depth. The Roto-
Lock requires a 1" area around the speaker to function.
1. At each selected site, use a stud
locator (available at hardware stores
for about $20) to identify studs.
Center each speaker between two
studs. Check on both sides of the
wall (this and adjacent room) for
electrical outlets or switches, which
indicate wiring in the selected stud
bay. Attempt to avoid placing a
speaker in a stud bay shared with the
home’s electrical system.
2. Measure in from wall and mark
planned edge of each wall opening.
Painter’s masking tape (available at
paint and hardware stores) is good
for this because it leaves no adhesive
residue.
3. Position and temporarily attach the cardboard cut-out template from packaging with painter’s tape
or a stapler and a level.Trace a cutout hole on wall for each speaker (Figure 8).Remove template.
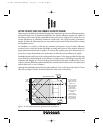
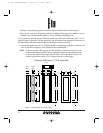
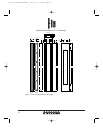
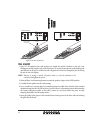
40.5"
for
Silhouette
I
I
N
S
U
L
A
T
I
O
N
38"– 42"
Sonance Silhouette Retrofit Guidelines
Firestop
(must move)
Speaker
sight
(Trace on
Wall)
Retrofit
Opening
Drywall screws
3"-4" spacing
Figure 8: Retrofit construction for Sonance Silhouette speakers.
33-1823 Silhouette Manual 2/16/00 1:36 PM Page 19