


3
INSTALLING THE SPEAKERS
PAINTING THE SPEAKERS AND GRILLES
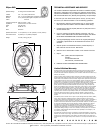
Speakers and grilles can be painted before installation, which will
eliminate the "paint scar" if the speaker needs to be removed for
service. Speakers may also be painted after installation, but before the
grilles are attached. All speakers come from the factory fitted with a
plastic "paint plug." Use the paint plug to protect the drivers while the
flange is being painted with the ceiling.
Sonance suggests always painting the grilles separate from the
speaker. The grilles may be lightly sprayed with thin paint (5 parts
thinning agent to 1 part paint), but be careful not to plug the holes.
Too much paint will adversely affect the sound of the speaker.
Once the grilles and flange are painted and dry, remove the paint plug
from the flange and install the grilles.
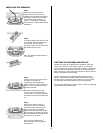
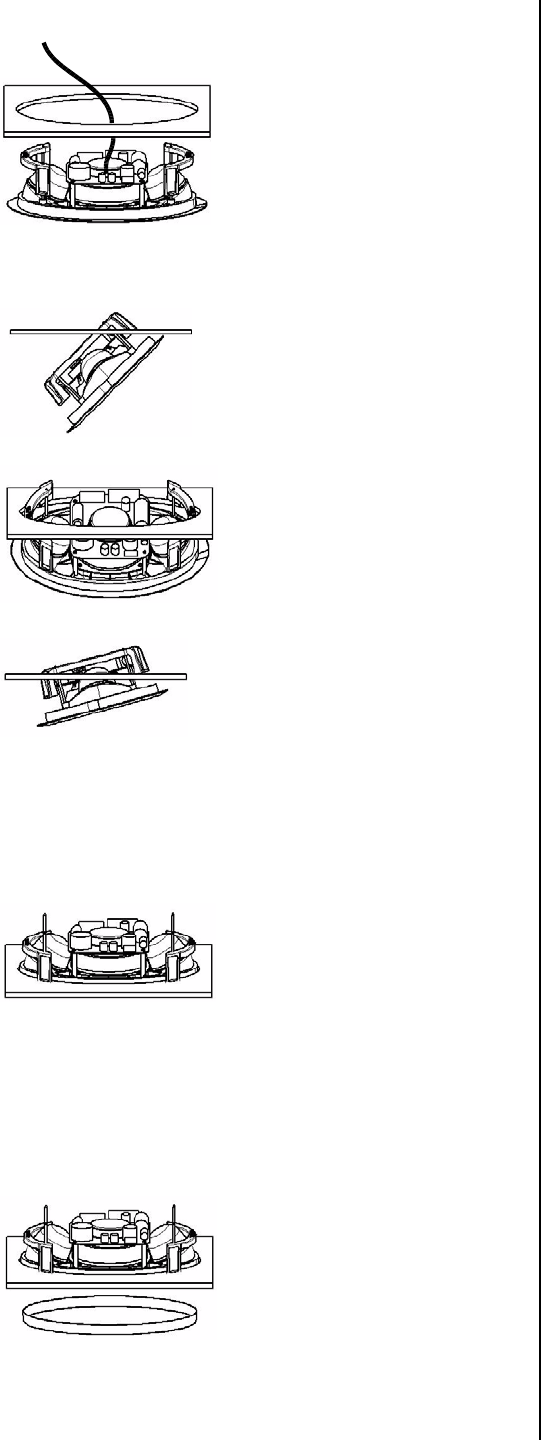
To install the Ellipse LCR, insert one side
of the Flexbar clamps through the hole
in the drywall. Once the feet are
through the hole, insert the other side of
the Flexbars into the cutout.
Note: The maximum clamp thickness is
1-1/4" (32mm)
Tighten the four screws on the front of
the baffle. The Flexbars will
automatically begin clamping the
speaker. When you notice resistance on
the four screws, the speaker has been
clamped successfully.
The flange is designed to flex and
conform to any small imperfections in
the wall surface. The screws should not
be tightened so far that the flange bows
out.
Step 2
Step 3
Remove the paint plug from the
speaker. Attach the wire from your
amplifier to the terminals on the back of
the speaker. Double check the polarity
of the speaker wires, amplifier + to
speaker + and amplifier - to speaker -.
Proper polarity is critical in home theater
installations.
Step 1
After the four Flexbar screws are
tightened the grille can be installed.
Insert about half of the grille into the
groove at the edge of the speaker.
Gently fit the remaining half of the grill
into the speaker by working your hands
around the speaker fitting the grille into
the groove as you go along.
Note: The torque applied to the
mounting screws can be adjusted for
proper grille fit.
Step 4