


15
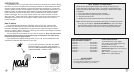
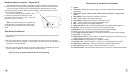
NOAA transmits coded weather and civil emergency alerts using Specic Area Message
Encoding (S.A.M.E. technology). SAME enables you to customize your WX-200 to receive
messages relevant to your area, thereby reducing unwanted alerts. SAME is activated by
programming your radio using the internal database of U.S. states and counties.
Specic Area Message Encoding (S.A.M.E.)
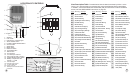
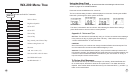
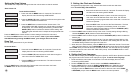
You are now ready to use your WX-200. To listen to the weather channel press the LISTEN
button. Place the radio where it gets the best reception. To turn off the weather channel, press
the LISTEN button again. Your radio can be further programmed to respond to alerts in specic
areas.To custom program your radio for alerts in your area only, see the SAME programming
instructions below.
18
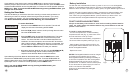
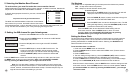
Setting the Alert Mode
Your WX-200 has 2 programmable Alert Modes.
1. Voice Mode - Sounds a warning siren for 10 sec. and turns on voice broadcast
2. Siren Mode - Sounds warning siren for the duration of the message.
To set the Alert Mode:
1. Press and hold the menu button for 3 seconds. The radio will display the main menu list
showing ALERT MODE.
2. Press the NEXT button to enter the Alert Mode menu. The alert icon will begin blinking.
Press the UP/DOWN (/) buttons to toggle between the Voice and Siren alert modes.
Note: When an alert is received, the colored LED warning light indicators will light up in both
of the Alert Modes.
Press the SAVE button to save the Alert Mode setting and exit to the main menu list. Press
the MENU button to return to normal operation. Note: if you exit the ALERT MODE menu
by pressing the MENU button, your changes will not be saved.
Chapter 3 - Advanced Programming Options
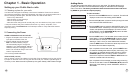
Set Backlight
The backlight for the WX-200 has an adjustable setting.
OFF - the backlight is always off except when a button is pressed or an alert
is received.
ON - the backlight is always on except when operating on battery power.
When operating on battery power, the backlight is activated only when a
button is pressed or an alert is received.
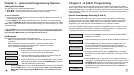
ALERT MODE
SET BACKLIGHT
To set the backlight:
1. Press and hold the menu button for 3 seconds. The radio will
display the main menu list showing ALERT MODE.
2. Press the DOWN (▼) button 2 times to scroll down through the
main menu list to the SET BACKLIGHT menu.
3. Press the NEXT button to enter the Set Backlight menu. The ON
setting will begin ashing. Press the UP/DOWN (/) buttons to
select the desired ON or OFF setting.
ON
Press the SAVE button to save the Set Backlight setting and exit to main menu list.
Press the MENU button to return to normal operation. Note: if you exit the SET
BACKLIGHT menu by pressing the MENU button, your changes will not be
saved.
Chapter 2 - S.A.M.E. Programming
Your radio is capable of being programmed with up to 20 different location codes. The radio
has been programmed at the factory to respond to all messages within your reception area.
To program the radio for your specic area, follow the steps below.
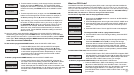
1. Press and hold the MENU buttion for 5 seconds. ALERT MODE is
displayed on the screen.
2. Press the UP () button 2 times to get to the COUNTY CODE menu.
3. Press the NEXT button to enter the COUNTY CODE menu. The
words ALL REGIONS will be displayed in the upper left hand
corner of the screen. This factory default setting will respond to all
messages broadcast in your reception area.
4. To change the default setting, press the NEXT button. The display
will show the words EDIT, ADD and DELETE. The word EDIT will be
ashing.
5. Press the NEXT button to enter a list of U.S. states and territories.
Once again, ALL REGIONS will be displayed on the screen. Use the
UP/DOWN (/) buttons to scroll through the list. NOTE: Pressing
the UP () button will begin to scroll through the list of states in
alphabetical order starting with ALABAMA. Press the UP button to
scroll through the list.
ALERT MODE
COUNTY CODE
ALL REGIONS
EDIT ADD DEL
ALL REGIONS
STATE