2
2. If your amplifier is going to be placed in an
enclosed space such as an armoire, it is essential
that adequate ventilation be provided. We strongly
suggest that the shelf on which the product is being
placed includes a cutout of at least twenty inches
by twelve inches (50 cm by 30 cm) directly under
the ventilation slots on the bottom of the amplifier.
A similarly sized cutout should be made in the
upper or rear wall behind the shelf so that free air
can flow from beneath the unit to the outside
atmosphere. Also allow a minimum of three inches
(7.5 cm) free space above the product and two
inches (5 cm) on either side of the product. This
combination of space will allow for a free flow of
circulating air to help keep the amplifier from
overheating. If your cabinet includes a number of
products, it may be advisable to install a quiet fan
to assist the cooling process.
3. The dealership from which you purchased the
product is an expert on custom installation
procedures and can provide invaluable advice to
help you make an aesthetically pleasing and trouble
free installation.
Caution for Connections
1. Connect this equipment only to the type of AC
power source as marked on the unit. Always route
AC power cords so they are not likely to be walked
on, or tripped over, or where they may be pinched
by items placed on or against them. Always pay
particular attention to cords at plugs and/or
convenience receptacles, and at the point where
they exit from the product.
2. Do not defeat the inherent design features of the
polarized plug. Non polarized line cord adapters
will defeat the safety provided by the polarized AC
plug. If the plug should fail to fit, contact your
electrician to replace your obsolete outlet. Do not
defeat the safety purpose of the grounding-type
plug. If you use this product in a country which
only has two slotted receptacles in the house, you
must use a three-pin adapter plug to earth ground
which is the “E” (earth pin) of the power cord
connected to this product.
3. Do not overload wall outlets, extension or
integral convenience receptacles, as this could
result in a risk of fire or shock.
Operating Voltage
The LDS16-40 amplifier is factory-set for 110V/
120V 60 HZ or 230V 50HZ AC operation,
according to the country for which the unit was
manufactured (230V in European Union countries,
in compliance with CE regulations). The operating
voltage cannot be changed by the user and any
attempt to do so may risk of causing damage to the
amplifier and will void the warranty.
Care of the Product
Clean the product by dusting with a dry cloth. Do
not permit objects of any kind to be pushed and/or
fall into the product through the enclosure
openings.
Front Panel Description
The front panel houses the main Power ON/OFF
switch. A blue power LED will illuminate when
the LDS16-40 is ON and will dim when all zone
amplifiers are in the ‘Standby’ mode. The LED will
only extinguish when the Power ON/OFF switch
is in the OFF position or when the LDS16-40 is
disconnected from the electrical outlet.
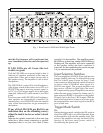
Rear Panel Connections
The LDS16-40 has been designed to provide
multiple stereo zones with identical performance
and features. The following descriptions apply to
all zones.
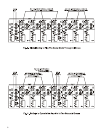
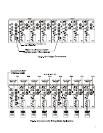
The connections of the audio signal between your
preamp/control center and your LDS16-40 will be
made discretely via cables from the outputs of your
preamp to the gold plated inputs of your LDS16-
40. Please ensure that the cables are installed for
each channel as described on the following pages.
Volume Controls
Two separate controls are provided for left and right
volume control. When functioning under the
bridge-mono mode, only the right volume control
is used for volume adjustment.
LDS Operation
Each time the power comes on, the LDS16-40 will
perform the LDS (Load Detection System) test
sequence from zone-1 to the last zone amplifier.
Sherbourn’s LDS technology incorporated in this
product will automatically detect a short-circuit in
the speaker wiring and will also check for
speaker(s) that may be configured with too low an
impedance of less than 4 ohms typically. During
the test sequence, observe the rear panel LDS LEDs
for the following test results.
The power should be off during your
installation. Once your installation is complete
and the unit is powered up, the LDS16-40 will
automatically perform the LDS Test Sequence
described in the previous paragraph. Please note


