E-11
Listening to a cassette tape
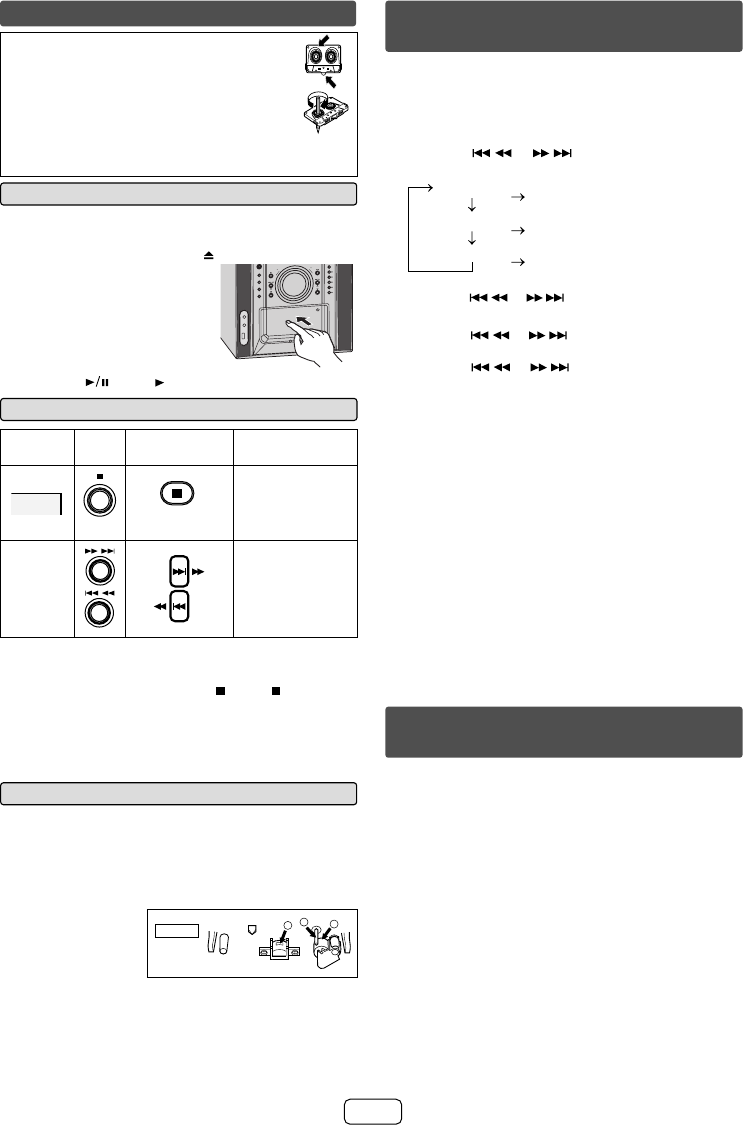
Before playback:
For playback, use normal or low-noise O
tapes for the best sound. (Metal or
CrO
2
tapes are not recommended.)
Do not use C-120 tapes or poor-quality O
tapes, as they may cause malfunctions.
Before loading a tape into the cassette compartment, O
tighten the slack with a pen or a pencil.
Tape playback Q
Press the ON/STAND-BY button to turn the power on.1
Open the cassette compartment 2
by pushing the area marked “ ”.
Load a cassette into the 3
TAPE compartment with
the side to be played facing
toward you.
Press the TAPE / TUNER
4
button repeatedly to select
TAPE.
4
5
3
2
1
TUNING
PRESET
USB
AUDIO IN
TAP
E
TUNE
R
CD
iPod/iPhone
(BAND)
VOL.
VOL.
Press the 5 (TAPE ) button to start playback.
Various tape functions Q
Function
Main
unit
Remote
control
Operation
Stop
TAPE
Press in the
playback, fast
forward or fast
rewind mode.
Fast
forward/
rewind
Press in the
playback or stop
mode.
Caution:
Before remove the cassette or changing from one tape O
operation to another, press the
(TAPE ) button.
If a power failure occurs during tape operation, the O
tape head will remain engaged with the tape and the
cassette door will not open. In this case, wait until the
power is restored.
Cleaning the tape-handling parts Q
Dirty heads, capstans or pinch rollers can cause poor O
sound and tape jams. Clean these parts with a cotton
swab moistened with commercial head/pinch roller
cleaner or isopropyl alcohol.
When cleaning the heads, pinch rollers, etc., unplug O
the unit which contains high voltages.
A Playback head
B Capstan
C Pinch roller
TAPE 1
A
C
B
After long use, the deck’s heads and capstans may O
become magnetized, causing poor sound. Demagnetize
these parts once every 30 hours of playing/recording
time by using a commercial tape head demagnetizer.
Read the demagnetizer’s instructions carefully before
use.
In this example, the clock is set for the 12-hour (AM 12:00)
display.
Press the ON/STAND-BY button to turn the power on.
1
Press the CLOCK/TIMER button.2
Within 10 seconds, press the MEMORY button.3
Press the 4 or button to select 12-hour or
24-hour display and then press the MEMORY button.
“AM 12:00”
“AM 0:00
”
“0:00”
The 12-hour display will appear.
(AM 12:00 - PM 11:59)
The 12-hour display will appear.
(AM 0:00 - PM 11:59)
The 24-hour display will appear.
(0:00 - 23:59)
Press the 5 or button to adjust the hour and
then press the MEMORY button.
Press the
6 or button to adjust the minutes
and then press the MEMORY button.
Press the
or button once to advance the
time by 1 minute. Hold it down to change the time in
5-minutes intervals.
To confi rm the time display:
Press the CLOCK/TIMER button. The time display will
appear for about 10 seconds.
Note:
The “CLOCK” will appear or time will fl ash to confi rm the
time display when the AC power supply is restored after a
power failure or unplugging the unit. If incorrect, readjust
the clock as follows.
To readjust the clock:
Perform “Setting the clock” from step 1. If “CLOCK” does
not appear in step 3, step 4 (for selecting the 12-hour or
24-hour display) will be skipped.
To change the 12-hour or 24-hour display:
Clear all the programmed contents. [Refer to “Factory
1
reset, clearing all memory” on page 14 for details.]
Perform “Setting the clock” from step 1 onwards.
2
Timer and sleep operation (Remote
control only)
Once timer:
Once timer play works for one time only at a preset time.
Daily timer:
Daily timer play works at the same preset time every day.
For example, set the timer as a wake-up call every
morning.
Using the once timer and daily timer in combination:
For example, use the once timer to listen to a radio
program, and use the daily timer to wake up.
Setting the clock (Remote control
only)
CD-DH950P_US_EN.indd 11CD-DH950P_US_EN.indd 11 2/21/2011 12:13:25 PM2/21/2011 12:13:25 PM
