


6
INSTALLATION
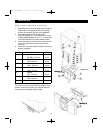
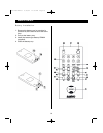
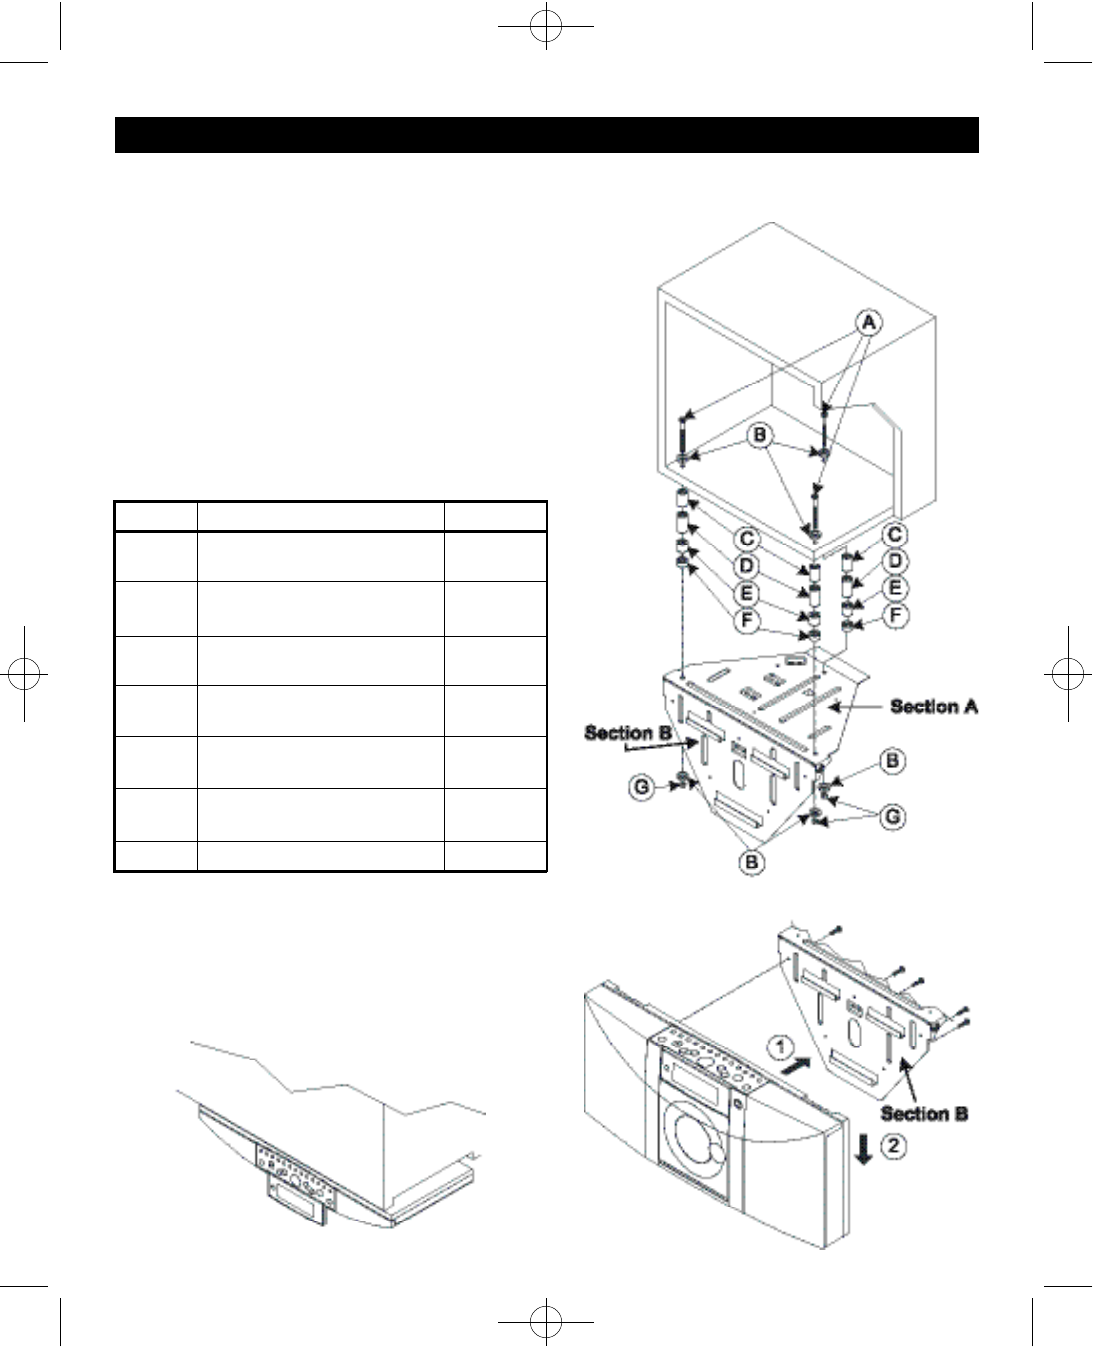
Wall/under-cupboard mounting
1. Attach Section A of the bracket onto the wall or
underside of the cupboard with 3 mounting
s c r ews (A), washers (B), and nuts (supplied).
2 . If the cabinet bottom has a valance for
f l u o rescent lights, etc., you will need 1 or more
of the supplied spacers (C, D, E, F) to mount the
unit flush with the front of the lowest surf a c e .
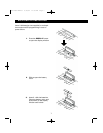
3 . I n s e rt the system into Section B as shown with
a rrow (1), and slide it down as shown with
a rrow (2).
4 . Attach the unit onto Section B with 5 mounting
s c r ews (supplied).
I t e m D e s c r i p t i o n Q ’t y
A S c re w
MF M5.0 x 70 mm 3 pcs
B Wa s h e r
15.2 x 3.0 mm 6 pcs
C S p a c e r
13.6 x 19.5 mm 6 pcs
D S p a c e r
14.5 x 27 mm 3 pcs
E S p a c e r
15 x 14.5 mm 3 pcs
F S p a c e r 3 pcs
15.2 x 8.5 mm
G S c rew Nut 3 pcs
The unit can now be raised with the hinges of the
bracket so that it fits under your cabinet with the
c o n t rols and the display clearly visible.
DTA-1800-Efinal 9/30/02 11:55 AM Page 6