


4 - English
Contents
Wiring the Main Power Supply Plug (UK Only)
IMPORTANT NOTICE : The mains lead on this equipment is supplied with a moulded plug incorporating a fuse. The
value of the fuse is indicated on the pin face of the plug and if it requires replacing, a fuse approved to BS1362
of the same rating must be used. Never use the plug with the fuse cover removed. If the cover is detachable and
a replacement is required, it must be of the same colour as the fuse fitted in the plug. Replacement covers are
available from your dealer. If the fitted plug is not suitable for the power points in your house or the cable is not
long enough to reach a power point, you should obtain a suitable safety approved extension lead or consult your
dealer for assistance. However, if there is no alternative to cutting off the plug, remove the fuse and then safely
dispose of the plug. Do not connect the plug to a mains socket as there is a risk of shock hazard from the bared
flexible cord. Never attempt to insert bare wires directly into a mains socket. A plug and fuse must be used at all
times.
IMPORTANT : The wires in the mains lead are coloured in accordance with the following code:– BLUE = NEUTRAL
BROWN = LIVE As these colours may not correspond to the coloured markings identifying the terminals in your
plug, proceed as follows:–The wire coloured BLUE must be connected to the terminal marked with the letter N or
coloured BLUE or BLACK. The wire coloured BROWN must be connected to the terminal marked with the letter L
or coloured BROWN or RED.
IMPORTANT : DO NOT CONNECT EITHER WIRE TO THE EARTH TERMINAL WHICH IS MARKED WITH LETTER E OR
BY THE EARTH SYMBOL , OR COLOURED GREEN OR GREEN AND YELLOW.
GETTING STARTED
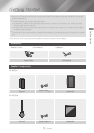
5 Accessories
5 Speaker Components
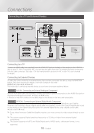
6 Front Panel
6 Rear Panel
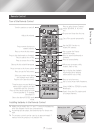
7 Remote Control
CONNECTIONS
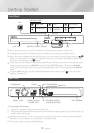
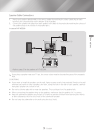
8 Connecting the Speakers
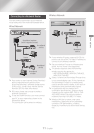
10 Connecting to a TV and External Devices
11 Connecting to a Network Router
SETTINGS
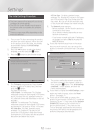
12 The Initial Settings Procedure
13 The Home Screen at a Glance
13 Accessing the Settings Screen
14 Settings Menu Functions
17 Network Setup
19 Wi-Fi Direct
20 Upgrading Software
22 Setting Up DLNA
PLAYING CONTENT
23 Switching the Source Device
23 Playing Commercial Discs
23 Playing a Disc with User Recorded Content
24 Playing Files on a USB Device
25 Controlling Video Playback
26 Playing a Pre-Recorded Commercial Audio Disc
27 Controlling Music Playback
28 Playing Photo Contents
29 Listening to the Radio
30 Using Bluetooth
33 Using the Special Effects Remote Control
Buttons
NETWORK SERVICES
34 Using BD-LIVE™
34 Using DLNA
34 Apps
35 Using Opera TV Store
36 Screen Mirroring
APPENDIX
37 Additional Information
38 Disk and Format Compatibility
43 Troubleshooting
46 Specifications
47 Licences