RSLS
C
L
SW
R
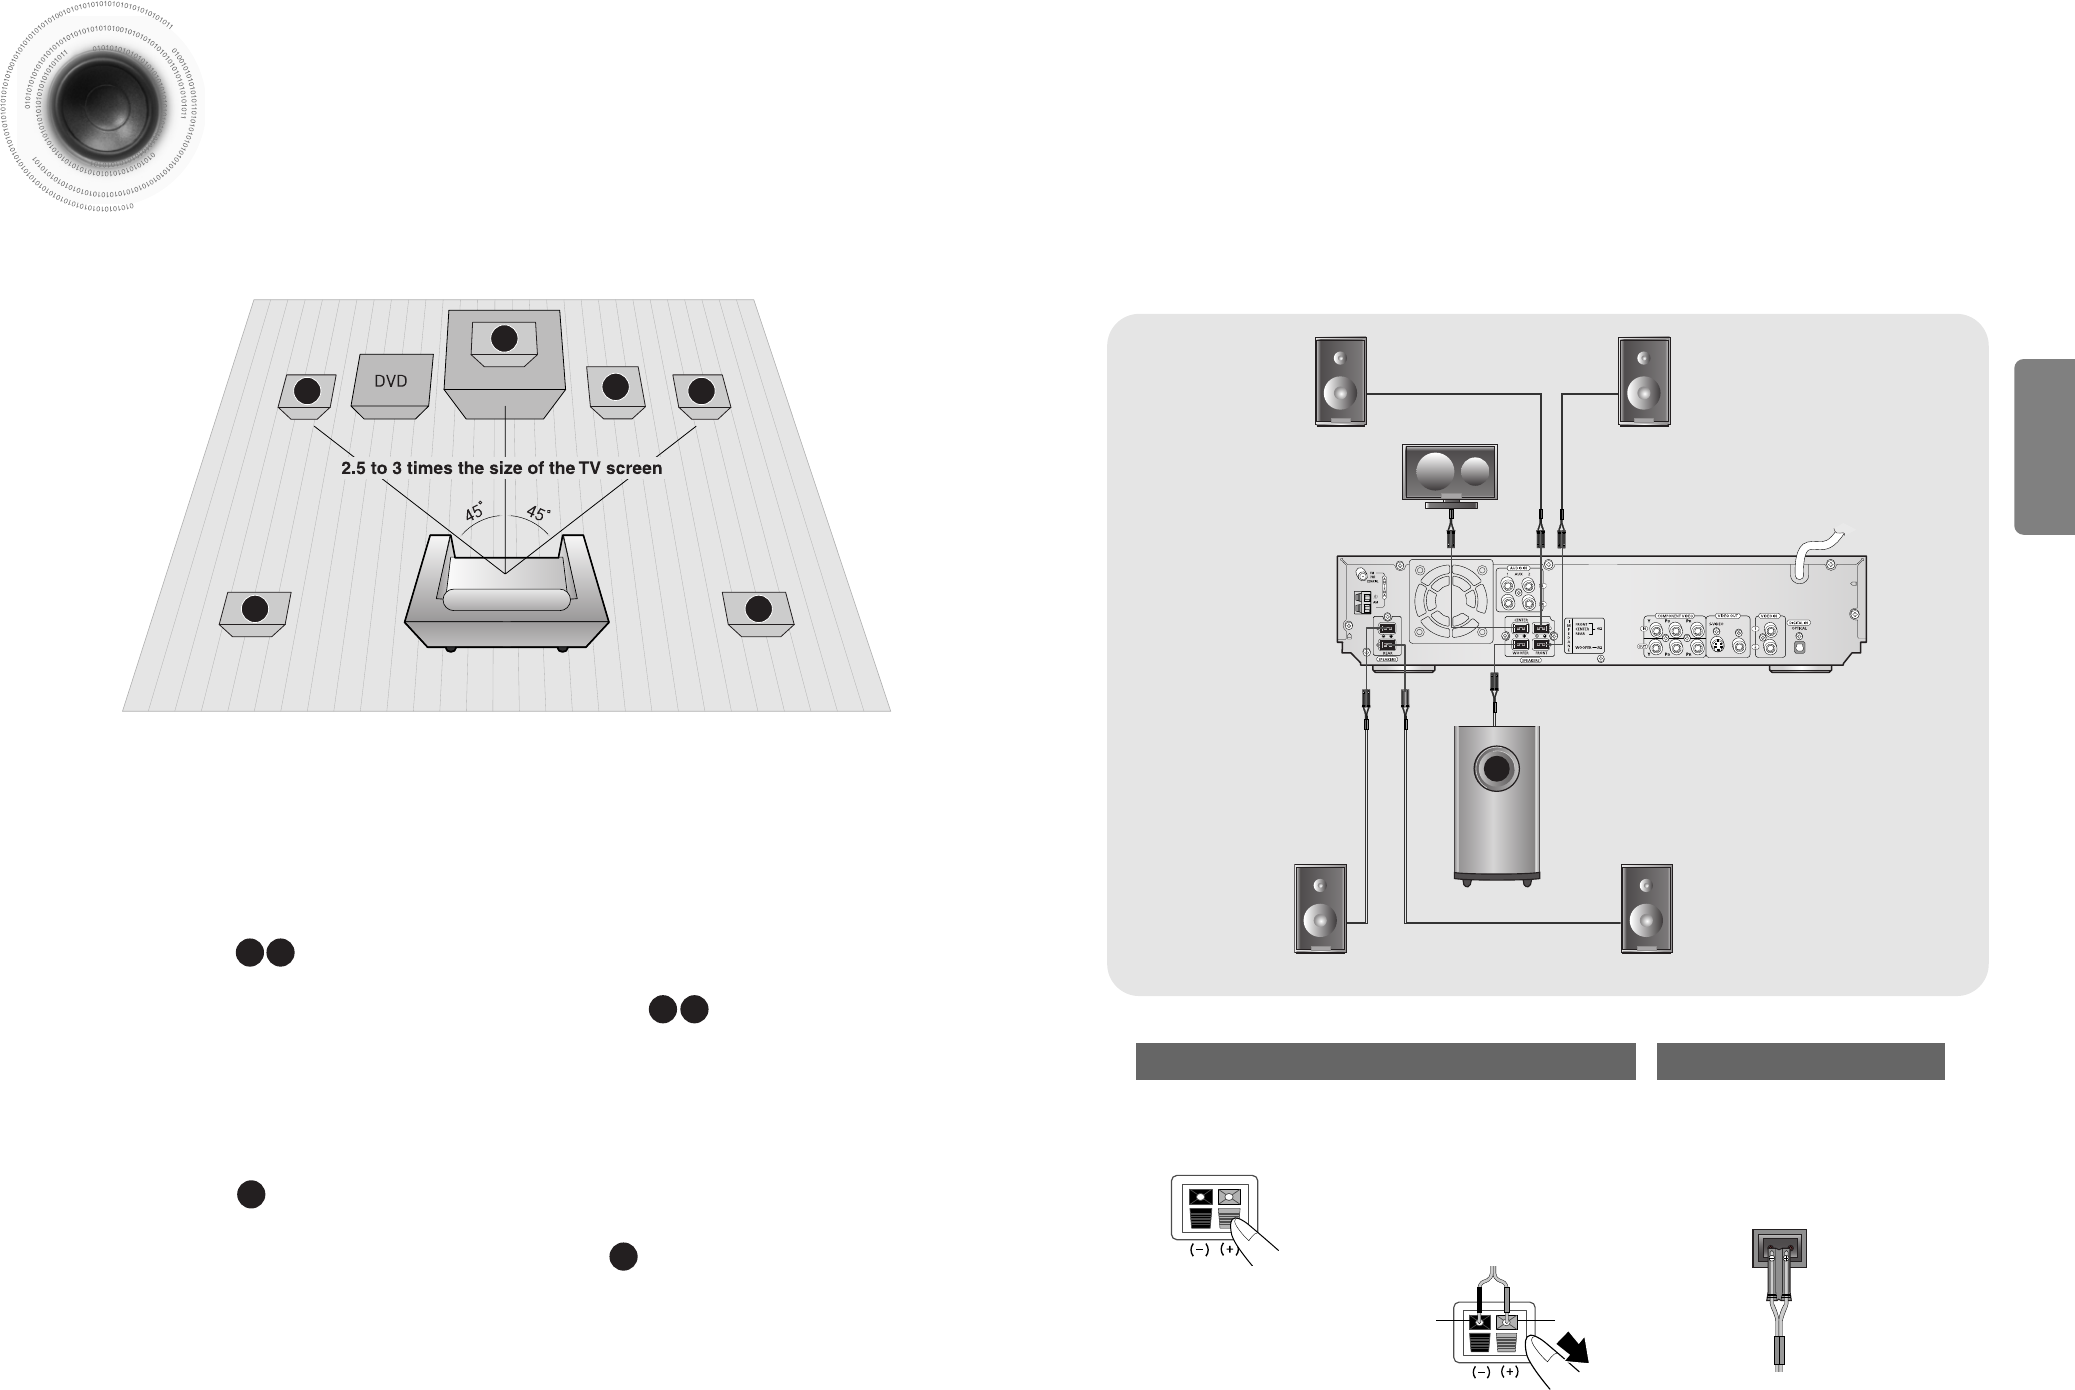
Rear Speaker (L)
Rear Speaker (R)
Subwoofer
Center Speaker
Front Speaker (L)
Front Speaker (R)
•
Make sure the colors of the speaker terminals
match the colors of the connecting jacks.
•
Make sure the polarities (+ and -) are correct.
•
Insert the black wire into the black
(–) terminal and the gray wire into
the gray (+) terminal.
•
Make sure the polarities (+ and –)
are correct.
Black
Press down the terminal
tab on the back of the
speaker.
1
Insert the wire into the
terminal and release the
terminal tab.
2
Connect the connecting jacks (6)
to the back of the DVD player.
3
Blue
Gray
Purple
White
Red
Green
Gray
14
Back of the Speakers Back of the Main Unit
Rear Speakers
•
Place these speakers behind your listening position.
•
If there isn't enough room, place these speakers so they face each other.
•
Place them about 60 to 90cm (2 to 3feet) above your ear, facing slightly
downward.
*
Unlike the front and center speakers, the rear speakers are used to
mainly handle sound effects and sound will not come from them all
the time.
Subwoofer
•
The position of the subwoofer is not so critical.
Place it anywhere you like.
•
Usually, it is placed by a corner near the front speakers.
Front Speakers
•
Place these speakers in front of your listening
position, facing inwards (about 45°) toward you.
•
Place the speakers so that their tweeters will be at
the same height as your ear.
•
Align the front face of the front speakers with the
front face of the center speaker or place them
slightly in front of the center speakers.
Center Speaker
•
It is best to install it at the same height as the front
speakers.
•
You can also install it directly over or under the TV.
Position of the DVD Player
•
Place it on a stand or cabinet shelf, or under
the TV stand.
Selecting the Listening Position
The listening position should be located about 2.5 to 3
times the distance of the TV's screen size away from the
TV. Example: For 32" TVs 2~2.4m (6~8feet)
For 55" TVs 3.5~4m (11~13feet)
13
Connecting the Speakers
Before moving or installing the product, be sure to turn off the power and disconnect the power cord.
CONNECTIONS
R
L
C
RS
LS
SW


