


ENG
18
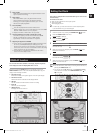
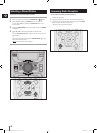
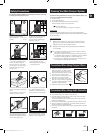
To delete a file
You can delete a file on your USB device.
This function only works in the USB jack 2 /USB 2 mode.
➣
Play a file you want to delete.
1
Press the
2
DELETE button on the main unit.
Turn the
3
Tuning/Jog Control left or right on the main unit to select YES.
To cancel the selection, press the
◆
RETURN button on the main unit.
Press the
4
ENTER button on the main unit.
The selected file will be deleted.
◆
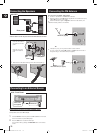
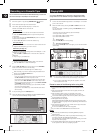
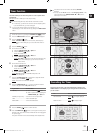
You can record sound of the CD/Cassette Tape, the Radio Broadcasting
or sound from the external source into the USB storage device.
Switch the system on by pressing the
1
STANDBY/ON ( ) button.
Connect the external USB storage device you want to record to the
2
USB jack 2 ( ) of the main unit.
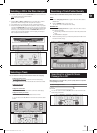
Play a Disc or a Cassette Tape, adjust the Radio frequency or connect
3
the external source to the main unit.
CD (See page 12)
Press the
◆
CD button on the main unit to select the CD function
.
Press the
◆
OPEN/CLOSE (^) button to open the Compact Disc
Compartment.
Insert a CD and press the
◆
OPEN/CLOSE (^) button to close the
Compact Disc Compartment.
Use the
◆
[ or ] button to select the desired song.
Tuner (See page 19)
Press the
◆
TUNER button on the main unit to select the Radio function.
Adjust the Radio frequency you want to record.
◆
Cassette Tape (See page 15)
Press the
◆
TAPE button on the main unit to select the cassette tape
function.
Press
◆
OPEN/CLOSE (^) of the cassette deck to open the cassette
door and insert a cassette.
Play a cassette tape.
◆
External Source (See page 10)
Connect an External Component/MP3 player to the main unit.
◆
Press the
◆
AUX button to select the AUX input.
Play a song from the external device.
◆
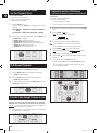
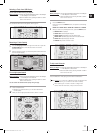
Press the
4
RIPPING button on the remote control or the REC TO USB
button on the main unit to start recording.
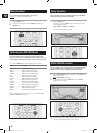
Recording Function
CD
“TRACK RECORDING” is displayed and CD recording starts.
◆
Press and hold the
◆
RIPPING button on the remote control to start
recording all tracks of Disc.
“FULL CD RECORDING” is displayed.
If you record the MP3 CD, the file is copied into the USB device
◆
totally.
“CHECK FILE”
;
“FILE COPY”
;
“COMPLETE” is displayed.
When the recording is done, “STOP” will be displayed.
If there is the same file name, "CHECK FILE"
◆
;
"FILE EXISTED" is
displayed, and the function is canceled.
Tuner/Cassette Tape/External Source
“
◆
RECORDING” is displayed.
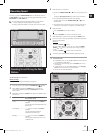
To stop recording press the
5
STOP (@) button, then it automatically
creates and saves as an MP3 file.
To remove the USB device safely, press the
6
STOP (@) button once again.
After the
recording
, a directory named “RIPPING”(CD), “CD COPY”(MP3
CD), “TUNER RECORDING”, “TAPE RECORDING” or “AUX RECORDING”,
will be created in your device.
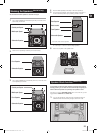
POWER
FUNCTION
TIMER
ON/OFF
REPEAT REPEAT
A-B
MUTE
RDS PTY +10
MP3-CD/CD/TAPE
GIGA
VOL VOL
DSP/EQ
TUNING /ALBUM
TUNING /ALBUM
MO/ST TUNING
MODE
RDS DISPLAY
RIPPING
TIMER/CLOCK SLEEP
DISPLAY DISC SKIP
RIPPING
SPEED
PARTY
TAPE REC
Do not disconnect the USB or the AC Cord during the recording as this
◆
may cause file damage.
If you disconnected USB device during the
◆
recording
, the main unit
will be power off and you may not delete the recorded file, In this
case, please connect the USB device to the PC and backup the USB
data on the PC first and then format the USB device.
When the USB memory is not enough, it will be displayed “NOT
◆
ENOUGH MEMORY”.
The recording works if the USB device or the HDD is formatted in the
◆
FAT file system. (The NTFS file system is not supported.)
When you use CD high speed search function, the CD recording
◆
can’t work.
Sometimes, the recording time may be longer with some USB
◆
devices. (See page 16)
In the program mode, you can't use the CD recording function. (See page 14)
◆
When the USB recording, the
◆
DSP/EQ and GIGA SOUND functions can
not work and automatically change to PASS.
When the CD recording, the REPEAT function can not work and
◆
automatically changes to OFF.
Even if you use the MIC function during the CD recording, the
◆
Microphone voice will not be recorded.
You can not record the radio when searching or no available
◆
frequencies in the Tuner mode.
USB 2
MX-C870-C850-C830-XAC-ENG.indd 18 2010-6-22 15:33:19