


37
ENG
● SYSTEM SETUP
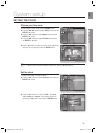
SETTING THE CLOCK
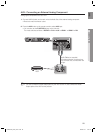
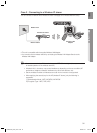
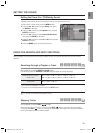
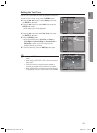
Choose your time zone
With the unit in Stop mode, press the MENU button.
Press the
▲▼◄►
buttons to select Setup, then press the
ENTER or
►
button.
Press the
▲▼
buttons to select System, then press the
ENTER or
►
button.
Press the
▲▼
buttons to select Time Zone, then press
the ENTER or
►
button.
Use the
◄ ►
button to place the cursor to the appropriate
time zone for your area and press the ENTER button.
To set the time zone automatically, set the NTP server to On (see page 57).
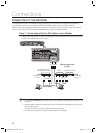
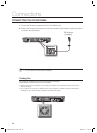
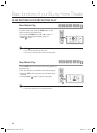
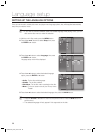
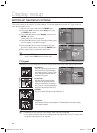
Set the clock
To setup, follow steps 1 through 3 above.
Press the
▲▼
buttons to select Clock Set, then press the
ENTER or
►
button.
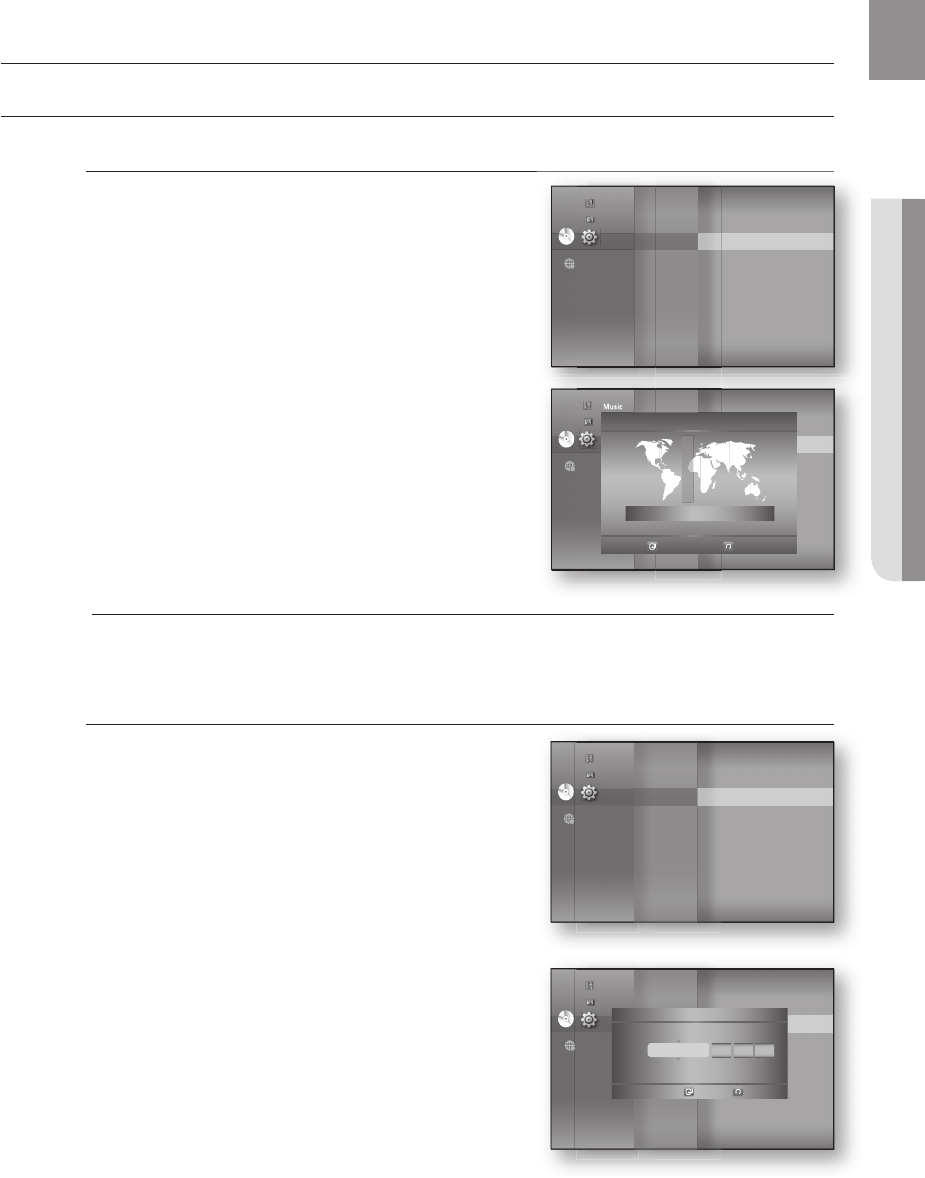
Press the
◄ ►
buttons to move to “Date.”, “hr” (hour),
“min” (minute) and “am/pm”. Set the date and time by
pressing the
▲▼
buttons, then press the ENTER button.
1.
2.
3.
4.
5.
M
4.
5.
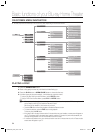
System setup
DVDDVD
System
◄
Language
Audio
Display
HDMI
Network
Parental
System Information
Time Zone
►
Clock Set
Power On/Off sound : On
BD data management
DivX(R) Registration
DivX(R) Deactivation
System Update
Music
Photo
Setup
Music
Photo
Setup
DVDDVD
System Setup
◄
Language Setup
Audio Setup
Display Setup
HDMI Setup
Network Setup
Parental Setup
System Information
Time Zone
►
Clock Set
Power On/Off sound : On
BD data management
DivX(R) Registration
DivX(R) Deactivation
System Update
Time Zone
London, Lisbon, Casablanca
◄ GMT + 00:00 ►
Save
Return
DVDDVD
System
◄
Language
Audio
Display
HDMI
Network
Parental
System Information
Time Zone
Clock Set
►
Power On/Off sound : On
BD data management
DivX(R) Registration
DivX(R) Deactivation
System Update
Music
Photo
Setup
DVDDVD
System
◄
Language
Audio
Display
HDMI
Network
Parental
System Information
Time Zone
Clock Set
►
Power On/Off sound : On
BD data management
DivX(R) Registration
DivX(R) Deactivation
System Update
Music
Photo
Setup
JAN/01/2009 01 01
Date. hr. min.
Thursday
Clock Set
Save
Return
AM
am/pm
HT-BD3252A_XAA_0724-2.indd 37HT-BD3252A_XAA_0724-2.indd 37 2009-07-24 5:44:032009-07-24 5:44:03