


6. Additional Information
Runco CL-710/ CL-710LT User’s Manual
32
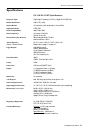
RS-232 Setup
Baud Rate: 115200 or 9600
Parity: None
Data Bits: 8 Bits
Stop Bits: 1 Bit
Flow Control: None
RS-232C Control Codes
Code Function
X01 Power On
X02 Power Off
X03 Message On
X04 Message Off
X10 Menu (arrow key)
X11 Enter (arrow key)
X12 Exit (arrow key)
X13 Up (arrow key)
X14 Down (arrow key)
X15 Left (arrow key)
X16 Right (arrow key)
X20 Switch to Composite input
X21 Switch to S-Video input
X22 Switch to Component input
X23 Switch to D-Sub _PC input
X24 Switch to YPBPR input
X25 Switch to BNC_PC input
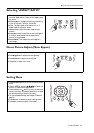
X35 Anamorphic
X36 Standard
X37 Letter box
X38 Virtual Wide
X40 Load memory 1 settings
X41 Load memory 2 settings
X42 Load memory 3 settings
X46 Load default of current source
X47 Save memory 1 settings
X48 Save memory 2 settings
X49 Save memory 3 settings
X55 Switch active source
X56 Picture in picture display
X57 Picture in picture display
X60 Switch language - English
X61 Switch language - French
X62 Switch language - Spanish
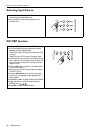
X85 PC Input - auto
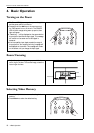
X90 Image orientation - floor front
X91 Image orientation - ceiling front
X92 Image orientation - floor rear
X93 Image orientation - ceiling rear
X94 Back light on
X95 Back light off
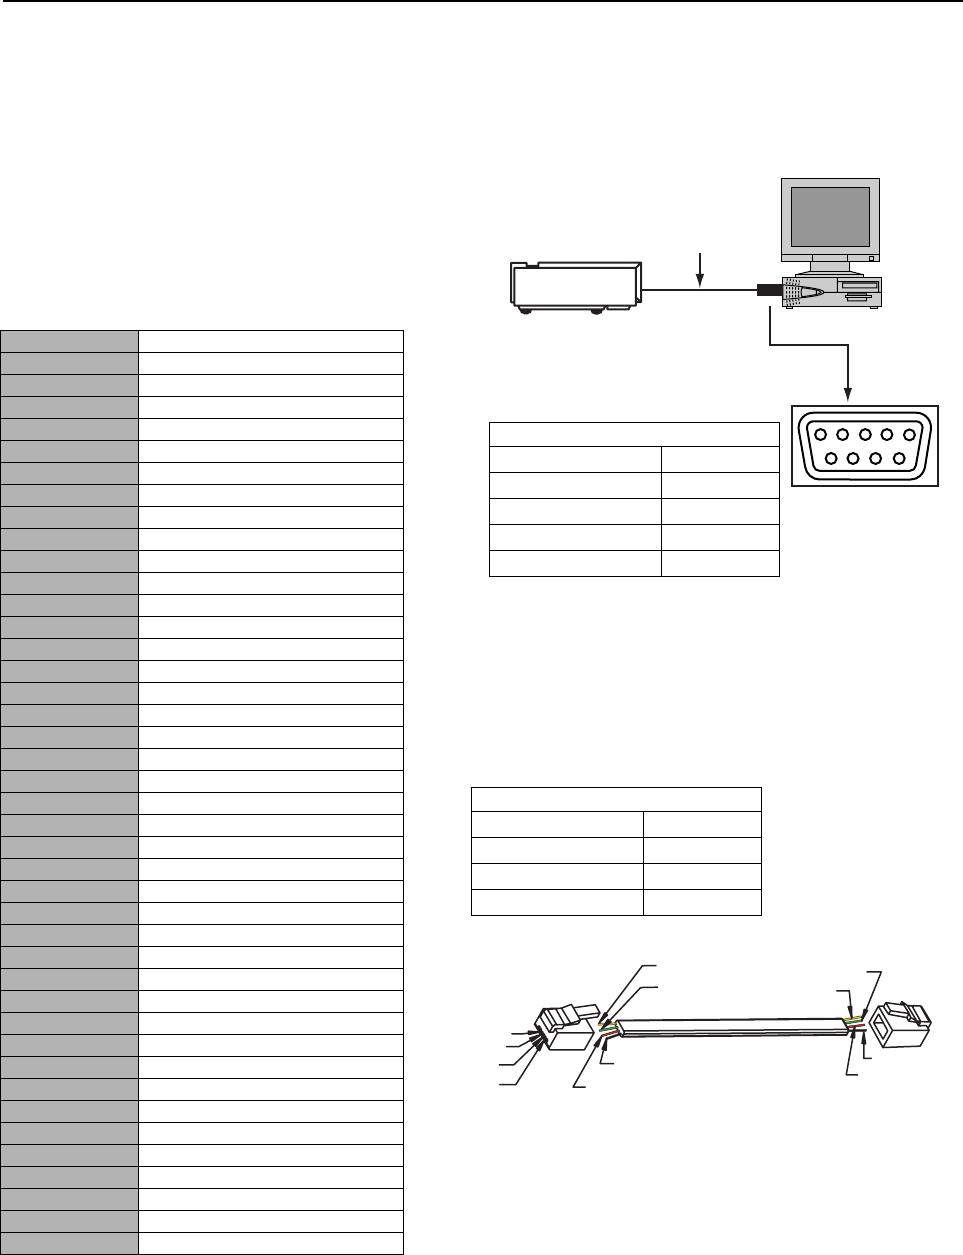
PC Out Adapter
1. Connect D-Sub 9-pin female to RJ-11 adapter (not
included) to Com port on PC.
2. Connect RJ-11 to Projector.
Warning: During initial turn on and turn off of the
projector, this unit will not accept RS-232 codes for 20
seconds.
NOTE:
1. All codes are in the ASCII format.
2. A carriage return is required after each command.
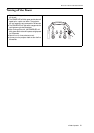
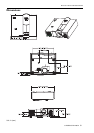
RS-232 For RJ-11 (not included)
4-pin RJ-11 Details
2TxT
3RxD
1, 4 Ground
1
2
345
7
89
6
RS-232 For D-Sub 9-pin (not included)
D-Sub 9-pin female Details
2TxT
3RxD
5 Ground
1, 4, 6, 7, 8, 9 NC
D-Sub 9-pin female
RJ-11 to D-Sub 9-pin (not included)
1
2
3
4
Yellow
Ye ll o w
Red
Red
Black
Green
Green
Black