


2. Installation
Runco CL-710/ CL-710LT User’s Manual
9
2. Installation
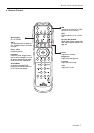
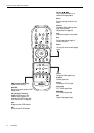
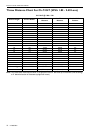
Remote Control
Notes on Batteries
■ Make sure that the battery polarities are correct when installing the batteries.
■ Do not mix an old battery with a new one or different types of batteries.
■ If you will not use the remote control for a long time, remove the batteries to avoid damage from battery
leakage.
Notes on Remote Control Operation
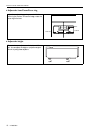
■ Make sure that there is nothing obstructing the infrared beam between the remote control and the IR receiver
on the projector.
■ The useable range is between 3m/ 9.8 feet (from the front of the projector) and 4m/ 13.1 feet (from the top of
the projector) within 30 degree horizontal angle and 15 degree vertical angle.
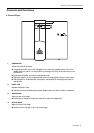
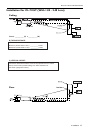
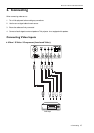
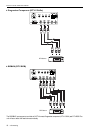
Projector
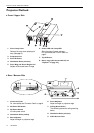
❚ Connect the Power Cord
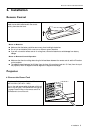
Push forward on the tap and lift to open the cover.
Install the two AAA batteries with the correct
polarity, then close the cover.
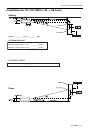
Plug the supplied power cord into the AC inlet in the
rear of this unit. (AC 100V ~ 240V)
Turn on the main power switch in the rear of this unit
(next to the AC inlet). The POWER LED will light up
in orange. Press ON key on the remote control for
ONE second to turn on the unit.