14
RSX-1055 Surround Sound Receiver
Volume Control
The VOLUME control adjusts the level of all
output channels. Rotate the front-panel control
clockwise to increase the volume, counterclock-
wise to decrease. The RR-969 remote has VOL-
UME UP and DOWN buttons.
When you adjust the volume, a digital read-
out appears in the front-panel display and the
new setting appears on your TV monitor.
NOTE
: The VOLUME control can be used to
change the volume in Zone 2. Press the front-
panel ZONE button and adjust the volume.
After 10 seconds, the VOLUME control re-
verts to normal operation.
MUTE Button
Push the MUTE button once to turn the sound
off. An indication appears in the front-panel
and on-screen displays. Press the button again
to restore previous volume levels.
Tone Adjustments
(remote only)
BASS and TREBLE adjustments (available only
the remote control) increase or decrease the
audio signal’s low and high frequency content
respectively. The front-panel display and ON-
SCREEN DISPLAY show tone control settings as
you adjust them.
To adjust the tone settings:
1. Press the SHIFT button
on the remote
control. Either BASS or TREBLE appears in
the front-panel display, depending on which
adjustment is currently active. Press the
SHIFT button again to toggle to the other
adjustment.
2. Press the UP/DOWN buttons
on the
remote to increase or decrease the setting.
The display will revert to normal operation
following several seconds of inactivity.
Tone adjustments can also be made from a
menu screen in the ON-SCREEN DISPLAY
system. See the Tone Setup section near the
end of this manual.
NOTE
: The tone adjustments are available for
all surround modes and inputs, including the
MULTI input.
FILTER Button
The FILTER button (remote only) activates or
deactivates a special CINEMA EQ setting. This
equalization may be desirable for playback
of movie source material to compensate for
the acoustic differences between a commer-
cial cinema and a home theater environment.
The FILTER setting is independent for each source
input. Using the button only changes the set-
ting for the currently active source input.
MENU Button
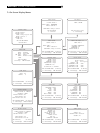
Push this button on the remote to turn on the
ON-SCREEN DISPLAY menu system. If the menu
system is already visible, push this button to
cancel the display.
The front panel FL display can be turned off
by pressing and holding the MENU button on
the remote for three seconds. Briefly press the
MENU button again to turn the display back
on. The display also turns back on whenever
the POWER button on the front-panel or re-
mote is pressed.
ENTER Button
The ENTER button is used to confirm and
memorize various settings in the setup and
operation of the RSX-1055. Its use is described
in detail in the relevant sections.
Input Controls
Input Source Buttons
Press any of the eight front-panel buttons to
select an audio or video input source (the built-
in tuner, CD, VCR, etc.) for listening. You will
hear this source and, if you have selected a
video source, see its picture on your TV monitor.
The front-panel display and the ON-SCREEN
DISPLAY show the name of the current listen-
ing source selection. The labels for VIDEO
sources can be customized to match your
components.
NOTE
: When the TUNER input source button
is pressed, the frequency of the currently tuned
station is displayed. Pressing the button again
toggles the display to show the word TUNER
instead of the frequency display.
All of the source inputs can be customized using
the ON-SCREEN DISPLAY configuration menus
to accept either analog signals or digital sig-
nals from one of the five assignable digital
inputs. When a digital input is assigned, the
RSX-1055 checks for the presence of a digi-
tal signal at that input. If a digital signal is present
when the source is selected, it is automatically
activated and the proper surround mode en-
abled. If no digital signal is present, the ana-
log inputs for that source are selected. This
auto-sensing is the preferred configuration for
digital source inputs such as DVD players.
When an ANALOG input is assigned, the unit
will not access a digital signal, even though
one may be available at the digital input.
By default, the source input buttons are fac-
tory configured to select the following inputs:
CD: Analog input
Tuner: Analog (built-in)
Tape: Analog input
Video 1: Digital Coaxial 1
Video 2: Digital Coaxial 2
Video 3: Digital Coaxial 3
Video 4: Digital Optical 1
Video 5: Digital Optical 2
Each source input should be configured us-
ing the ON-SCREEN DISPLAY menu system to
use the desired input type (analog or digital
auto-sensing). See the INPUT MENU section
for configuration instructions.
NOTE
: In addition to selecting analog or digital
signals, the configuration options also permit
custom labeling and selection of a default sur-
round mode for each of the seven inputs plus
the built-in tuner.
The input source buttons can also be used (with
the REC button
described in the next sec-
tion) to select an analog input source signal
to be available at the outputs for recording.
Additionally, the input source buttons can be
used with the ZONE button
to select an
analog input source for ZONE 2.


