


5
English
About Rotel
A family whose passionate interest in music
led them to manufacture high fidelity compo-
nents of uncompromising quality founded Rotel
over 40 years ago. Through the years that
passion has remained undiminished and the
family goal of providing exceptional value for
audiophiles and music lovers regardless of their
budget, is shared by all Rotel employees.
The engineers work as a close team, listen-
ing to, and fine tuning each new product until
it reaches their exacting musical standards.
They are free to choose components from
around the world in order to make that product
the best they can. You are likely to find ca-
pacitors from the United Kingdom and Ger-
many, semi conductors from Japan or the
United States, while toroidal power transform-
ers are manufactured in Rotel’s own factory.
Rotel’s reputation for excellence has been
earned through hundreds of good reviews and
awards from the most respected reviewers in
the industry, who listen to music every day.
Their comments keep the company true to its
goal - the pursuit of equipment that is musi-
cal, reliable and affordable.
All of us at Rotel, thank you for buying this
product and hope it will bring you many hours
of enjoyment.
Getting Started
Thank you for purchasing the Rotel RC-03 Ste-
reo Control Amplifier. When used in a high-
quality music audio system, it will provide years
of musical enjoyment.
The RC-03 is a full featured, high performance
component. All aspects of the design have been
optimized to retain the full dynamic range and
subtle nuances of your music. The RC-03 has
a highly regulated power supply incorporat-
ing a Rotel custom-designed toroidal power
transformer. This low impedance power sup-
ply has ample power reserves, which enables
the RC-03 to easily reproduce the most de-
manding audio signals. This type of design
is more expensive to manufacture, but it is better
for the music.
The printed circuit boards (PCB) are designed
with Symmetrical Circuit Traces. This insures
that the precise timing of the music is main-
tained and faithfully recreated. The RC-03 cir-
cuitry uses metal film resistors and polystyrene
or polypropylene capacitors in important signal
paths. All aspects of this design have been ex-
amined to ensure the most faithful music re-
production.
The main functions of the RC-03 are easy to
install and use. If you have experience with
other stereo systems, you shouldn’t find any-
thing perplexing. Simply plug in the associ-
ated components and enjoy.
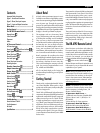
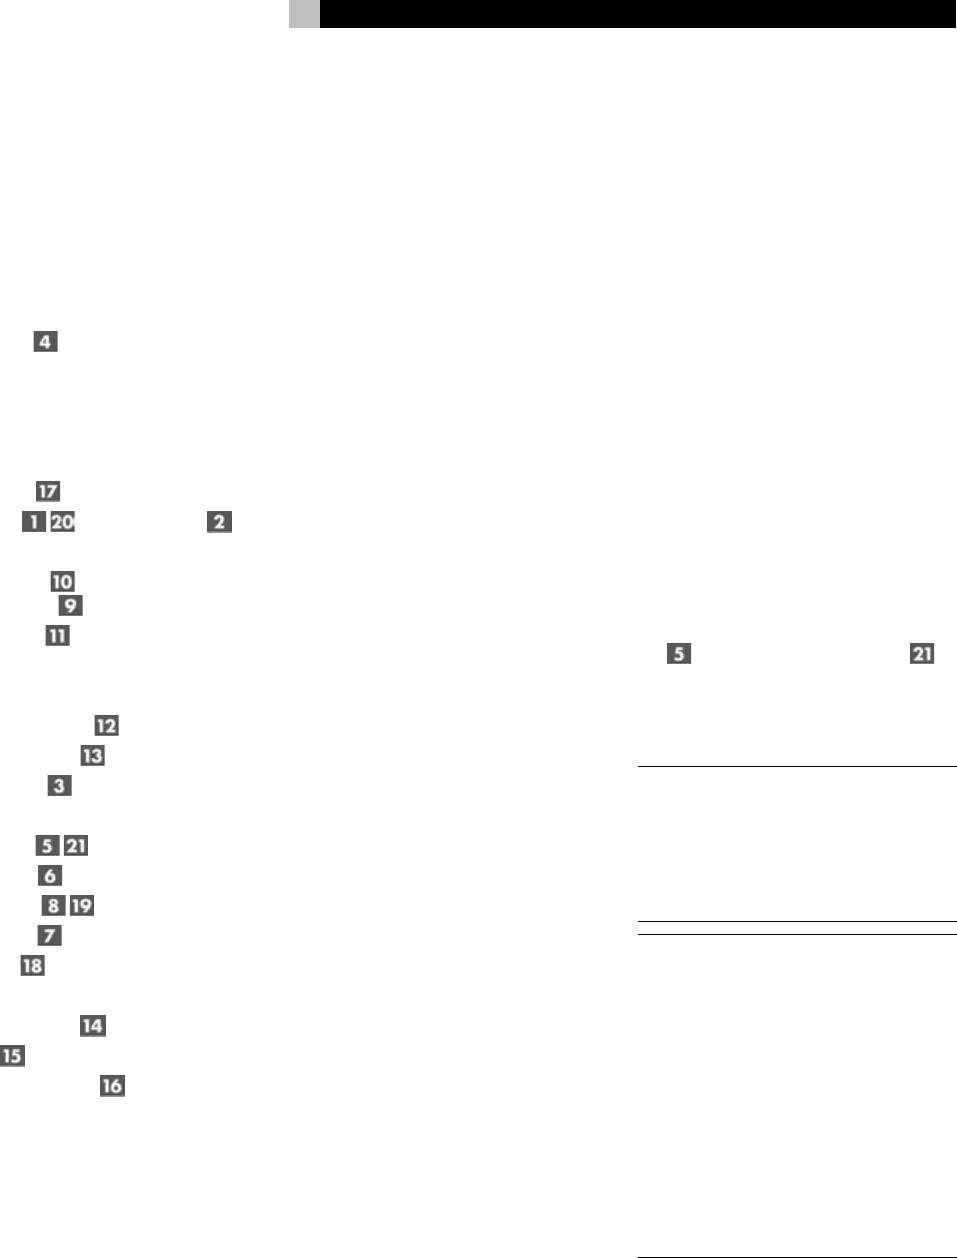
The RR-AT92 Remote Control
Some functions can be done with either the
front panel controls, or the supplied RR-AT92
remote control. When these operations are de-
scribed, the call out number for both controls
is shown. For example, you can adjust the
volume with either the front panel Volume con-
trol
or the remote control buttons .
See the “IR Inputs and Output” section for more
information on way to expand the IR control
capabilities of your system.
Note: Remove the batteries from the re-
mote control if it will not be used for a long
period of time. Do not leave run down bat-
teries in the remote control. Exhausted bat-
teries can leak corrosive chemicals which
will damage the unit.
NOTE: The RR-AT92 can be used to oper-
ate the basic function of other certain other
Rotel components, including Tuners, CD
Players and DVD Players.
To operate a Rotel Tuner —
1) Select the tuner function of the RR-AT92.
2) Press “Power” and “1” (RT-02) or “2”
(RT-940AX).
3) Press the key for Tuner operation.
To operate a Rotel CD Player —
Select the CD function of the RR-AT92
To operate a Rotel DVD Player —
Select the AUX 1 function of the RR-AT92.
Contents
Important Safety Instructions 2
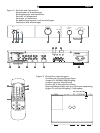
Figure 1: Controls and Connections 3
Figure 2: Phono/Line Input Jumpers 3
Figure 3: Input and Output Connections 4
About Rotel........................................... 5
Getting Started ..................................... 5
The RR-AT92 Remote Control ................. 5
Remote Sensor 6
A Few Precautions 6
Placement 6
Cables 6
AC Power and Control............................ 6
AC Power Input 6
Power Switch and Power Indicator 6
Input Signal Connections.........................7
Phono/Line Input and
Ground Connection 7
Line Level Inputs 7
Phono/Line Input Conversion 7
Resetting Jumpers 7
Recorder Connections ....................... 7
Output Connections ..........................7
Phones Output ................................. 8
Audio Controls....................................... 8
Volume Control 8
Balance Control 8
Function Control 8
Monitor Control 8
Mute Control 8
IR Inputs and Outputs ............................ 8
External Remote Input 8
IR Output 8
12 Volt Trigger Outlet ...................... 8
Troubleshooting ..................................... 9
Power Indicator Is Not Lit 9
Fuse Replacement 9
No Sound 9
Specifications ........................................ 9