9
OPERATION
Warning:
To prevent possible hearing loss, turn
VOLUME
to
MIN
before you turn on the receiver or change the program
source. After you turn on the receiver or change the program
source, adjust
VOLUME
to a comfortable listening level.
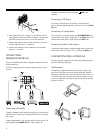
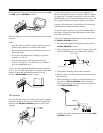
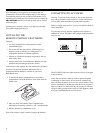
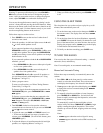
You can use the supplied remote control by pointing it at the
receiver’s front panel and pressing the desired button(s). Many
buttons on the remote control work the same as buttons on the
receiver’s front panel. Use these buttons exactly as you would
use the corresponding buttons on the receiver.
Follow these steps to use the receiver.
1. Press
POWER
to turn on the receiver. It takes about 5
seconds to hear sound.
2. Select the speakers. An indicator lights next to the
A
and/
or
B
to show which speakers are on.
If you connected speakers only to the
A
(or
B
)
SPEAKERS
terminals, press
SPEAKERS A
(or
B
) to turn
on only those speakers. Do not press both
SPEAKERS A
and
B
because doing so turns off all speakers even though
both indicators are on.
If you connected speakers to both the
A
and
B SPEAKERS
terminals, you can:
•Press
SPEAKERS A
or
B
to turn on either pair of speak-
ers for a two-speaker effect.
•Press
SPEAKERS A
and
B
to turn on both pairs of
speakers for a four-speaker effect.
Press
SPEAKERS A
and/or
B
to turn off all speakers so
you can listen privately with headphones (see “Using
Headphones” on Page 11).
3. Select a program source.
To tune to a radio station, see “Direct Tuning (Remote
Control Only)” on Page 10.
To listen to signals from the component connected to the
TAPE MONITOR
jacks, press
TAPE MONITOR
so
TAPE
MON
appears.
To listen to a source other than the one connected to the
TAPE MONITOR
jacks, press
TAPE MONITOR
so
TAPE
MON
disappears. Then press
CD
,
PHONO
, or
AUX
(
CD
,
PHONO
, or
AUX
appears).
4. Turn
VOLUME
clockwise to increase the volume or
counterclockwise to decrease it. Or, you can use
VOLUME
and on the remote control.
5. To adjust the tone, turn
BASS
and
TREBLE
toward
+
or
–
. To increase the high and low ranges of sound at low
volume, press
LOUDNESS
. (To turn off this feature, press
LOUDNESS
again.)
6. To adjust the balance of sound between the left and right
speakers, see “Adjusting Balance” on Page 11.
7. When you finish using the receiver, press
POWER
to turn
it off.
USING THE SLEEP TIMER
The sleep timer lets you set the receiver to play for up to 90
minutes, then automatically turns off.
1. To set the timer, turn on the receiver then press
SLEEP
on
the remote control. The display dims and shows
SLEEP
90
SLEEP
.
2. To set the sleep timer for less than 90 minutes, repeatedly
press
SLEEP
to decrease the time by 10 minutes for each
press of the button. Once you select the time, the receiver
displays the program source. (
SLEEP
stays on the display
in small letters until automatic shut-off.)
3. To briefly see the time remaining, press
SLEEP
once.
TUNING THE RADIO
Your receiver has four types of electronic tuning — manual,
automatic, direct, and memory.
Note: For weak signals, we recommend manual tuning.
Manual and Automatic Tuning
Follow these steps to manually or automatically tune to the
stations.
1. Press
FM
or
AM
on the front panel (or on the remote
control) to select the desired band. The receiver tunes to
and displays the frequency last selected in that band.
2. If
CH
appears on the right side of the display, press
MODE
to change the receiver to manual-tuning mode.
MANUAL
briefly appears.
3. To manually select the next higher or lower frequency,
press
TUNING
UP
or
DOWN
once. Or, hold down the
button to rapidly scan through the frequencies; release the
button to stop scanning.
To automatically search for the next higher or lower
station, briefly hold down
TUNING
UP
or
DOWN
to begin
rapidly scanning through the frequencies. The receiver
searches up or down the band, stopping on the next strong
station.
Notes:
•
TUNED
appears when the received signal is strong.
•
STEREO
appears when the received FM broadcasts are
in stereo.


