


6
PREPARATION
BEFORE YOU BEGIN
Before you install your CD changer’s
components, read all the instructions in
this owner’s manual. You should be able
to answer all of these questions about
your vehicle’s electrical and sound sys-
tems:
• Does my vehicle’s sound system
have a power amplifier with a pair of
RCA input jacks? If not, can my
vehicle’s sound system tune FM
broadcasts and does it have an
antenna jack?
• Which terminal in my vehicle’s fuse
box is for accessories?
• How do I connect a wire to the fuse
box?
• Which of the CD changer’s wires is
the power wire?
• Does my vehicle have a 12-volt neg-
ative ground system?
Note:
Installation in your vehicle might
require cutting or modifying your vehicle.
Important:
To avoid damage to your
stereo, CD changer, and your vehicle’s
electrical system, you must follow the or-
der of installation shown in this manual,
including instructions for making con-
nections and testing.
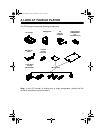
In addition to the supplied hardware kit,
you need these items to install your CD
changer:
• cable ties or electrical tape
• isopropyl alcohol
• small-and medium-sized screwdriv-
ers.
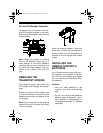
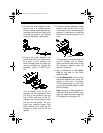
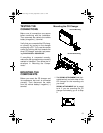
CHOOSING MOUNTING
LOCATIONS
Choose locations for mounting the CD
changer and its components where:
• You can easily reach them.
• Wires and cables will not interfere
with the vehicle’s pedals or other
moving parts.
• No component is directly in front of
heating vents.
• All wires and cables will reach their
connection points.
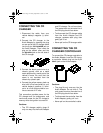
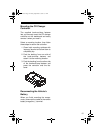
Before attempting to mount the CD
changer and its components, confirm
that they will fit the selected mounting
areas.
Caution:
Be careful to avoid obstruc-
tions behind all mounting surfaces.
12-2182.fm Page 6 Friday, September 3, 1999 7:31 AM