2
+
-
+
-
7
6
ON
OFF
1234
ON
DIP
CH11
801.8MHz
CH03
797.0MHz
CH09
800.6MHz
CH01
795.8MHz
CH10
801.2MHz
CH02
796.4MHz
CH07
799.4MHz
CH05
798.2MHz
CH06
798.8MHz
CH04
797.6MHz
CH08
800.0MHz
CH00
795.2MHz
CH12
802.4MHz
CH13
803.0MHz
CH14
803.6MHz
CH15
804.2MHz
FREQUENCY CHART
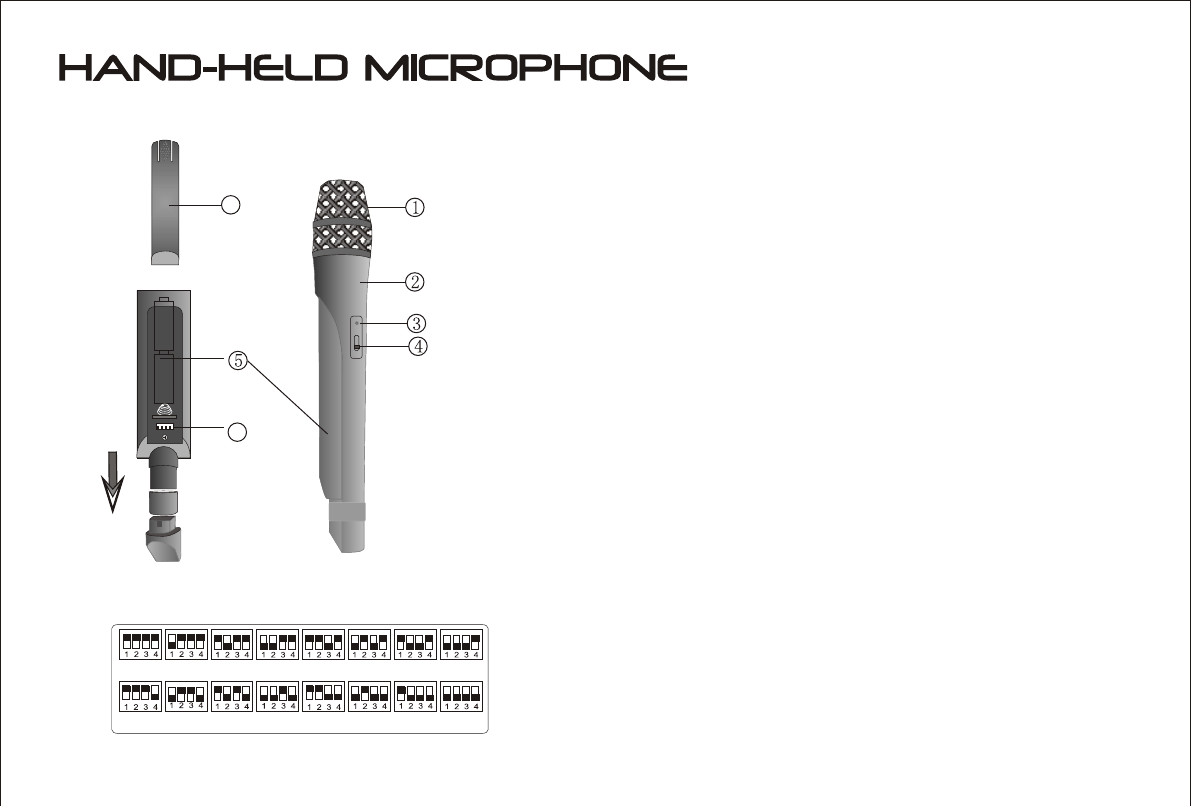
1. Unscrew the battery cover at the end of the microphone. Install the
provided 2 1.5V batteries, taking care to fit it with the correct polarity
connected.
2. According to frequency Chart on the battery cover, adjust the CH
selector to make the microphone to be the same frequency as receiver.
3. Check the battery by switching the microphone ON. The red LED will
come on. This indicates correct operation. If the red LED is dim, this
indicates the battery is low and should be changed. If the red LED does
not come on at all, it indicates the battery is dead and should be replaced.
PARTS DESCRIPTION
OPERATION
1. Mesh: cartridge inside
2. Tube
3. Power LED indicator
4. Power and Mute switch: Switch on and off the microphone.
Move the switch to middle position to mute the mic.
5. Battery compartment
6. Battery Cover
7. CH selector


