Controls and displays 03
13
En
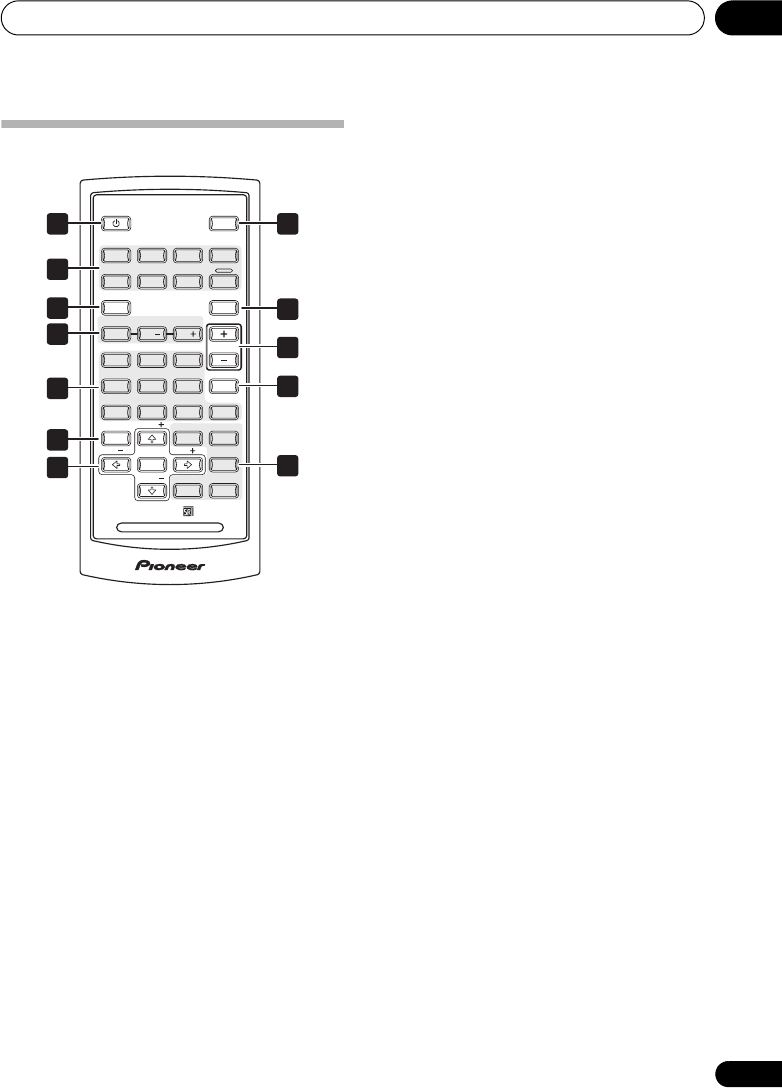
Remote control
1
Switches the receiver between standby and on.
2 Input selector buttons
Press to select an input source.
3
S. RETRIEVER
Press to switch the Sound Retriever on/off
(page 15).
4
TONE/BAL
controls
Use to adjust the tone and balance (page 15).
5 Number buttons
Use the number buttons to directly select a
radio frequency (page 17).
6
(TUNE/ST) /
ENTER
Use the TUNE +/– buttons to find radio
frequencies and use ST +/– to find preset
stations (page 17).
7
DIMMER
Dims or brightens the display (or switches the
backlight off).
8
DIRECT
Press to access Direct listening (page 15).
9
VOLUME +/–
Use to set the listening volume.
10
MUTE
Mutes/unmutes the sound.
11 Tuner and XM Radio controls
DISPLAY (XM Radio only) – Switches
between named station presets and radio
frequencies (page 17).
BAND (Tuner only) – Switches between the
AM and FM bands (page 17).
CATEGORY (XM Radio only) – Press to
browse digital radio broadcasts (page 19).
MPX (Tuner only) – Switches between
stereo and mono reception of FM
broadcasts (page 17).
D.ACCESS – Press to access a radio
station directly using the number buttons
(page 17).
T.EDIT – Memorizes/names stations for
recall (page 17).
CLASS – Switches between the three
banks of radio station presets (page 17).
RETURN (XM Radio only) – Press to confirm
and exit the current menu.
Using the remote control
Keep in mind the following when using the
remote control:
• Make sure that there are no obstacles
between the remote and the remote sensor
on the unit.
• The remote has a range of about 7 m (23 ft.)
at an angle of about 30º from the remote
sensor.
• Remote operation may become unreliable
if strong sunlight or fluorescent light is
shining on the unit’s remote sensor.
STEREO RECEIVER
DIMMER
TAPE
TUNER
AUX1
USB
MUTE
CD
PHONO
TONE/BAL
L
/
R
/
S.RETRIEVER
DIRECT
VOL
AUX2
XM
1
23
456
7890
BAND
MPX
ENTER
CLASS
T.EDIT
DISPLAY
TUNE
TUNE
ST
CATEGORYD.ACCESS
RETURN
ST
1
2
3
4
5
11
6
7
8
9
10
11
A9_KU.book 13 ページ 2006年11月6日 月曜日 午後3時34分


