


www.phoenixgold.com
+
-
(+)
(-)
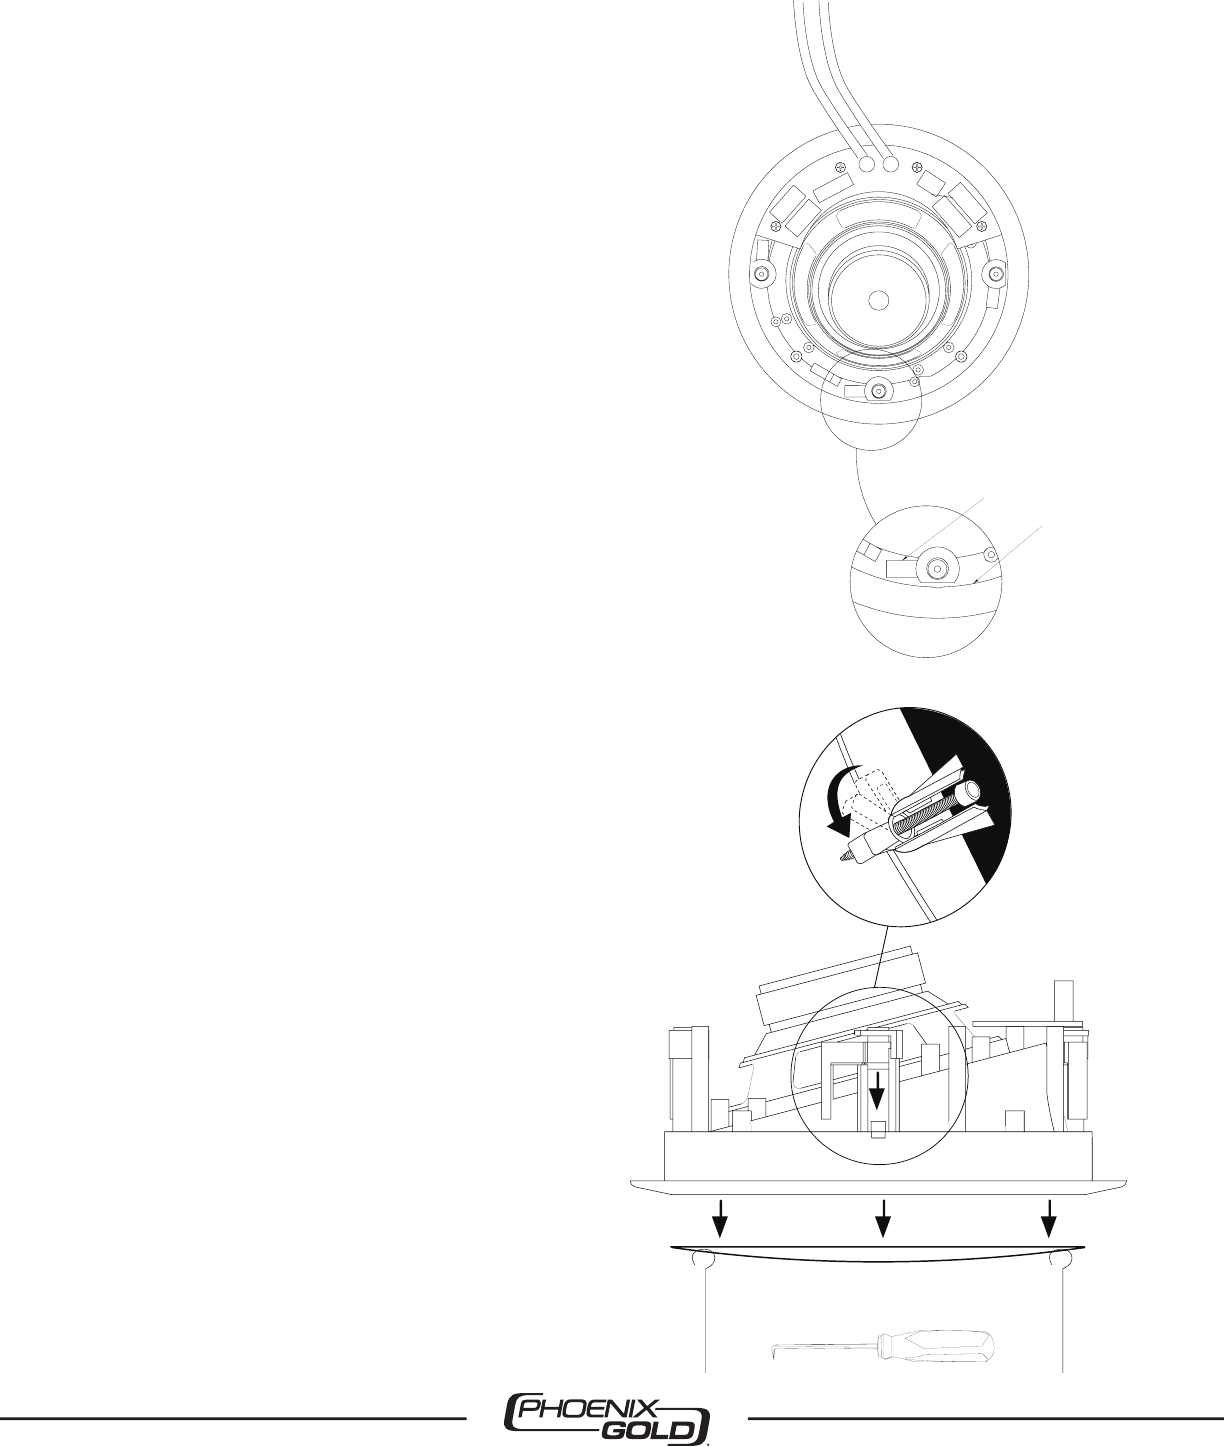
Figure 5
Figure 4
Figure 5
Figure 4
Installing the ATCLCR6
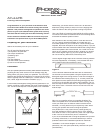
It is now time to connect the speaker wire to the ATCLCR6.
Your speaker wire is usually coded to maintain proper system
phasing. This can be by color coding, or one conductor may
have a printed marking or a rib along one edge that will not be
found on the other. Identify which type of polarity coding that
your wire is using. You must carefully observe that the positive
terminal of the speaker output on your amplifi er is connected
to the positive terminal of the ATCLCR6 speaker. Likewise, the
negative terminal of the amplifi er’s speaker output should be
connected to the negative terminal of the ATCLCR6 speaker
(Fig. 4).
Installation Tip!
To further enhance the performance of your
ATCLCR6 speakers, the ceiling joist cavity where you plan to
place your speakers can be stuffed with a generous quantity of
fi berglass insulation. If un-insulated, stuff the area on either
side of the speaker opening with 6” thick insulation to a depth of
approximately 2 feet beginning 1 foot in from either side of the
speaker opening. If the insulation is foil or paper backed, face the
backing away from the ATCLCR6 speaker. The addition of this
insulation will help prevent the unwanted transfer of sound into
the large and resonant cavity of the un-insulated ceiling.
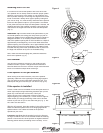
Next, make sure that the doglegs are positioned inside the
frame of the speaker (Fig. 5).
Grill removal
The grill uses a pressure fi t relying on the contact of both
surfaces to hold it in place. If the grill becomes distorted it
becomes diffi cult to remove or reinstall. Proper care should be
taken to not distort its shape while removing it.
If the speaker is not yet installed
While looking at the motor structure (rear) of the speaker
assembly, rotate two of the opposing mounting legs outward
(Fig. 6a) and then evenly press them towards the grill. This
should push the grill out so that you can remove it (Fig. 6b).
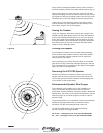
If the speaker is installed
Locate a small hook tool available at most auto parts stores or
home improvement shops resembling a dentists pick (a bent
paper clip or stiff wire will work as well). Hook your
chosen device into the metal mesh of the grill near the
edge and gently pull it towards you, once it moves a slight bit
make certain you change positioning of the hook to another
location to pull from so you do not distort the grill (Fig. 7). DO
NOT PRY ON THE GRILL!
With the grill removed, place the speaker in the ceiling opening.
Make sure that the speaker wire is not hanging against the
speaker where it can vibrate and rattle as the speaker
reproduces your music.
Installation Tip!
Note that the speaker is set in the frame at
an angle so that the cone can be directed toward the listening
position. Ensure the cone of the speaker is angled toward the
listening position before proceeding to the next step. This is
Dogleg
Frame
Figure 6a
Figure 7
Figure 6b