


17
English
Getting Started
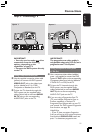
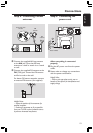
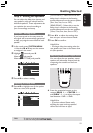
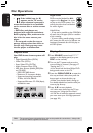
Step 1: Inserting batteries
into the remote
control
1
3
2
1 Open the battery compartment.
2 Insert two batteries type R06 or AA,
following the indications (+-) inside
the compartment.
3 Close the cover.
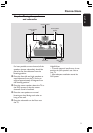
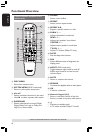
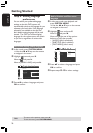
Using the remote control to
operate the system
1 Aim the remote control
directly at the remote
sensor (iR) on the front
panel.
2 Select the source you
wish to control by
pressing one of the
source select buttons on
the remote control (for
example TV, TUNER.)
3 Then select the desired
function (for example
ÉÅ,
S,
T .)
CAUTION!
– Remove batteries if they are
exhausted or if the remote is not to
be used for a long time.
– Do not use old and new or
different types of batteries in
combination.
– Batteries contain chemical
substances, so they should be
disposed of properly.
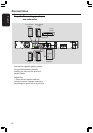
Step 2: Setting the TV
IMPORTANT!
Make sure you have completed all
the necessary connections. (See pages
11–12 “Connecting TV”.)
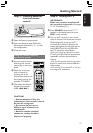
1 Press SOURCE control until “DISC”
appears on the display panel (or press
DISC on the remote.)
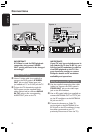
2 Turn on the TV and set to the correct
video-in channel. You should see the blue
DVD background screen on the TV.
➜ Usually this channel is between the
lowest and highest channels and may be
called FRONT, A/V IN, or VIDEO. See
your TV manual for more details.
➜ Or, you may go to channel 1 on your
TV, then press the Channel down button
repeatedly until you see the Video In
channel.
➜ Or, the TV remote control may have a
button or switch that chooses different
video modes.
➜ Or, set the TV to channel 3 or 4 if you
are using an RF modulator.