11
English
Connections
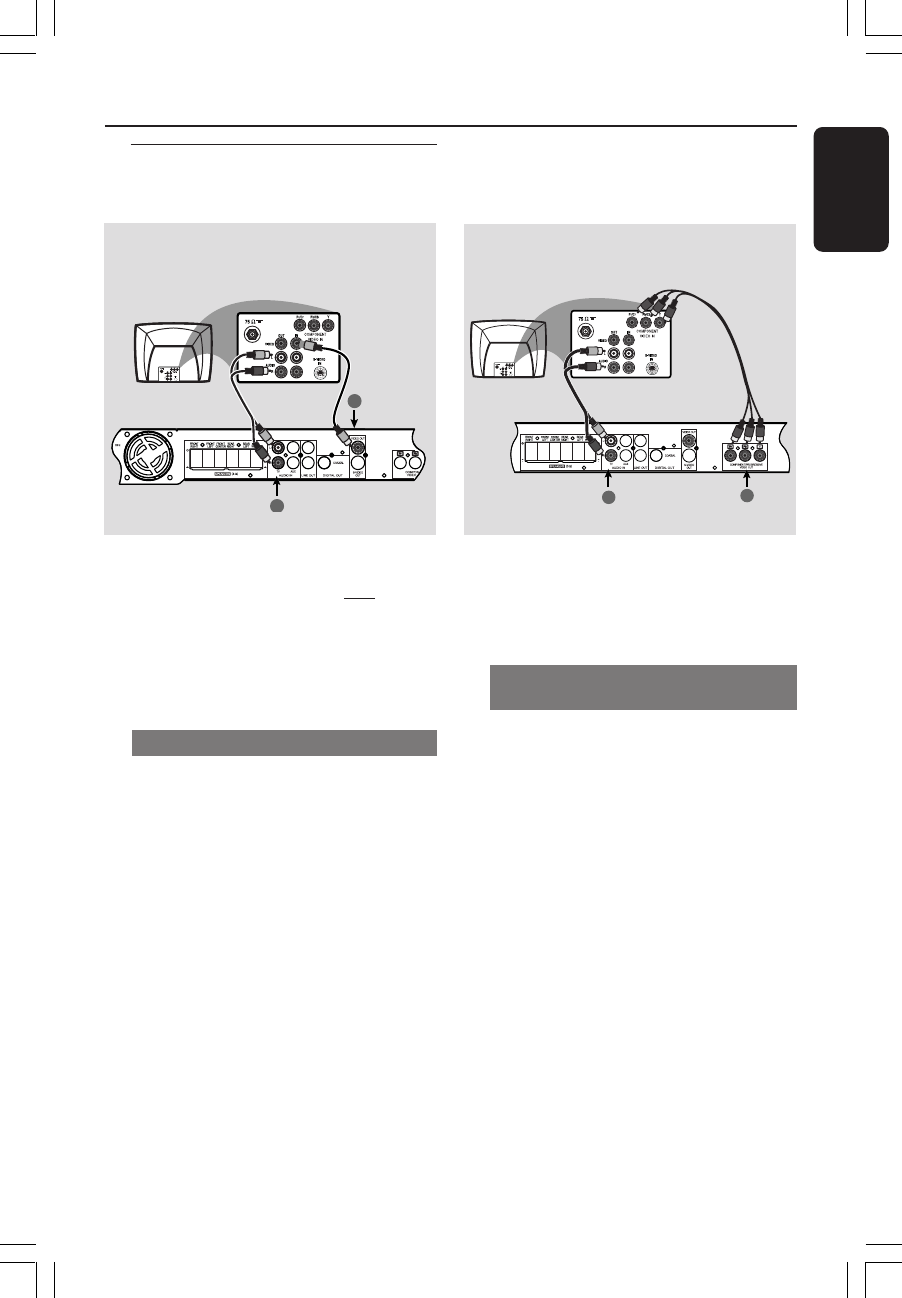
Step 3: Connecting TV
1
2
2
1
IMPORTANT!
– You only need to make
one video
connection from the following
options, depending on the
capabilities of your TV.
– Connect the DVD system directly
to the TV.
Using Composite Video jack
1 Use the supplied composite video cable
(yellow) to connect the DVD system’s
VIDEO OUT jack to the video input
jack (or labeled as A/V In, CVBS,
Composite or Baseband) on the TV.
2 To hear the TV channels through this
DVD system, use the supplied audio
cables (white/red) to connect AUDIO
IN-TV jacks to the corresponding
AUDIO OUT jacks on the TV.
IMPORTANT!
The progressive scan video quality is
only possible when using Y Pb Pr, and a
progressive scan TV is required.
Using Component Video jacks
(Y Pb Pr)
1 Use a component video cables (red/blue/
green - not supplied) to connect the DVD
system’s Y Pb Pr jacks to the corresponding
Component video input jacks (or labeled as
Y Pb/Cb Pr/Cr or YUV) on the TV.
2 To hear the TV channels through this
DVD system, use the supplied audio
cables (white/red) to connect AUDIO
IN-TV jacks to the corresponding
AUDIO OUT jacks on the TV.
3 If you are using a Progressive Scan TV
(TV must indicate Progressive Scan or
ProScan capability), to activate TV
Progressive Scan, please refer to your TV
user manual. For DVD system Progressive
Scan function, see page 28.
Helpful Hint:
– If your TV does not support Progressive
Scan, you will not be ab le to view the picture.
Press and hold OPEN/CLOSE button and
press ‘1’ to deactivate progressive scan.
Option 1
Option 2


