


21
3139 116 17942
English
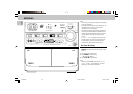
Dubbing tapes
(from tape deck 1 to tape deck 2)
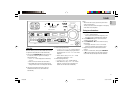
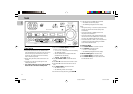
1 Press TAPE to select tape deck 2 .
2 Load the prerecorded tape into tape deck 1 and a
blank tape into tape deck 2.
™ Make sure that the tape in tape deck 1 has its full
spool to the left.
3 Press DUBBING
once
for normal speed dubbing or
twice
within 2 seconds
for high speed dubbing.
™ "NORMAL" (normal speed) or "FAST" (high speed)
will be displayed and then followed by
"DUBBING".
™ HSD flag appears on the display for high speed
dubbing.
• Dubbing will start immediately.
™ REC flag starts flashing.
4 Press STOP Ç to stop dubbing.
Notes:
– At the end of side A, flip the tapes to side B and
repeat the procedure.
– Dubbing of tapes is only possible from tape deck 1 to
tape deck 2.
– To ensure good dubbing, use tapes of the same length.
– During high speed dubbing in Tape mode, the sound is
reduced to a low volume.
– You can switch to other source while dubbing.
CD Synchro Start Recording
1 Load a blank tape into tape deck 2 and a disc into the
disc tray.
2 Press CD to select CD mode .
™ You can program the tracks in the order you want
them to be recorded (see Programming Tracks). If
not, the tracks are recorded according to the
selected disc.
3 Press RECORD to start recording.
™ REC flag starts flashing.
• CD will start playback automatically.
4 Press STOP Ç to stop recording.
Recording from other sources
(only on tape
deck 2)
1 Load a blank tape into tape deck 2.
2 Press CD, TUNER or AUX.
• Start playback of the selected source.
3 Press RECORD to start recording.
™ REC flag starts flashing.
4 Press STOP Ç to stop recording.
Note:
– During recording, it is not possible to listen to another
sound source.
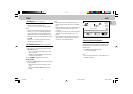
RECORDING CLOCK
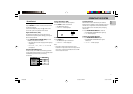
View Clock
You can view the clock (if it is set) at standby or any
source mode. It will be displayed for about 7 seconds.
• Press CLOCK•TIMER briefly.
™ “10:25” (the current time) will be displayed.
™ “--:--” will be displayed if the clock is not set.
Clock Setting
The clock is set in 24-hour mode, e.g. “00:00“ or
“23:59“. Before setting the clock, you must be in the
View Clock mode.
1 Press CLOCK•TIMER to select clock mode.
™ “00:00” or the current time starts flashing.
™ “à , á , í , ë, Ç” light up.
2 Set the hour with à or á.
3 Set the minute with í or ë.
4 Press CLOCK•TIMER again to store the setting.
™ The clock starts running.
• To exit without storing the setting, press STOP Ç.
Notes:
– During clock setting, if no button is pressed within 90
seconds, the system will exit clock setting mode
automatically.
– When a power interruption occurs, the clock setting is
erased.
– To set the time with RDS clock, see "Receiving RDS
Radio Station" under TUNER section.
Untitled-26 6/15/00, 4:52 PM21