


Step 4
a) If a wall stud is found, drill a pilot hole into the stud at each mark,
then move to Step 5. OR
b) If no stud is found, install wall anchors at each mark following the
instructions for the type of wall anchor you are using. CAUTION:
We strongly recommend contacting a professional contractor
for this type of installation.
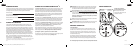
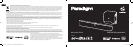
Step 5
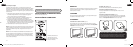
Using the screws, attach the first wall bracket
to the wall. DO NOT completely tighten
screws (Fig. 5).
Step 6
Repeat steps for the second bracket. Use a
level to make sure the brackets are completely
straight before tightening all screws.
Step 7
IMPORTANT: Attach audio cables BEFORE mounting soundbar to
wall brackets. See Set-Up Guide for how to attach cables.
Move soundbar into place directly over brackets and gently push it to the
wall making direct contact with brackets. You will hear a CLICK as each
bracket makes contact with the soundbar. DO NOT release soundbar
from your grasp until you hear those two clicks.
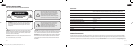
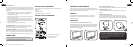
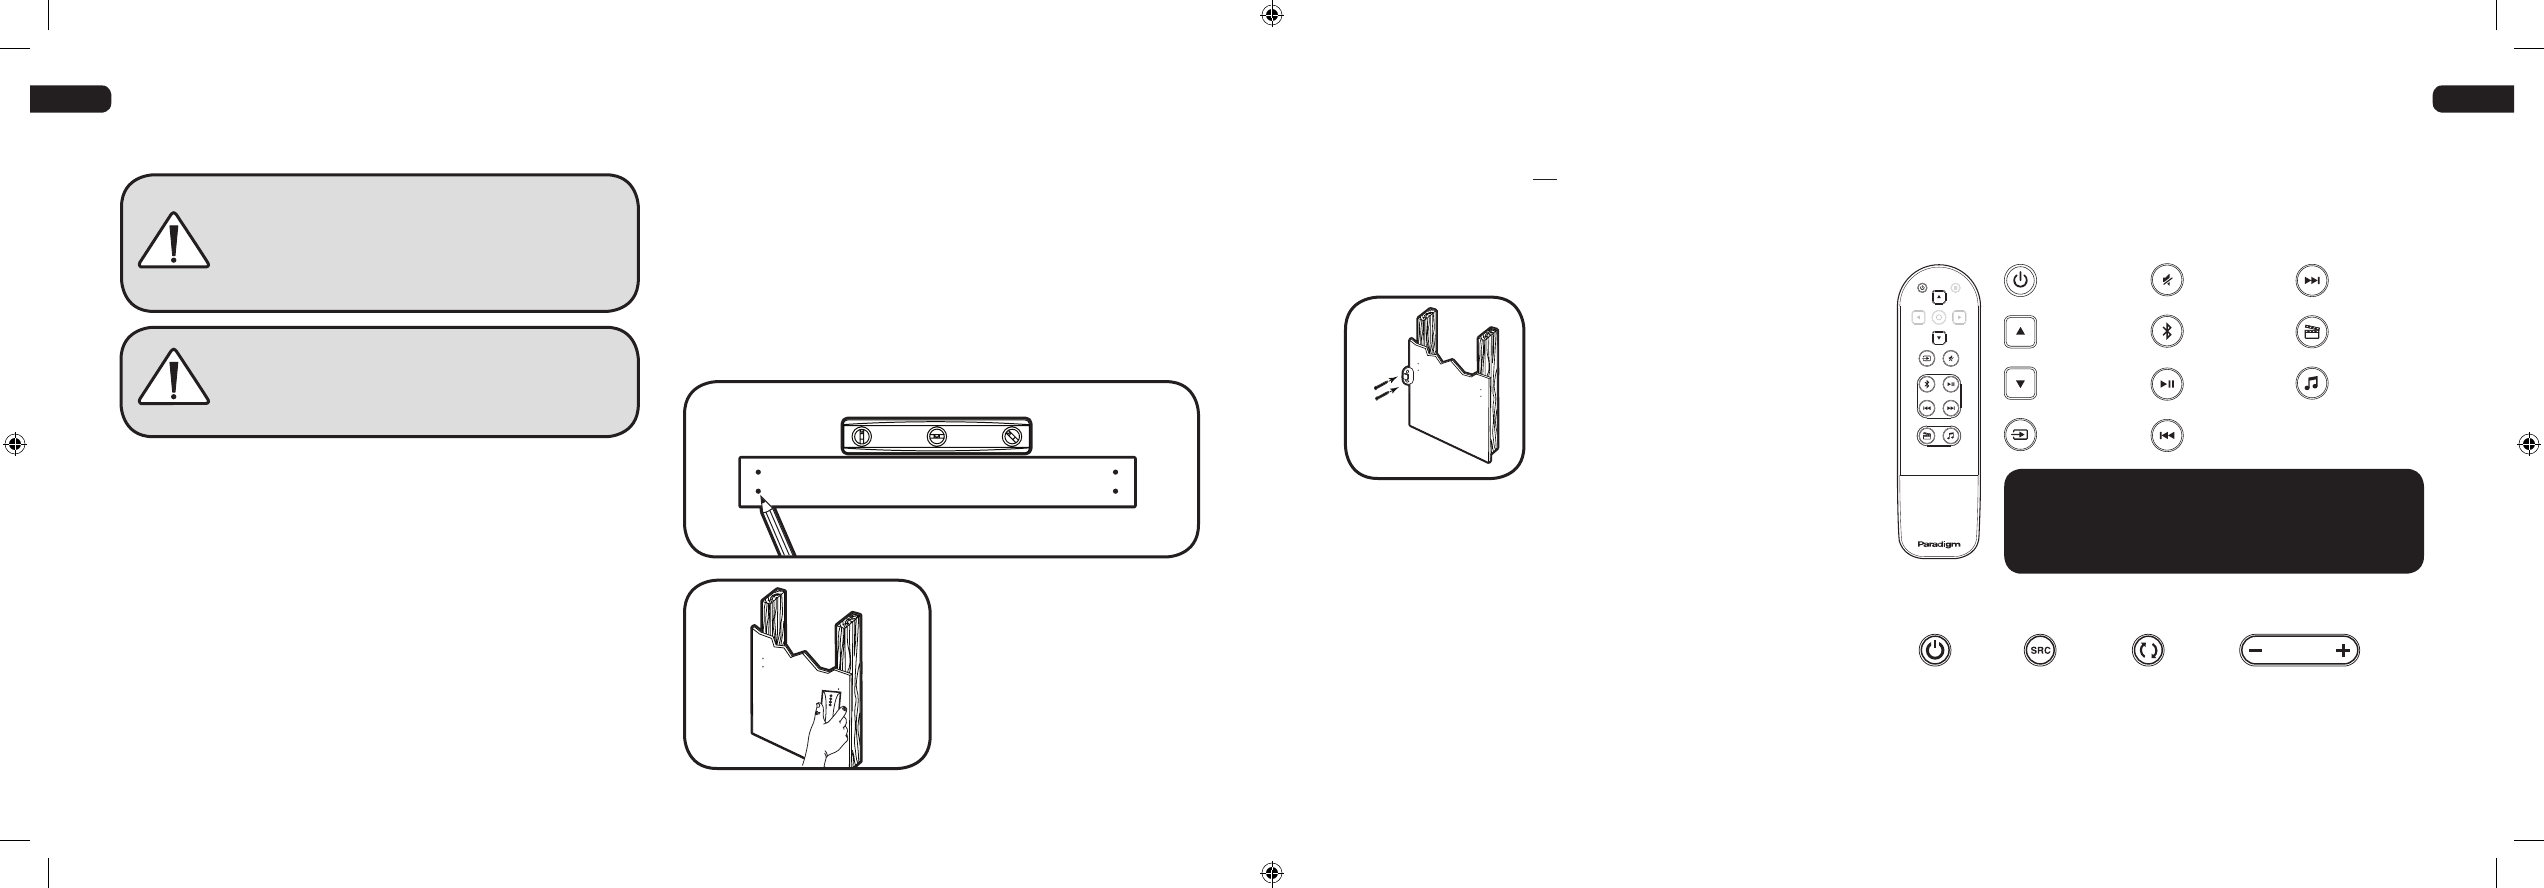
CONTROL
Remote Control
The supplied remote includes 2 x AAA batteries. Follow the diagram on
the back of the Remote for correct insertion: + to + and – to -.
Press to synch
soundbar and
subwoofer
Press to
select
Source
Press to turn
system
on and off
MODE
IMPORTANT:
If you lose the remote, contact Paradigm at 1-905-696 2868
to purchase a new one. Loss of remote is not covered under
Paradigm warranty.
Press and
release to
decrease
volume
Press and
release to
increase
volume
Fig. 5
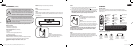
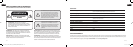
Input
Power
On / Off
Volume Up
Volume Down
Enable
Bluetooth
Play / Pause
Mute
Movie Mode*
Next Track
Previous Track
Music Mode*
* Sonic enhancements
to listening experience
according to mode.
Soundbar Top-Panel Controls
EN
EN – 6
UBICACIÓN (seguido)
Pasos del montaje (las instrucciones son para cada soporte)
Qué está incluido
2 soportes para montaje en la pared
1 plantilla para montaje en la pared
Herramientas recomendadas (no incluidas)
1 detector de vigas
1 nivel
1 perforadora eléctrica y brocas apropiadas
1 destornillador Phillips
Herramientas recomendadas (no incluidos)
4 tornillos aptos para la superficie de montaje y el peso de la
barra de sonido.
4 tarugos (anclajes de pared) aptos para la superficie de montaje
y el peso de la barra de sonido.
IMPORTANTE: Paso barra de sonido: 7.35 lb / 3.34
Pasos del montaje (las instrucciones son para cada soporte)
Paso 1
Establezca el lugar de montaje deseado.
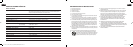
Paso 2
Sujete en la pared con cinta la plantilla de instalación provista, en la
posición correcta, usando un nivel para lograr mayor exactitud. Marque
en la pared las posiciones de los dos tornillos. (Fig. 3)
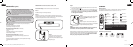
Paso 3
Utilice un buscador de vigas para
determinar si hay una viga en la
pared directamente detrás del lugar
elegido. (Fig. 4)
Paradigm no provee tornillos ni pernos de anclaje
para montar su barra de sonidos en la pared. Si bien
proporcionamos instrucciones limitadas para el montaje
en la pared, debe contactar a un concesionario de Paradigm
para más información. El subwoofer no está diseñado para
montaje en la pared.
Las instrucciones que siguen a continuación suponen
que la superficie de montaje consiste en vigas de madera
estándar. En caso de que desee montar el equipo en
otro tipo de superficie, debe consultar a un contratista
certificado.
PLANTILLA
Fig. 3
Fig. 4
ES
ES
ES – 5
Soundtrack_2_Manual_EN_FR_ES_PRINTER_SPREADS_REV4.indd 5-6 13-11-14 10:41 PM