


10
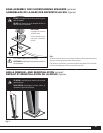
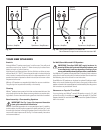
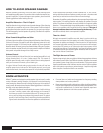
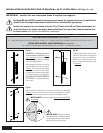
WALL MOUNTING (Figs. 9a – 9e)
IMPORTANT: Paradigm DOES NOT supply hardware for
mounting LCR brackets to the wall. Mounting hardware used is
an example only; it will vary depending on wall type. If you are
not comfortable performing this procedure, contact Dealer.
IMPORTANT: When mounting the speakers, use the bumper
pads marked with the angle you wish to achieve.
INSTALLING THE ON-WALL BRACKETS
(included)
Brackets must be used when mounting Millenia
™
LCR speakers on the wall.
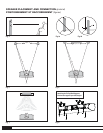
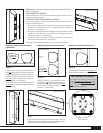
If desired:
• To further optimize imaging, you can tilt Left and Right speakers inward
7° (Fig. 9d – 1) positioning the self-adhesive bumper pads marked 7°
(as shown)
.
• To further optimize clarity and intelligibility, you can tilt the center
channel up 7° or down 7° (Fig. 9d – 2) positioning the bumper pads
marked 7°
(as shown)
.
• You can also mount the speakers parallel to the wall (Fig. 9d – 3)
positioning the self-adhesive bumper pads marked 0°
(as shown)
.
For complete details on wall mounting your speakers, see Figs. 9a – 9e in the
pictorial illustrations at the front of this manual.
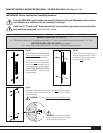
SPEAKER CONNECTION
Turn all amplifier(s) OFF before connecting your speakers.
This will avoid damage which could result from accidental
shorting of speaker cables.
Your speakers are equipped with binding posts that can be used with pin or
spade (except for Millenia
™
200/300) connectors as well as with bare wire.
Banana plugs are included with Millenia
™
200 and 300 speakers. Using
high-quality speaker cable
(see Dealer)
, connect one speaker at a time to
your amplifier.
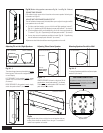
NOTE: To accommodate rotation of speaker, binding posts are not labelled
for Left / Center / Right connection. Refer to Figs. 10a and 10b, then connect
using the following information:
Connect the red (+) amplifier terminal to the red (+) speaker terminal and the
black (–) to the black (–). Tighten the posts firmly by hand, but don’t over-
tighten them.
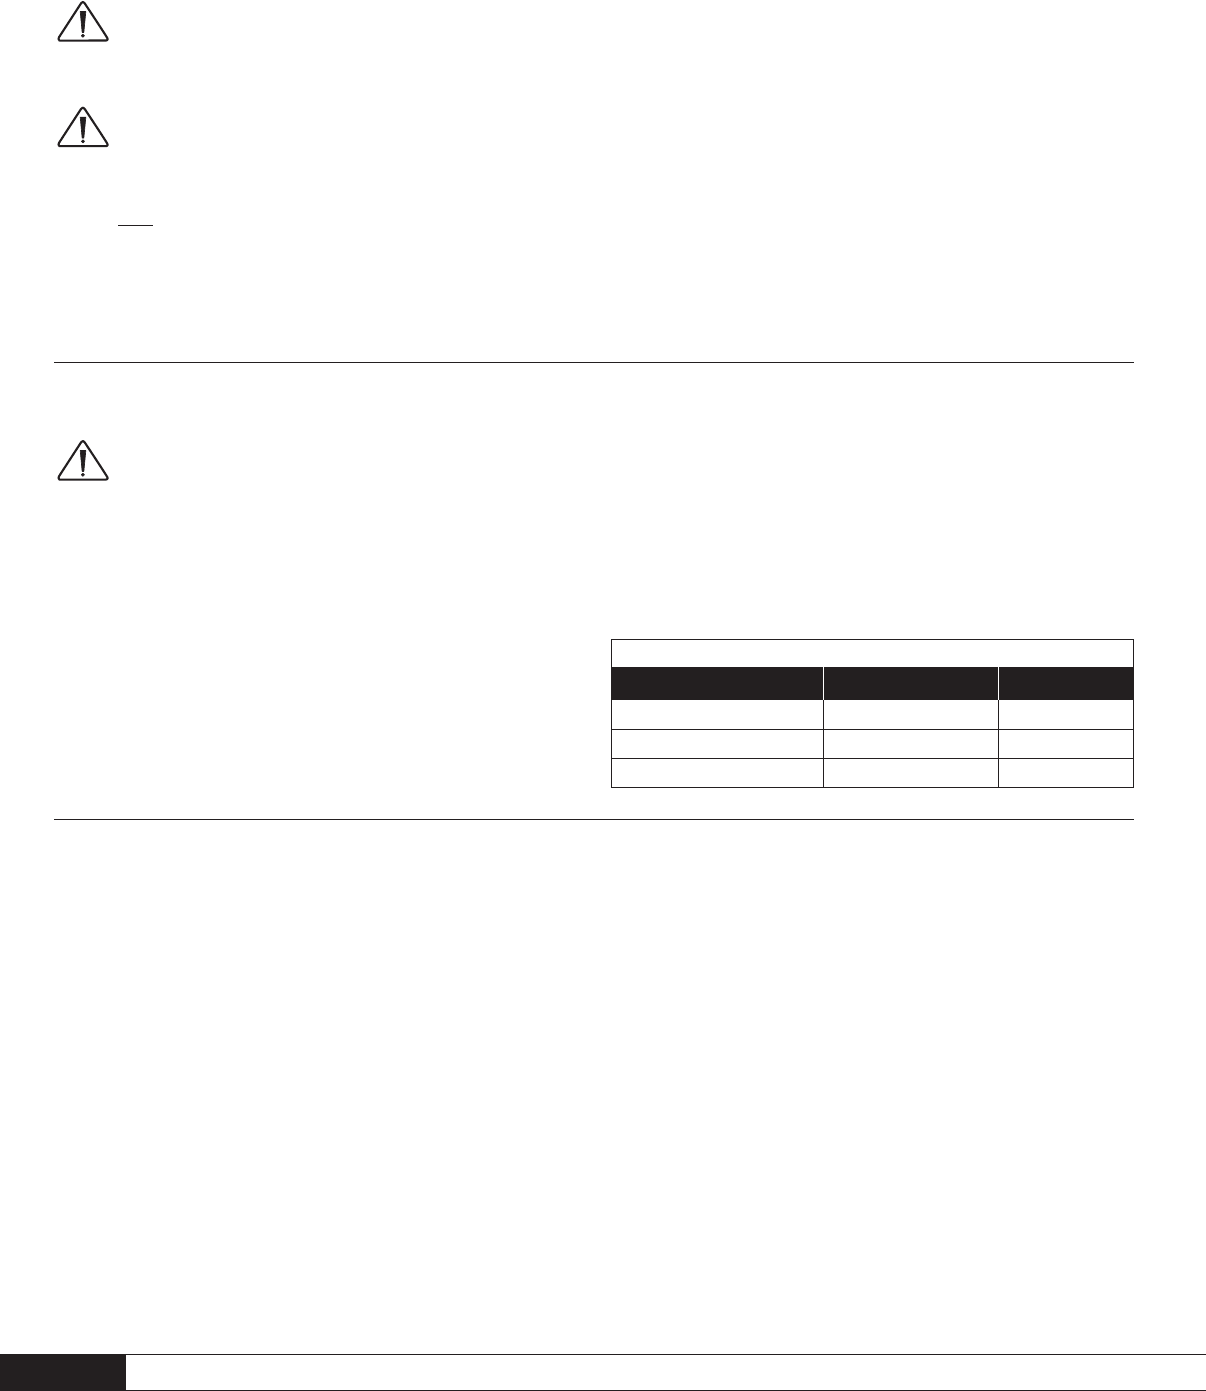
The following chart identifies the minimum gauge requirements for various
cable lengths:
LENGTH DIAMETER GAUGE
Under 4.5 m (15 ft) 1.3 mm (0.05 in) 16 awg
Under 9 m (30 ft) 1.6 mm (0.06 in) 14 awg
Over 9 m (30 ft) 2.0 mm (0.08 in) 12 awg
MINIMUM GAUGE REQUIREMENTS
Once you have your speakers positioned in the room and have set speaker
distances and calibrated speaker levels through your Audio/Video Processor
or A/V Receiver, it’s time for a little fine tuning. Since Paradigm
®
Reference
Millenia
™
speakers provide exceptional performance in a variety of room
settings, fine tuning is simply a matter of making slight adjustments
(if neces-
sary)
to their placement in the room.
Start with just the front speakers and listen to familiar music in stereo. The
soundstage will be both wide and deep, but this can be turned to your personal
preference by adjusting the toe-in (the amount the speakers are turned toward
the listening area). More toe-in will increase image depth and localization,
less toe-in will increase image width. Adjust the toe-in in small increments,
listening each time, until you achieve the soundstage balance you prefer. Toe-
in is not applicable to the other speakers in your system since their position
and sound distribution pattern is fixed.
Fine tuning for center speakers is a matter of making volume level adjustments
that may be required for a particular multi-channel music or movie program.
If necessary, adjust your Audio/Video Processor’s or A/V Receiver’s volume
levels to ensure there is a cohesive overall soundstage.
To fine tune your surround/rear speakers or the subwoofer, refer to the Owners
Manual included with those speakers.
FINE TUNING