


RQTX0044
8
Simple Setup
Proceed to step 5 if you are not connecting an iPod to the main unit.
For SC-PT753, use an optional SH-PD10 Panasonic Universal Dock for
iPod.
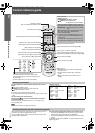
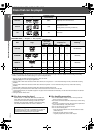
∫ Charging the iPod
Charging time
[Note]
≥AC cord must be connected with the main unit.
≥“OPTION ¢” will be shown on the main unit’s display during iPod
charging in main unit standby mode. It will go off when charging
is finished.
For the above models under “fixed 5-hour charging”,
“OPTION ¢” continues to be displayed throughout this duration,
even when your iPod is fully charged. You can turn off this display
by removing the iPod from the dock.
≥Compatibility depends on the software version of your iPod.
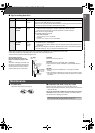
Conserving power
The main unit and the wireless system consume a small amount of
power when they are turned off (\U.S.A.\and\Canada] main unit: approx.
0.5 W, wireless system: approx. 0.2 W, \Others] main unit: approx. 0.9 W,
wireless system: approx. 0.3 W). To save power when they are not to be
used for a long time, unplug them from the household AC outlet.
You will need to reset some memory items after plugging in the main unit.
[Note]
The included AC power supply cords are for use with the main unit and
wireless system only. Do not use them with other equipment. Also, do
not use cords for other equipment with the main unit or wireless system.
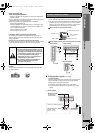
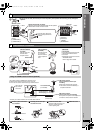
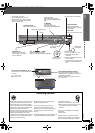
step
3
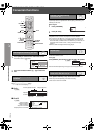
Digital transmitter connection
AV OUT
TRANSMITTER
DIGITAL
R
L
AUX
COMPONENT VIDEO OUT
VIDEO
OUT
P
B
Y
R
P
AM
ANT
EXT
XM
LOOP
ANT GND
FM ANT
75
LOOP
OPTION V. 1
Do not insert or remove while
the main unit is on.
Digital transmitter
Insert fully until you hear a click.
Main unit
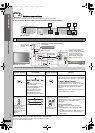
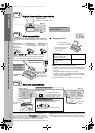
step
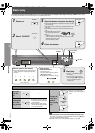
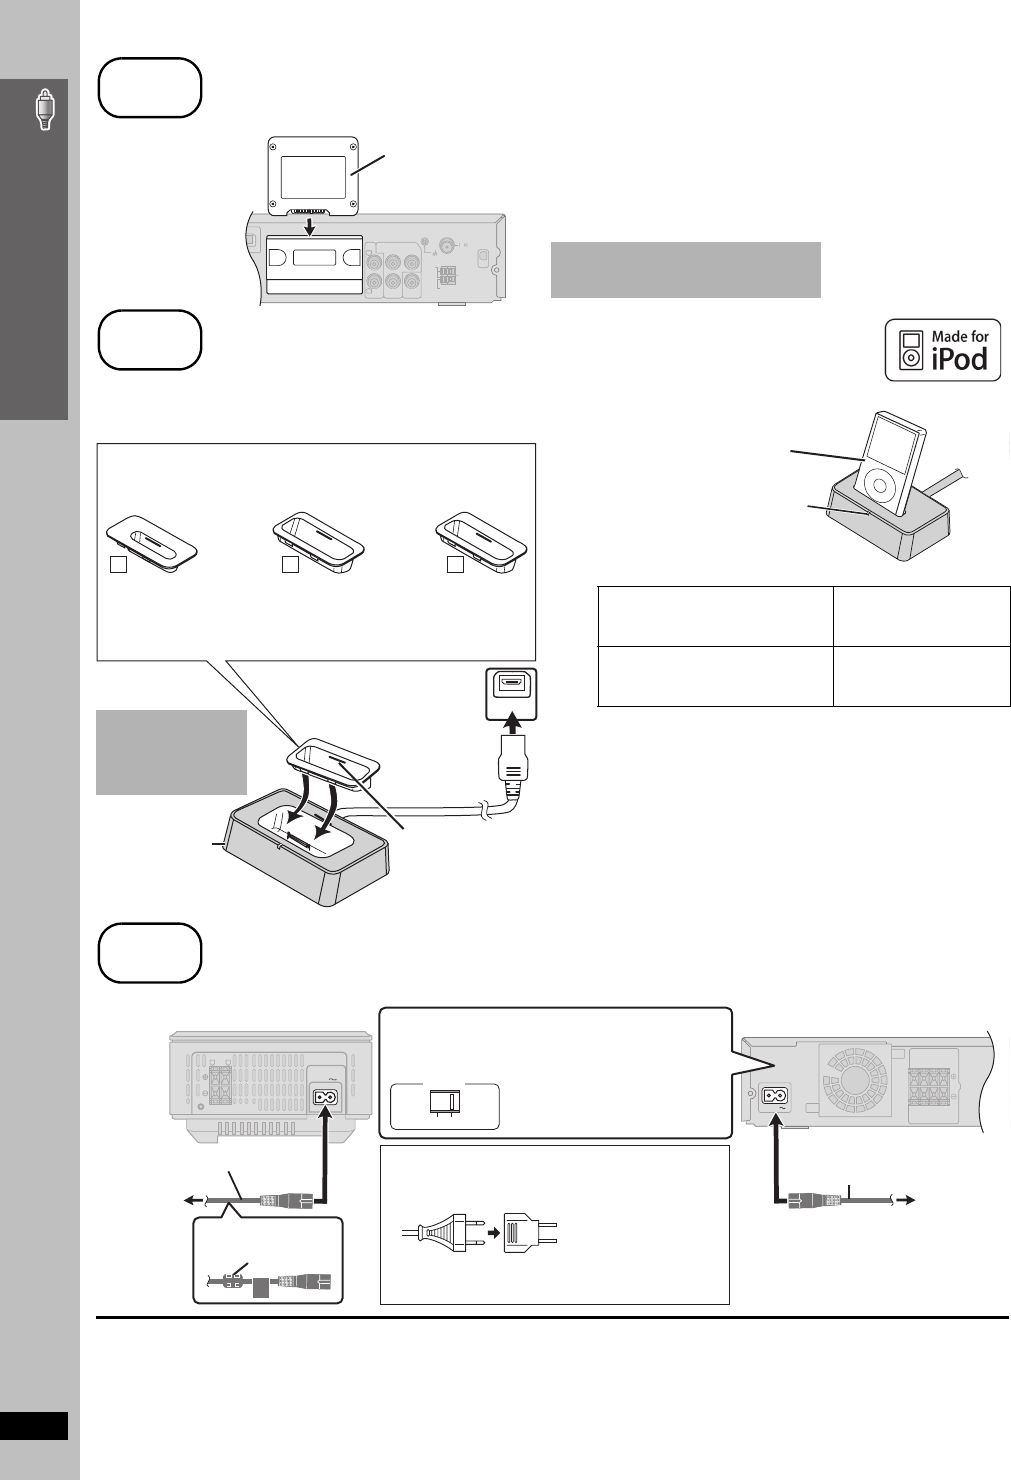
4
iPod connection
OPTION V
.1
11
9
10
Dock adapter for
iPod 5th generation
(video) (30GB)
Dock adapter for
iPod nano 2nd generation
(aluminum)
(2GB, 4GB, 8GB)
Universal Dock
for iPod
Connect the dock to the
back of the main unit.
When removing, use
your fingernail or a flat
object to lift upwards.
The mark [11], [10] or [9] is shown on the back of each dock
adapter.
≥For other types of iPod, use the dock adapter sold separately.
Or visit the official Apple website for compatible adapters.
Dock adapter for
iPod 5th generation
(video) (60GB, 80GB)
Do not connect or
disconnect the
dock while the
main unit is on.
iPod nano 2nd generation (aluminum)
iPod 5th generation (video)
iPod nano 1st generation
Until iPod is fully charged
iPod 4th generation (color display)
iPod 4th generation
iPod mini
5 hours (fixed)
iPod (not included)
≥Connect the iPod firmly.
The indicator lights up when
the iPod is inserted, and
charging starts.
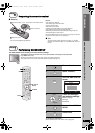
step
5
AC cord connections
AC IN
AC IN
I/D SET
LR
VOLT ADJ
110-127V 220-240V
[For\areas\except\U.S.A.\and\Canada]
Before connecting the AC power supply cord
Set the voltage.
Use a flat-head screwdriver to
move the voltage selector to the
appropriate position for the area
in which this system is used.
[For\areas\except\U.S.A.\and\Canada]
≥If the power plug does not fit your AC outlet
Use the power plug adaptor (included).
If it still does not fit, contact an electrical parts
distributor for assistance.
AC power supply cord
(included)
AC power supply cord
(included)
To household
AC outlet
Main unit
Wireless system
To household
AC outlet
[For\areas\except\U.S.A.\
\and\Canada]
Ferrite core
Digital transmitter connection/ iPod connection/ AC cord connections
0044En_p03-13.fm Page 8 Tuesday, February 13, 2007 5:41 PM