


Precautions
Getting started
11
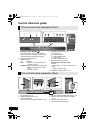
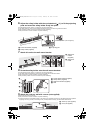
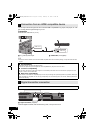
1 Use the measurements indicated below to identify the screwing positions on
the wall.
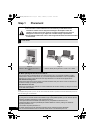
≥ Position the unit with at least 50 mm (2q) of space above the unit. If not, it may not be possible to access the buttons on this unit.
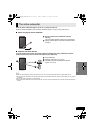
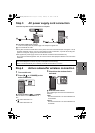
2 Attach the wall mount brackets to the wall.
≥ The position in the wall where the screw is to be attached as well as the screw should be capable of supporting over 33 kg
(72.8 lbs).
≥ Be sure to use a spirit level to ensure that both screwing positions are horizontal to each other.
≥ Keep the screws out of reach of children to prevent swallowing.
≥ Keep the wall mount brackets out of reach of children to prevent swallowing.
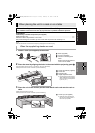
3 Complete all the necessary connections to this unit. (> 15 to 17)
≥ Connect the AC power supply cord to this unit, but do not connect it to the household AC outlet until the installation is completed.
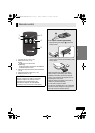
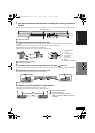
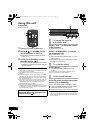
4 Attach the rear pads to the rear of the unit.
≥ Keep the rear pads out of reach of children to prevent swallowing.
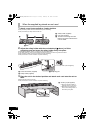
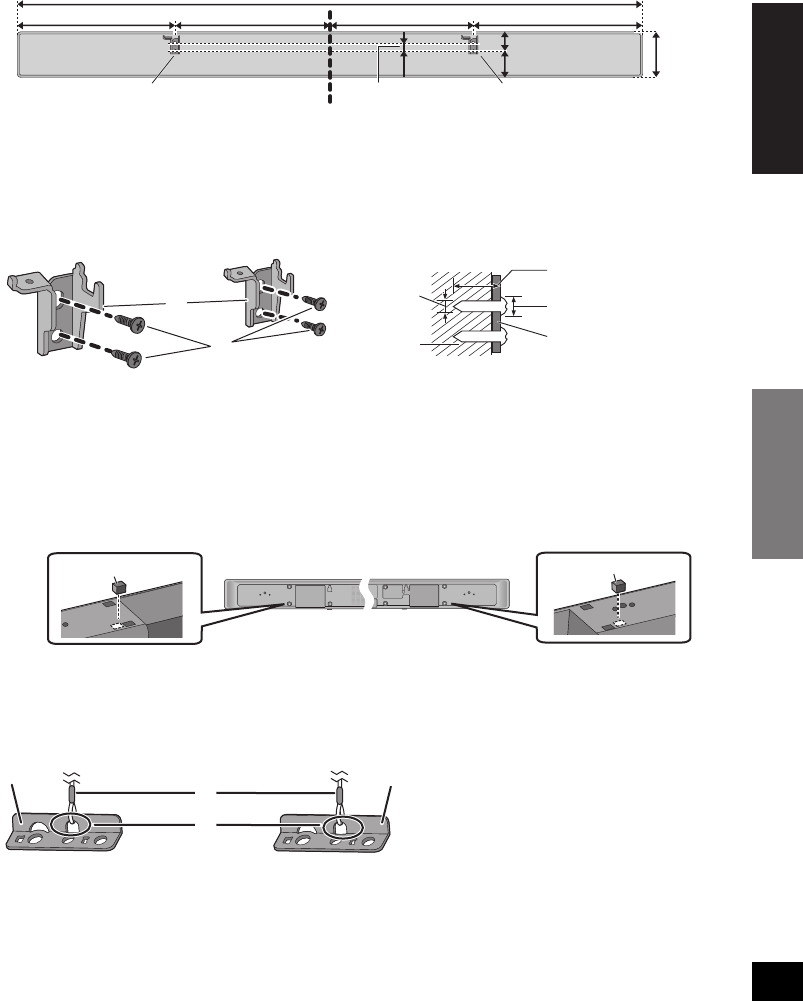
5 Attach a cord (not supplied) to 2 safety holders.
≥ Use a cord which is capable of supporting over 33 kg (72.8 lbs).
≥ Keep the safety holders out of reach of children to prevent swallowing.
A Wall mount bracket
252 mm (9
29
/32)257 mm (10
1
/8) 233.5 mm (9
13
/64) 275.5 mm (10
13
/16)
1018 mm (39
11
/16)
75 mm
(2
15
/16)
31.5 mm (1
15
/64)
43.5 mm (1
45
/64)
12.5 mm (
31
/64)
A At least 30 mm
(1
3
/16q)
B ‰4.0 mm (
5
/32q)
C ‰7.5 mm to
‰9.4 mm
(
19
/64q to
3
/8q)
D Wall
E Wall mount bracket
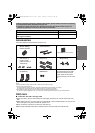
B Wall mount bracket (supplied)
C Screws (not supplied)
D Rear pads (supplied)
E Safety holder (supplied)
F Cord (not supplied)
G Thread a cord through the holes.
Refer to the Owner’s Manual of the cord
for details.
SC-HTB520PP_RQTX1278-Y.book Page 11 Friday, February 18, 2011 8:48 AM