


9
Recording
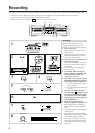
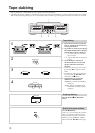
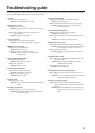
Stopping recording
Press the e button.
Interrupting recording briefly
Press the t button.
9
10
e
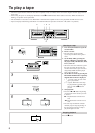
9. Put the source component into
recording standby status.
• Temporarily stop CD (or LP) play.
• Rewind the tape to the portion you wish
to start playback.
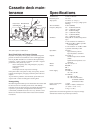
10. Press the s button on this unit and
begin playing the source component.
You can also use the CD Synchro
Recording function if this unit is prop-
erly connected to an ONKYO CD player
bearing the z symbol.
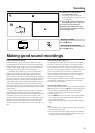
Making good sound recordings
s
DUBB.STOP
t
Dolby Noise Reduction System
Dolby B NR is the system used in most cassette tape decks to
reduce the background noise that is inherent in all cassette tapes.
Dolby Laboratories then developed an even more effective noise
reduction system, Dolby C NR, in response to the demand for
increasingly better sound quality from cassette tapes.
Both Dolby noise reductions systems operate by boosting
signals during recording that fall below a certain input level.
Dolby B and C NR operate on the higher portions of the fre-
quency spectrum using what is called a “sliding band” technique.
This is because tape hiss is most prominent during the quiet, high
frequency portions of a recording. These same signals are then
reduced back to their original strength during playback, thereby
reducing the background noise by the same amount. In order to
operate only when necessary, the Dolby NR system has a varying
effect depending on the input level and frequency of the material
being recorded.
Dolby C NR is capable of reducing tape hiss by 10 dB more
than Dolby B NR. In addition to its noise reducing function,
Dolby C NR has an anti-saturation network that lowers high input
levels before recording them and returns the signals to their
original strength during playback. This raises the high-frequency
saturation level of cassette tapes to allow you to record signals
that would normally cause distortion. This system raises the
maximum output level of cassette tapes by more than 4 dB at 10
kHz.
Setting the Proper Recording Level
The recording level has an important effect on the sound quality a
tape will have when it is played back. A recording level that is
too high will cause distortion while one which is too low will
lower the signal-to-noise ratio resulting in a tape with excessive
“hiss noise.” It is particularly important to set the recording level
correctly with cassette tapes since they have a much thinner
magnetic coating than open reel tapes. The thin coating gives the
tape a comparatively low saturation level which can easily be
surpassed if the recording level is set too high.
The recording level indicators feature a peak-hold function for the
indicators from -6 dB through +6 dB. This can come in handy
when setting the recording level.
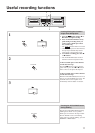
CD Synchro Recording System
Once the TA-RW244/144 is connected to a CD player bearing the
z mark (see page 12), press the s button of the CD player will
cause recording to start automatically on the TA-RW244/144.
1. Insert a cassette with the side to be recorded facing out.
2. Start the CD player.
3. Press the t button to place the unit in the recording standby
mode. Adjust the input level. When the recording level has
been set, stop the CD player.
4. Start the CD player again, and recording will begin simultane-
ously.
Notes:
1. Even if the CD player is stopped during recording, the cassette
deck will continue recording.
2. If the cassette deck is in the recording standby mode when the
CD is put in play, the deck will begin recording. When setting
recording levels, always start the CD first.