


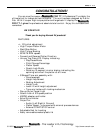
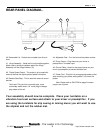
PRO TT-1
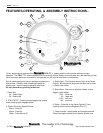
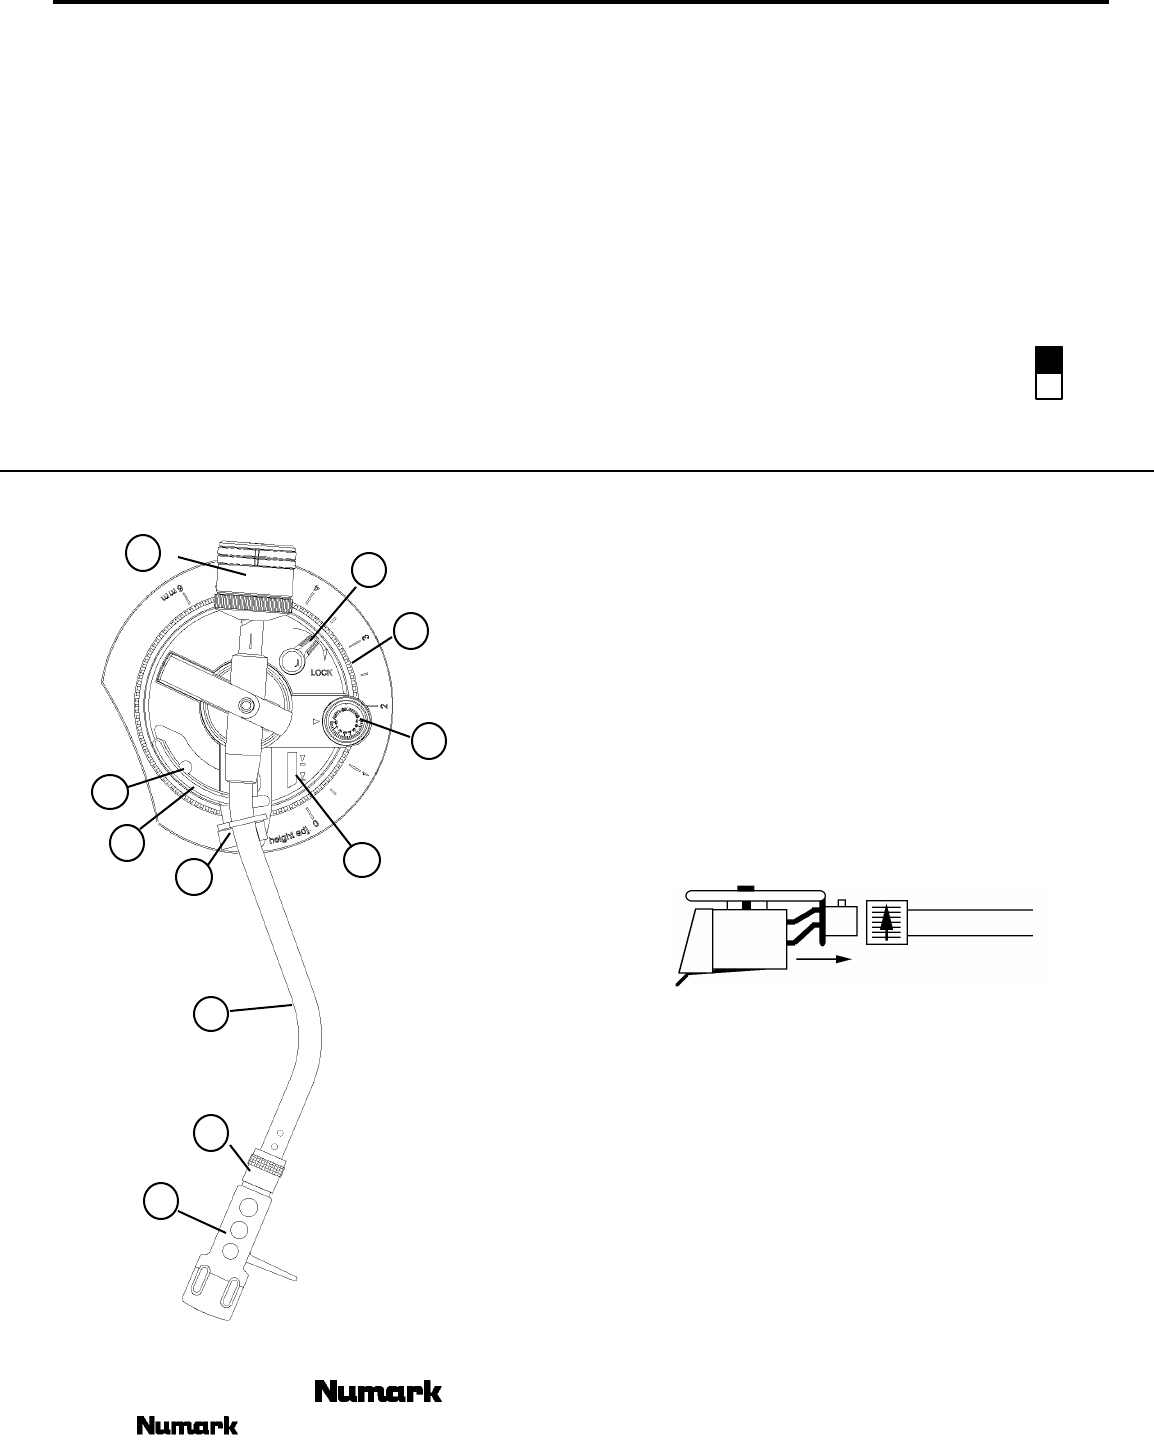
8. 45 Adapter - Place on Center Spindle (7) for playing 7”
records with large center holes.
9. Forward/Reverse Buttons - These determine the
direction the platter will spin.
10. Lid Hinge Holder - Place the bottom tabs of your lid
hinges in here after you finish assembly.
11. Extra Stylus Holder - Place extra headshells here.
12. Tone Arm Assemble - Explained in tonearm section
20
21
22
23
24
25
26
27
28
29
30
13. Pitch Adjust - use this the change the speed of the
platter when quartz lock is inactive. You can adjust the
revolutions by ±10%.
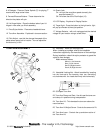
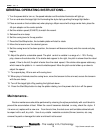
TONE ARM ASSEMBLY
14. Quartz Lock
On - will hold the revolution speed at exactly the
specified speed (3)
Off - will allow use of the Pitch Adjust (13)
15. LCD Display - Explained in Display Section
16. Target Light - Press the button to the right and a light
will pop up directed at the stylus position.
17. Voltage Selector - with unit unplugged set the desired
voltage for your location using a screw driver.
115V
230V
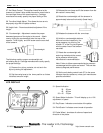
20. Headshell - Attach the cartridge here.
When installing a cartridge, refer to the installation
instructions supplied by the manufacturer of that cartridge.
During installation, attach the stylus protector to guard the
stylus tip from damage.
Attach wires as follows:
White (L+)Left channel+
Blue (L-)Left channel
Red (R+)Right channel+
Green (R-)Right channel
21. Headshell Locking Nut - Attach headshell by inserting
into the front end of the tonearm, then turn the locking
nut clockwise with the head shell firmly held horizontally.
22. S-Shaped Tone Arm
23. Tone Arm Clamp and Rest - Use this rest the tone arm
and clamp it in position during transportation.
24. Tone Arm Lift - This elevates the tone arm above the
record surface
25. Tone Arm Lift Adjust Screw - Controls the amount of lift
26. Tone Arm Lever - Controls the up and down action of
the Tone Arm Lift
- The Leader in DJ Technology
©1999 Industries 7 http://www.numark.com