


7
www.nilesaudio.com
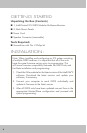
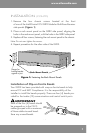
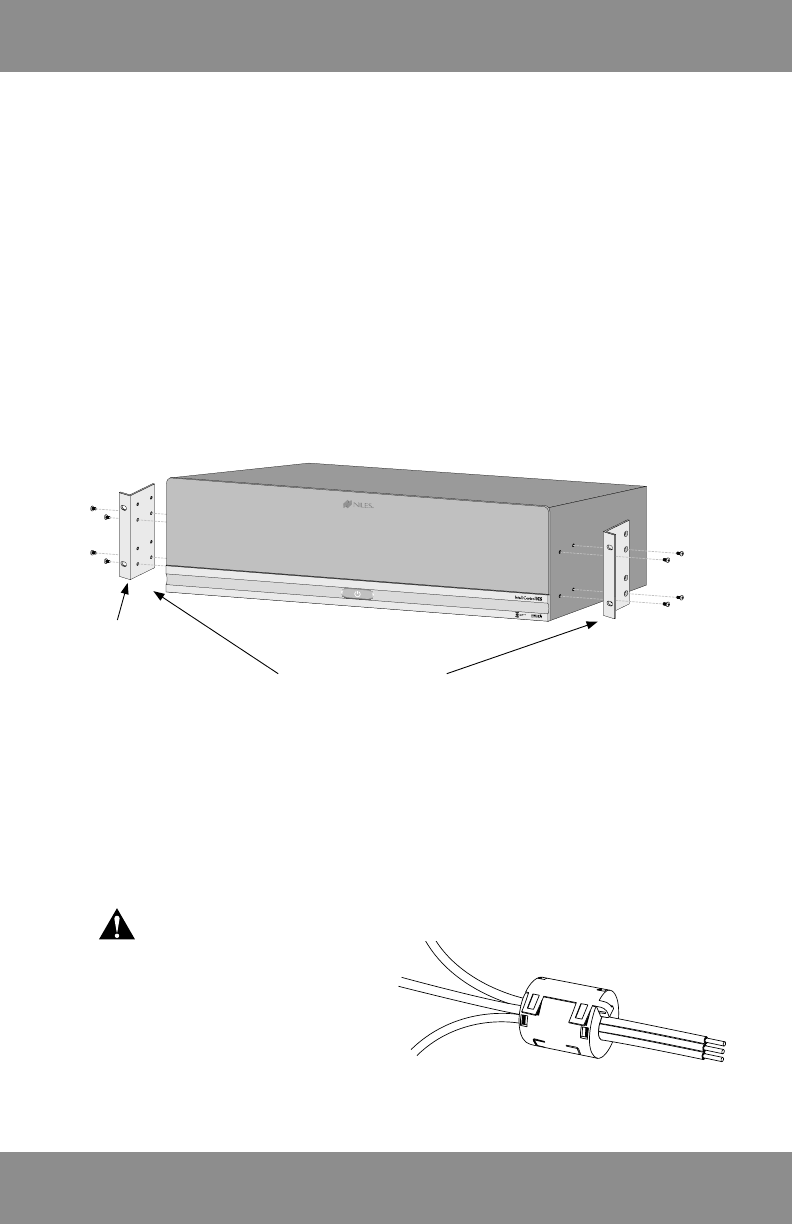
Figure 1: Fastening the Rack Mount Panels.
Rack Mount Panels
Flange for
butting bracket
against a joist
INSTALLATION (CONT’D)
1. Remove the four chassis screws located at the front
of one of the IntelliControl ICS GXR2 Modular MultiZone Receiver
side panels (Figure 1).
2. Place a rack mount panel on the GXR2 side panel, aligning the
holes in the rack mount panel, with the holes in the GXR2 side panel.
3. Replace all four screws, fastening the rack mount panel to the chassis.
Note: Do not over tighten the screws.
4. Repeat procedure for the other side of the GXR2.
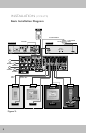
Installation of Clip-on Ferrite Beads
Your GXR2 has been provided with snap-on ferrite beads to help
ensure FCC and EMC Compliance. It is the responsibility of the
installer to install the beads properly. There are four (4) beads pro-
vided for the twelve (12) communication and control switch ports.
IMPORTANT
Each of the four (4) beads should
be snapped on to the CAT-5
cables grouped with a maximum
of three cables to each bead.
Save any unused beads.