6) Input Section:
The S-20 offers three stereo input options: two types of
balanced inputs (TRS and XLR) and unbalanced RCA.
The two balanced inputs are wired in parallel. Note:
Standard 1/4” connectors may be used in place of the
TRS type if the source equipment employs unbalanced
outputs, but this method may induce unwanted noise.
PLEASE NOTE: These different connector options
have been provided for your convenience. Use only
one connection for the left channel and only one con-
nection for the right channel or damage may result to
your subwoofer.
7) Output Section:
The output connectors to the satellite monitors are bal-
anced, TRS type. Two 12' cables are included to connect
the S-20 left and right outputs to the satellite monitors.
PLEASE NOTE: If you are using your S-20 subwoofer
with a pair of NHT M-00’s, set the sensitivity switch
on the M-00’s to +4.
8) Subwoofer Bypass:
This feature, helpful when monitoring, allows you to turn
the S-20 “ON” or ”OFF” on the fly. Any standard “latching”
or two-position foot switch that has a 1/4”plug will control
this function. A press of the foot switch will place the S-
20 and its High Pass filter into BYPASS mode and
remove them from the signal chain. A second press of
the foot switch, causes the S-20 to resume operation.
9) Power Section:
The main power ON and OFF switch is located above the
power cord receptacle.
Located above to the power switch is an LED Inticator:
GREEN: the S-20 is operating normally.
AMBER: the S-20 is in Standy Mode. When the S-20
doesn’t hear an incoming signal after a period of time it
will go into standy mode and will ‘wake up’ and come out
of standby mode when it hears a signal.
RED: the S-20 is in FAULT, consult the Troubleshooting
section of this manual (pg. 5)
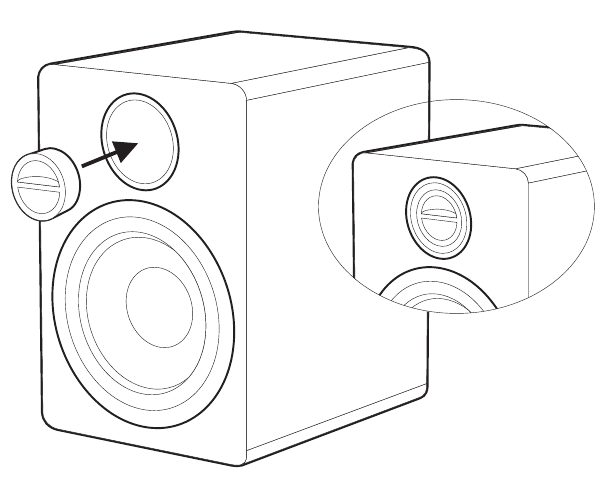
The Port Plug:
The S-20 subwoofer is designed to be used as either a
bass reflex or acoustic suspension subwoofer. With the
port plug removed, the subwoofer is a bass reflex sys-
tem. With the plug in, the system is acoustic suspension.
In bass reflex mode, the subwoofer will have lower bass
extension and more output capability, but somewhat less-
ened transient response. In acoustic suspension mode,
the subwoofer will have less bass extension and output,
but better transient response. In a room with a lot of low
frequency standing waves or where the subwoofer must
be placed in a corner, acoustic suspension mode will
probably sound best. In a larger room or where the sub-
woofer is farther from the walls or corners, bass reflex
mode will work best.
When installing the port plug, put it in the port until it
stops, and then push it in another 1/4". It is not necessary
to use a lot of force. As long as there is no audible air
noise coming from the port, the plug is in far enough.
CONNECTING THE S-20 SUBWOOFER:
Using the S-20 as a .1 or LFE stand-alone device:
Connect either an RCA, XLR or TRS from your designat-
ed LFE channel or buss output assignment to either the
left or right input on the S-20 “INPUT SECTION”. If more
subwoofer sensitivity is required, use a “Y” adaptor and
connect to both left and right inputs. Turn the low pass
control to it’s maximum position. Be sure to utilize sur-
round test tone signals to properly balance the woofer
level with the other monitor channels. Please read
through the Subwoofer Placement and User Controls
sections before you begin.
Using the S-20 to augment the frequency response of
powered mini-monitors:
Connect the left and right outputs from your mixer or
source unit to either the XLR, TRS or RCA jacks on the
“INPUT” section of the S-20. Now connect the supplied
left and right TRS cables from the “OUTPUT” jacks on
the S-20 to your satellite monitors' input jacks. You may
also want to connect a foot switch (or any standard 1/4”,
2-position switch) into the BYPASS input on the rear of
the S-20. Using this feature is not necessary to the basic
operation of the S-20.
3


