


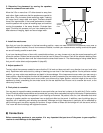
3. Determine fine placement by moving the speakers
inward or outward from each other
Move the 3.3's no more than 1/2" either toward or away from
each other. Again make sure that the speakers are parallel to
each other. Play the same three recordings again, listening
for image focus, stage width and depth. Evaluate whether
there is an improvement. If the overall performance is better,
mark the position with a piece of masking tape, and continue
moving the speakers in the same direction. Evaluate them
again. Continue this process until you have determined the
best balance of imaging, depth and sound-stage width.
4. Install the metal cones
Now that you have the speakers in the best sounding position, install the metal cones onto the stabilizer bars (refer to
"SpikeKit Installation" above). Once all four cones are installed, re-check your measurements, making sure that the speak-
ers are still exactly parallel to each other.
If you have hardwood floors or floors with a scratchable surface, you may choose not to use the cones because they will
pierce the surface. Rubber feet are provided and can be used in place of the cones. Peel off the adhesive backings from
the rubber feet, and place them over the holes where the cones would screw in. The disadvantage of using rubber feet is
that you will not be able to adjust speaker tilt (step #5).
5. Adjust speaker tilt
To start, adjust the cones as needed to ensure that the 3.3 is level and does not rock in any direction (use your level to be
sure). Experiment with vertical axis by raising or lowering your ear level in the listening position. At one particular vertical
position, you may notice more ambience and depth in the soundstage. If the improvement occurs when your ears are at a
lower position, raise the height at the front of the speakers by slowly unscrewing the two metal cones on the front stabiliz-
er bar. Likewise, if the improved sound occurs when your ears are at a higher position, raise the height at the rear of the
speakers by slowly unscrewing the two metal cones on the rear stabilizer bar. Be sure not to unscrew too much, or the
cones may come off.
6. Final points to remember
You may want to repeat the setup procedures at some point after you have had a chance to live with the 3.3's for a while.
You will find that subtle improvements can be made that you may have overlooked during the initial setup. Experimentation
is the key to finding the best arrangement in your listening environment. Be patient, have fun, and remember that small
changes in speaker position can sometimes have a significant effect on the sound. In addition, room furnishings play an
important role in absorbing and reflecting soundwaves. Midrange and high frequencies in particular will be absorbed by
soft furnishings such as sofas, carpets and curtains. A large number of these soft furnishings will dull the sound, while a
"live" room with few furnishings will brighten the sound.
!!
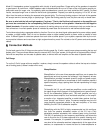
Connections
Before connecting speakers to your system, it is very important that you turn off the power to your amplifier /
receiver to avoid damage to the equipment.
5
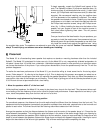
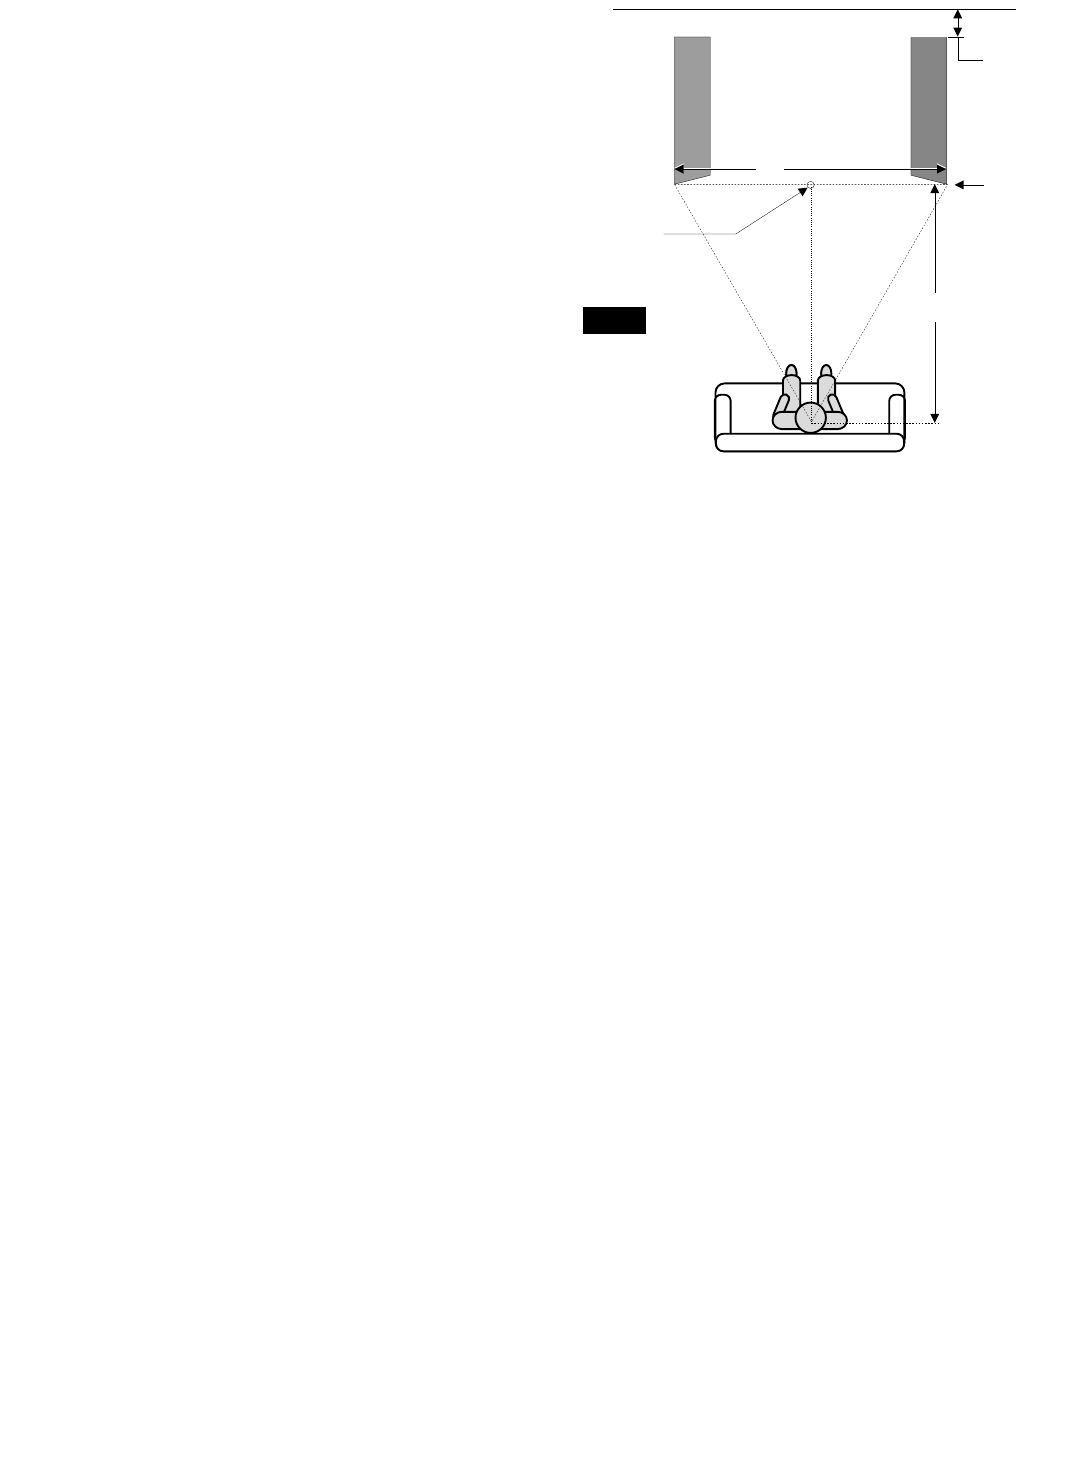
D
1.5xD
Speaker
Plane
3"
Center of
Speaker
Plane
fig. 2