


To begin assembly, unpack the SpikeKit and inspect all the
parts. The SpikeKit includes: (2) aluminum stabilizer bars, (4)
aluminum cones, (4) stainless steel alien studs, (1) alien head
wrench, (8) Phillips head machine screws and (4) rubber feet.
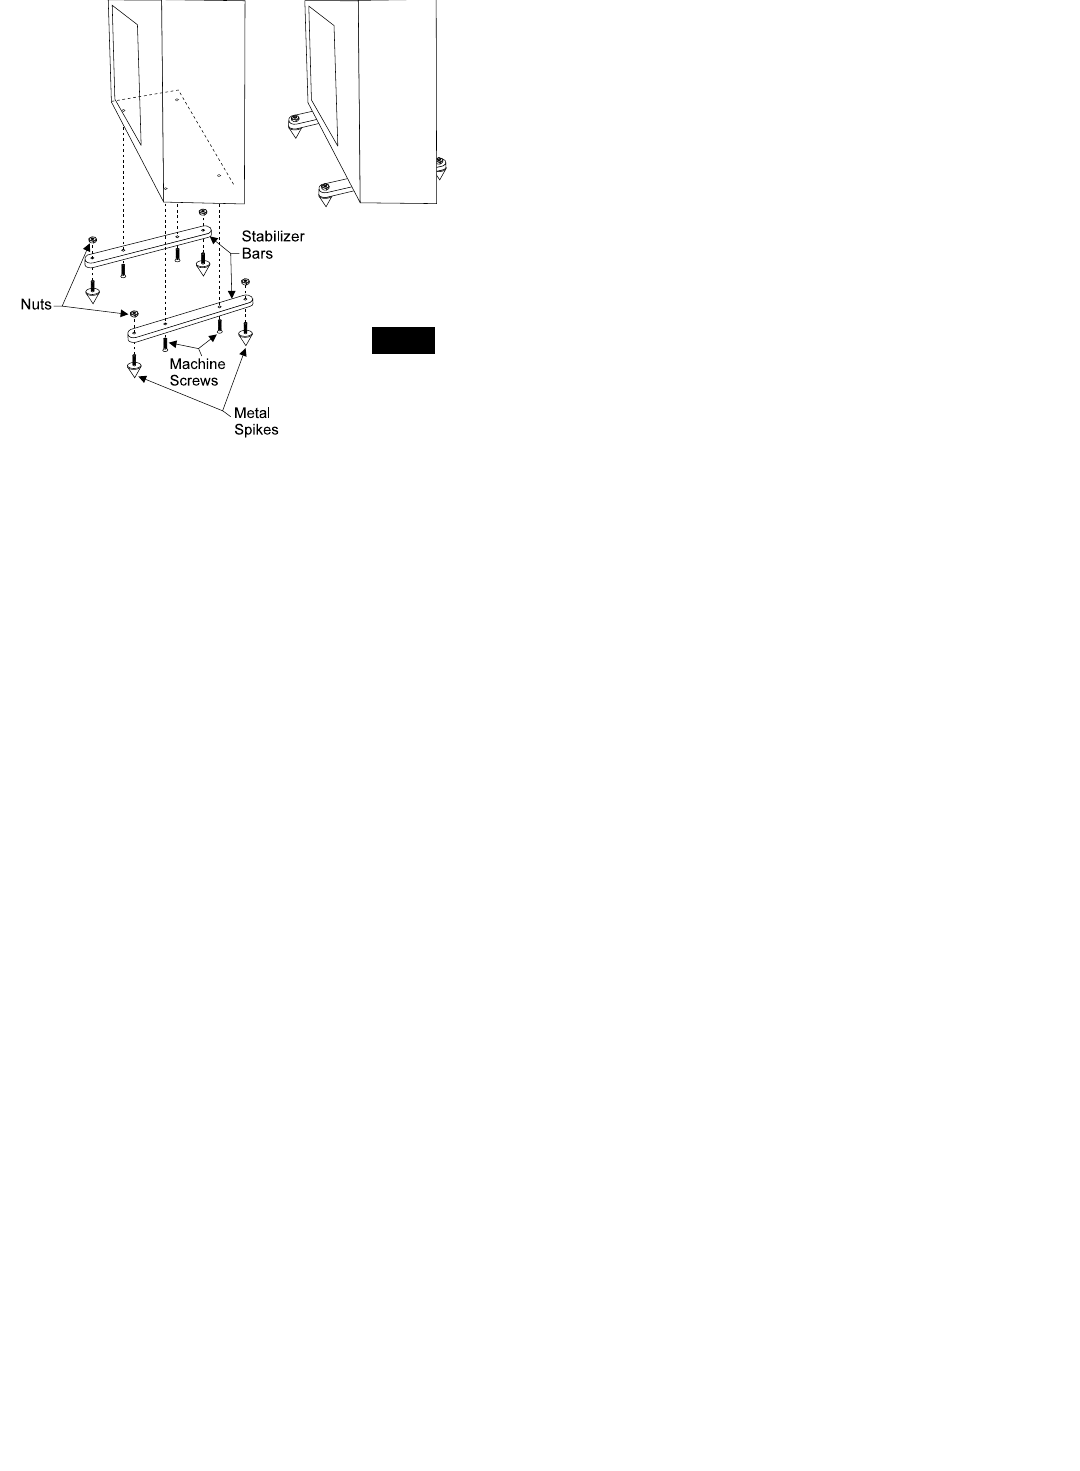
Important: We recommend installing only the stabilizer bars
until final placement of the speakers is obtained. This makes
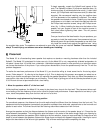
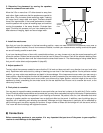
the speakers much easier to move. Carefully turn the speaker
upside down or on its back, and attach the stabilizer bars with
the Phillips head machine screws, using a #3 Phillips screw-
driver (fig. 1). When installing the bars onto the bottom of the
speaker, use your fingers to start all the machine screws in
their holes before tightening them down. This will prevent
crossthreading.
Once you have found the ideal location for your speakers, you
are ready to install the metal cones. Have someone help you:
While one person tilts and holds the speaker to one side, care-
fully install the cones flush against the stabilizer bars using
the supplied allen studs. The speakers are awkward to move after the cones are installed. Caution: The cones are very
sharp. To avoid injury, use extreme care when handling and installing.
!!
Placement
The Model 3.3 is a floorstanding tower speaker that requires no stands or mounting hardware other than the included
SpikeKit. The Model 3.3 is designed for indoor use only. As the Model 3.3 is not a magnetically shielded loudspeaker, do
not place it closer than 18 inches from a television. Unshielded magnets placed in close proximity to a television screen
can cause discoloration of the picture. If you notice picture discoloration, move the speakers away from the TV until the
problem disappears.
To realize the maximum performance of the Model 3.3, you should be willing to invest some time for fine-tuning adjust-
ments. Follow steps #1 - 6, referring to the diagram in fig.2. Prior to beginning this process, we suggest you select two or
three of your favorite recordings to use while you optimize the speaker placement. Each time you move the speakers to a
new position, take note of the changes you are hearing. This will help in guiding you to find the ultimate placement for your
3.3's. Be sure to have a tape measure and a level handy.
1. Move the speakers within 3" of the front wall
Unlike traditional speakers, the Model 3.3 is meant to be placed very close to the front wall. This placement allows opti-
mum loading of the low frequency driver and is critical for proper bass performance. If bass response is too heavy in your
room, move the speakers away from the front wall an inch at a time.
2. Determine rough placement by listening position
For smoothest response, the distance from the side walls should be different than the distance from the front wall. The
speakers should be arranged as symmetrically as possible: equidistant from side walls, perpendicular to the front wall and
parallel to each other. The drivers should face the listening area without obstruction from furniture.
Arrange the speakers so that the distance between the listener and the center of the speaker plane is 1.5 times the dis-
tance between the speakers. This configuration puts the listener in the center of the stereo image. Begin your listening by
sitting centered between the speakers. While listening to the first selection, close your eyes and listen for image focus and
depth of sound between the speakers. Balance this image focus and depth with apparent stage width, listening for sound
beyond the boundaries of the left and right speakers. Play all three recordings before completing this step.
4
fig. 1