


5
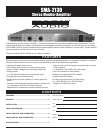
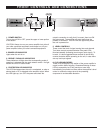
FRONT CONTROLS AND CONNECTIONS
(5)
(4)
(6)
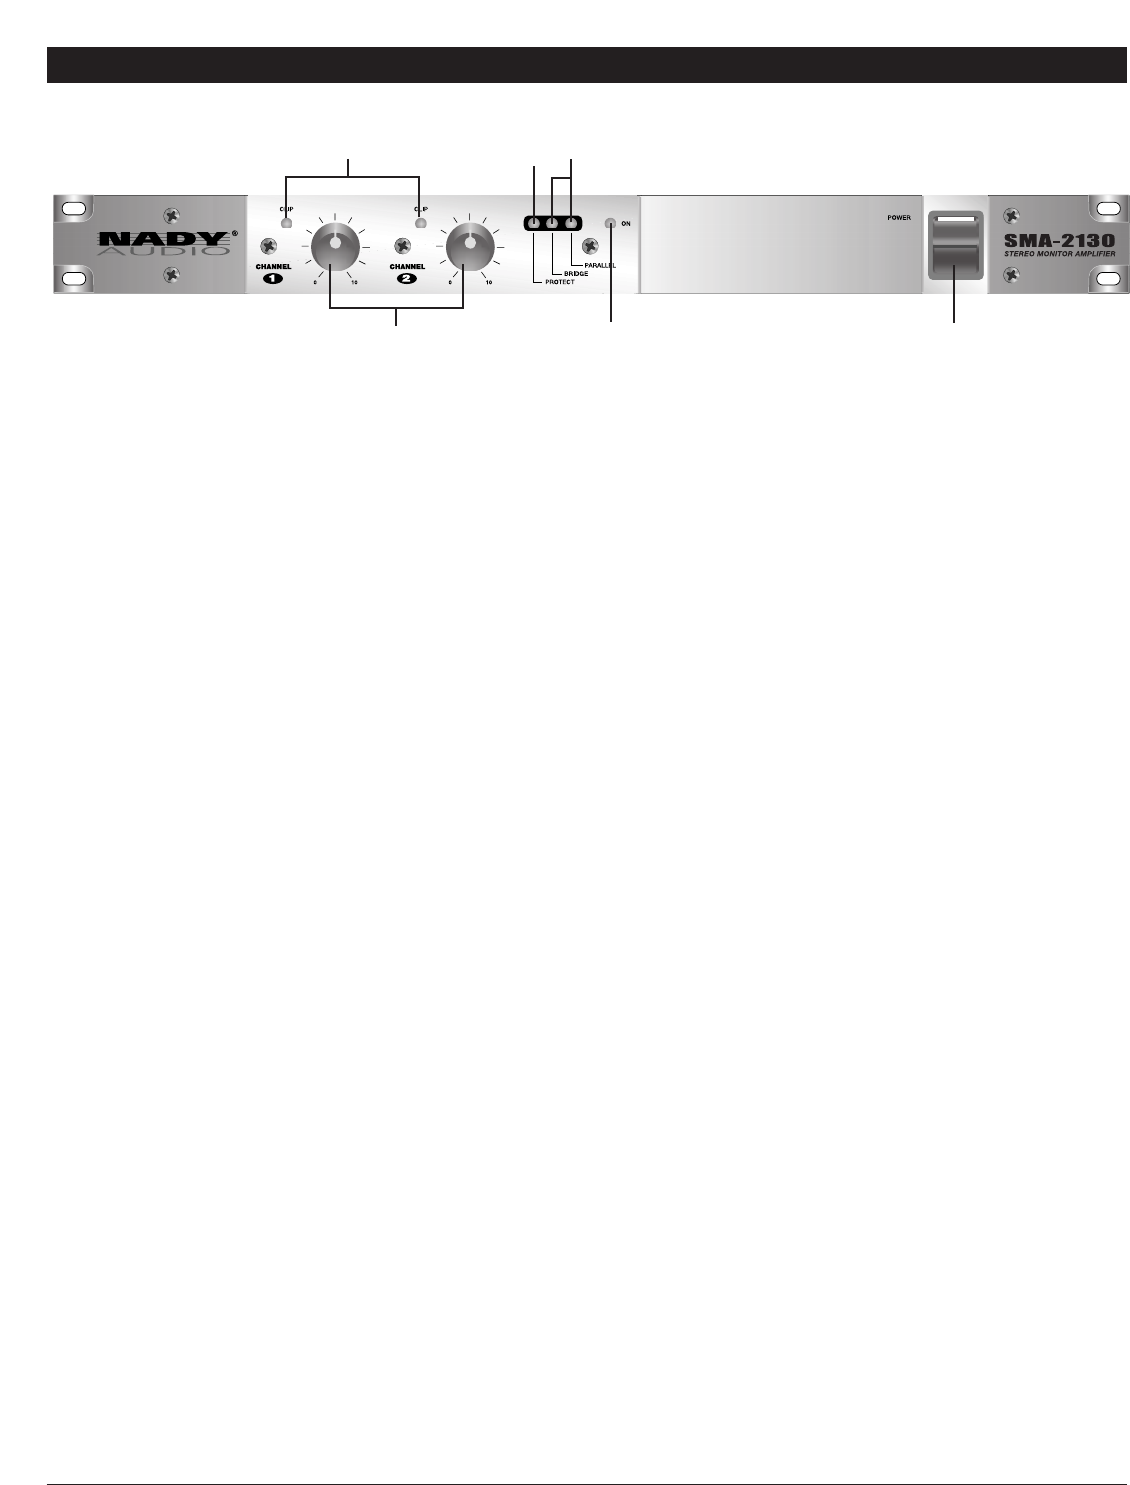
1. POWER SWITCH
To turn the unit ON or OFF, press the upper or lower portion
of this button.
CAUTION: Always turn on your power amplifier last, after all
your other connected equipment, and always turn off your
power amplifier before your other connected equipment.
2. POWER LED INDICATOR
Lights when the unit is on.
3. BRIDGE / PARALLEL INDICATORS
These indicators will light when the corresponding mode of
operation is selected with the mode selector switch. No light
means the unit is in Stereo mode.
4. PROTECTION LED INDICATOR
This LED illuminates when the unit is overheated, or when a
shorted load or DC is detected at the amplifier output. When
this LED lights up, turn OFF the power and check the
output’s connection to verify that it is correct, then turn ON
the power again. The amplifier will reset itself when the
problem is corrected. This LED will also light briefly when
the unit is powered on.
5. LEVEL CONTROLS
These control the level of signal coming into each channel.
Turn these controls counterclockwise if the peak LEDs
illuminate steadily (indicating too strong an input signal). To
be safe, it is also suggested these controls be turned fully
counter-clockwise before powering on the unit, in case there
are any loud input signals.
6. CLIP LED INDICATORS
These LEDs illuminate if any section of the power amplifier’s
output is within 3dB of clipping. Occasional blinking of these
LEDs is acceptable, but if they remain on more than
intermittently you should turn down either the amplifier’s level
control or reduce the output level of the preceding
component to avoid audible distortion.
(1)
(2)
(3)