


15
brilliance. It is well suited for processing dynamic and brilliant recordings, increasing their
"punch".
6) Kick Drum: In this preset, mid-low range is emphasized, while high and mid
frequencies are slightly attenuated. This special preset is extremely well suited for drum
recordings. It is ideal for underlining drums’ low range in multitrack recordings or mixed
microphone environments.
7) Mixdown: Mixdown is less brilliant than Clean Preset and mid-low end is more
pronounced. This is ideal for underlining bass and drums without losing definition in the
rest of the range. This preset is also suited for harmonically complex instruments, e.g.
double bass, which have a non-negligible high frequency range.
9) Jumping Up: The Jumping Up Preset is quite similar to Clean Preset in its general
timbre, but this preset is particularly effective with male voices and is capable of
maintaining the level in soft passages of a music program. For female voices, the Clean
Program is generally preferred.
Mono 2 Bands+ 5 Bands EQ Compressor
The DigiComp 16’s Mono 2 Bands +5 Bands EQ dynamic process algorithm is based on
a "multi-band" process concept, splitting the full band signal entering the dynamic
process algorithm into 2 "sub-bands" — the low frequencies band and the mid/high
frequencies band. This enables differentiation of the dynamic processes operating on the
low frequencies (with higher energy content) and on the mid/high frequencies (with lower
energy content). This technique avoids the common "pumping" effect which often occurs
when applying a dynamic process to a sound signal.
Once the input signal is split into 2 "sub-bands", the DigiComp 16 operates a first limiting
process on the low frequencies band, and then, once the full band, is restored, it applies
a powerful stereo dynamic process on the two "recombined" channels.
The input signal to the dynamic compression "block" is the sum of the input signals
filtered with a 5 bands parametric EQ.
This feature allows you to modify the "color" of the input signal before applying the
dynamic process.
6
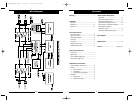
(3)
(5)
(4)
(1)
(2)
(6)
(7)
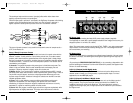
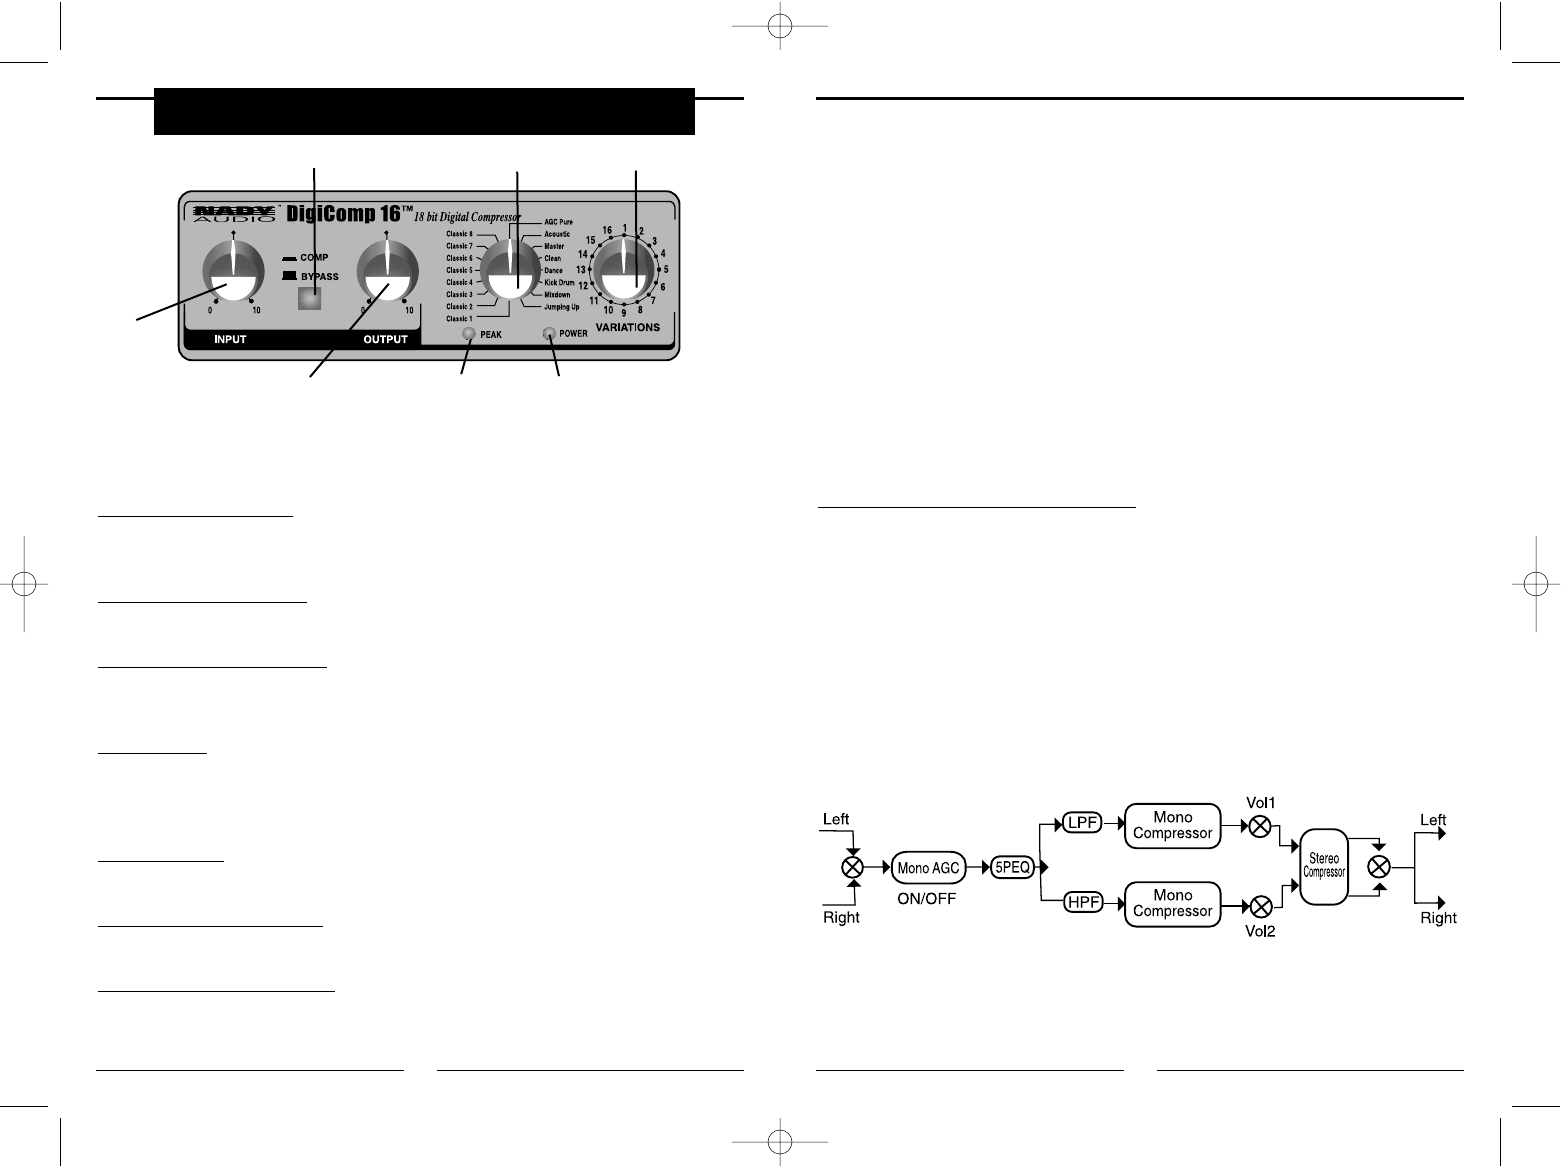
Front Panel Controls
Before using the DigiComp 16, it is best to familiarize yourself with the functions of all the
controls and connections. After you have set up your unit, you should refer back to these
descriptions to fully optimize operation in your paticular application.
(1) Input Level Contr
ol
The input level control sets the main input gain, before the signal reaches the input bus.
It controls both Left (MONO) and Right input levels simultaneously.
(2) Output Level Contr
ol
The output level control sets the level going to the amplifer or mixer from this apparatus.
(3) Pr
ocess Bypass Switch
This switch allows you to bypass the digital process to have the input signal available on
the outputs.
(4) Peak LED
This displays the signal level being processed by the DigiComp 16. If the signal level is
at overload, this LED will light red continuously and you might begin to hear the signal
distort. Back off the INPUT CONTROL (1) until the LED lights only occasionally.
(5) Power LED
This is lit whenever the DigiComp 16 power adapter is plugged in.
(6) Pr
ogram Select Control
The Program select knob is used to choose the program you wish to activate.
(7) V
ariations Select Control
Each program on this apparatus has the AGC parameter which can be adjusted by
means of this knob.
DigiComp16booklet 1/23/03 10:26 AM Page 12