LOUDSPEAKER PLACEMENT
The Model 525W was designed to work within almost any interior
decorating scheme. It can be installed in virtually any location where flush
mounting is possible. For a quick, easy installation there are integral bubble
levels located on the baffle to insure perfect horizontal or vertical
alignment. Additionally, the Model 525W is magnetically shielded and
can be safely mounted near TV’s for use in Home Theaters.
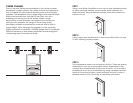
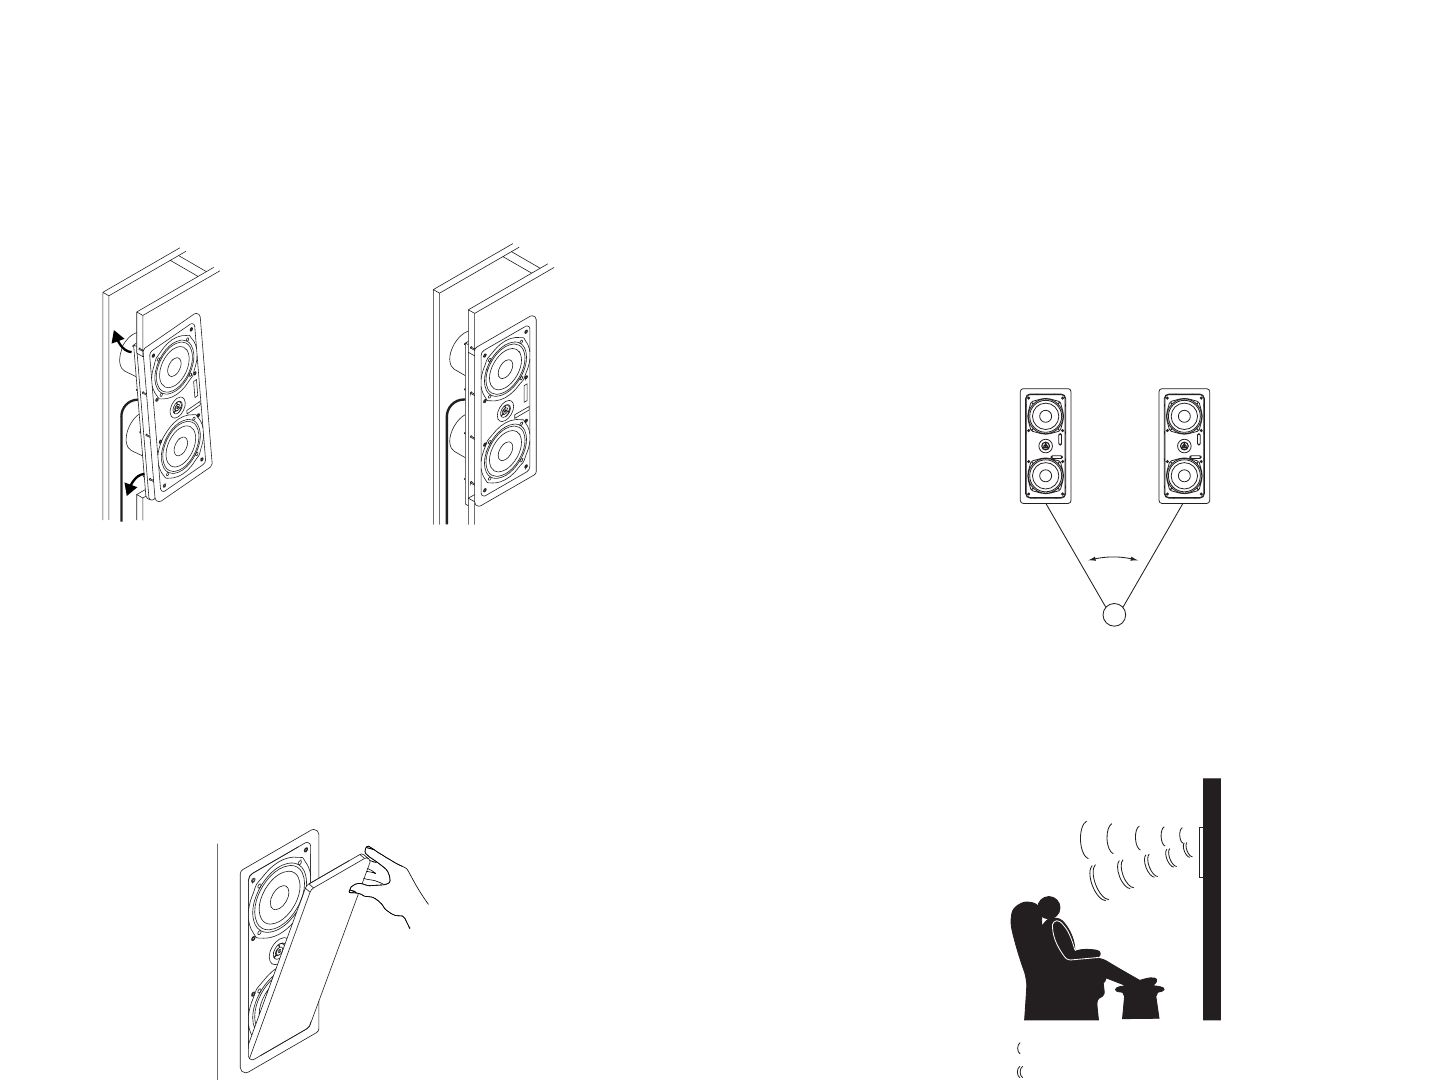
LEFT/RIGHT FRONT SPEAKERS
For best stereo reproduction, the two loudspeakers should be placed an
equal distance from your listening position and separated so that the
angle between them at the listening position is between 40 and 60
degrees.
Note: Although the speaker can be mounted either horizontally
or vertically, the MTM design used in the Model 525W will produce a more
evenly distributed sound throughout the listening area if mounted
vertically.
For best stereo imaging, we recommend that the units be placed so that
the tweeters are as close as possible to the ear level of a seated listener.
As this is not always possible in keeping with aesthetic design of a
particular room, the Model 525W loudspeaker is designed with a pivoting
tweeter which rotates to allow you to “aim” the high frequencies toward
the listening position.
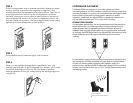
STEP 6
When you are satisfied the speaker is operational, “aim” the
tweeter, and affix grill. As grill is designed for a snug fit, you’ll need
to position one edge into the slot first, and press or squeeze
around perimeter of the grill, while pushing the leading edge into
the grill slot.
STEP 4
Attach loudspeakers wires to speaker terminals, observing correct
polarity (positive to positive and negative to negative), and
position panel and frame assembly to hole as shown. Insert top of
mounting frame into hole at top. By moving bottom of frame
upwards, you should now be able to insert bottom of frame into
hole at bottom. Be careful not to pinch loudspeaker wires in the
process. Tighten long screws. Use the integral bubble levels during
tightening to insure straightness of final position.
STEP 5
After speaker panel is secured tightly, test for sound.