


9
Unpacking and Assembly
Unpacking and Assembly
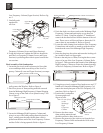
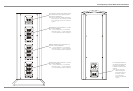
Figure 2
Follow the instructions below for unpacking and assembling
the XRT2K Loudspeaker System. To protect the fine finish
of the XRT2K Loudspeaker System during the assembly
process, it is advisable to prepare a suitable assembly area.
A freshly vacuumed carpeted area covered with a soft, clean
fabric, such as a large bed linen or blanket would be suit-
able. Start by unpacking the Midrange/High Frequency Col-
umn.
It is recommended that the Professionals at your McIn-
tosh Dealer, who are skilled in all aspects of installation and
operation, install the XRT2K Loudspeaker System and any
associated audio equipment.
CAUTION: When this Loudspeaker is assembled
it weighs 452 pounds (205.0 kgs). It
requires four or more persons to
safely handle during assembly and
placement in the room.
Unpacking the Midrange/High Frequency Column
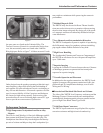
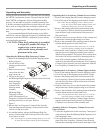
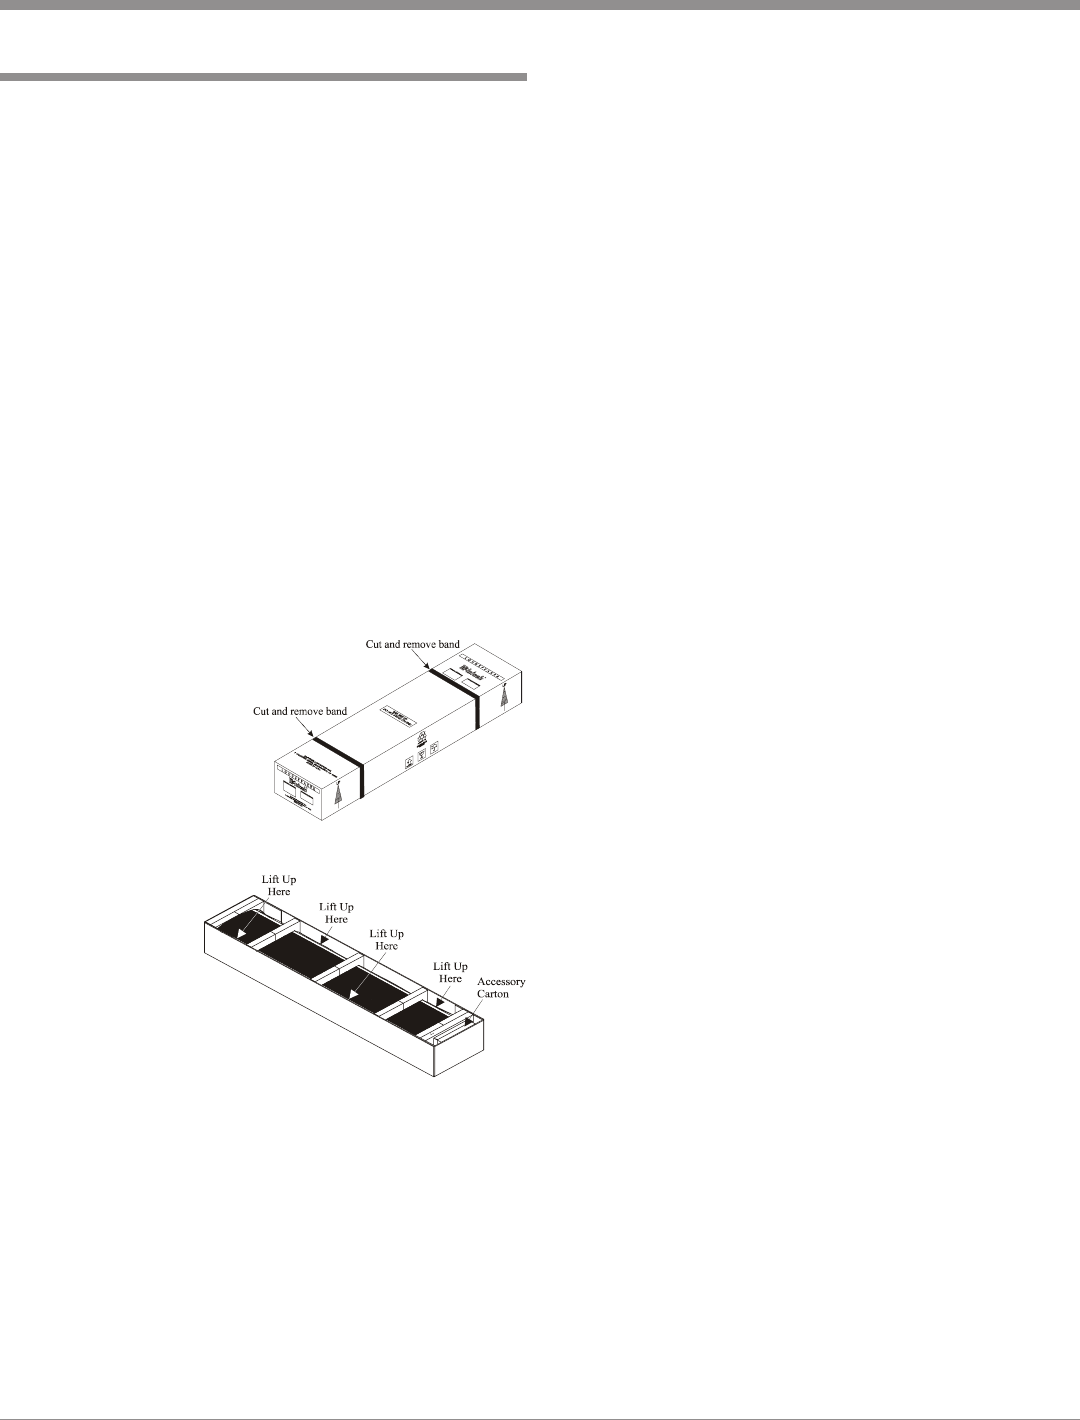
1. Remove the banding material from the shipping carton.
Refer to figure 1.
2. Lift off the top of the
shipping carton and set
it aside.
3. Remove the accessory
carton from the ship-
ping carton end.
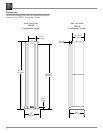
4. Lift up on the rear of
the Midrange/High Frequency Column, which is located
under the larger
Low Frequency
Column Grille.
Place the entire
assembly
(Midrange/High
Frequency Column
with Grille attached, Low
Frequency Column Grille and foam
packing material) in a safe area. Refer to
figure 2.
5. Release the Low Frequency Column Grille from the
foam packing material leaving it in the protective blue
cloth cover and set it aside.
6. In a similar manner, release the Midrange/High Fre-
quency Column with Grille in the protective blue cloth
cover and set it aside.
Note: Save the pieces of foam packing material, as it will
be used later during assembly of the Loudspeaker.
Unpacking the Low Frequency Column (Lower Section)
1. Remove the banding material from the shipping carton.
2. Lift off the top of the shipping carton and set it aside.
Note: When the top shipping carton is lifted up and
away, the sides of the bottom shipping carton will
unfold providing easier access to the column.
3. Remove the packing material from the bottom of the
Low Frequency Column (with the base attached) and
untie the draw cords on the bottom of the protective
blue cloth cover.
4. Push the cloth cover up over the base of the column and
position the column upright resting on its base.
5. Remove the remainder of the packing material from the
column and the protective blue cloth cover.
Note: Save the protective blue cloth cover as it will be
used later during assembly of the Loudspeaker.
6. Relocate the Low Frequency Column (Lower Section)
onto the previously prepared assembly area with the
Woofers facing upward. The bottom of the column base
will need to be easily accessible for fastening both sec-
tions of the columns together. Sufficient space also
needs to be provided for positioning the Low Frequency
Column (Upper Section), next to be unpacked, with the
Low Frequency Column (Lower Section).
Unpacking the Low Frequency Column (Upper Section)
1. Remove the banding material from the shipping carton.
2. Lift off the top of the shipping carton and set it aside.
3. Remove the packing material from the bottom of the
Low Frequency Column (Upper Section) with the flat
end and untie the draw cords on the bottom of the pro-
tective blue cloth cover.
4. Push the cloth cover up over the flat end of the column
and position the column upright resting on its flat end.
5. Remove the remainder of the packing material from the
column and the protective blue cloth cover.
Note: Save the protective blue cloth cover as it will be
used later during assembly of the Loudspeaker.
6. Relocate the Low Frequency Column (Upper Section)
together with the previously placed Low Frequency
Column (Lower Section) in the assembly area.
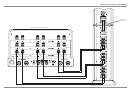
Assembly of the Low Frequency Column (Lower and
Upper Sections)
1. Locate the supplied tools in the Accessory Carton previ-
ously removed from the Midrange/High Frequency Col-
umn Shipping Carton.
2. Line up the three metal pins located on the top metal
plate of the Low Frequency Column (Lower Section)
with the three openings on the bottom metal plate of the
Figure 1