9
Installation
Loudspeaker placement in a room can greatly affect
performance. The XRT29 Loudspeaker is designed for
both Music and Home Theater Systems. The optimal
method for selecting speaker locations includes the use of
a real time spectrum analyzer operated by an experienced
system installer. An uncompromising installation would
take into consideration the floor, wall and ceiling
coverings, the type and placement of furniture and can
even include the architectural design of the room and its
construction materials. In those instances where placement
in the room is fixed, an environmental equalizer may be
needed to restore proper musical balance. Experiment with
various Loudspeaker positions to determine the best
sounding location.
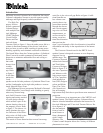
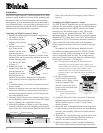
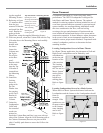
Locating Loudspeakers for use in Home Theater
In a Home Theater application, the placement of Left and
Right Front Loudspeakers can be limited by such
considerations
as the size and
location of the
video monitor.
The locating
suggestions in
the “for use in a
Music System”
section below
can still be
helpful as a
starting place.
Refer to figure
13.
Locating Loudspeakers for use in a Music System
When used in a Music System the distance between the
Loudspeakers and the listener to the Loudspeakers should
form an
isosceles
triangle. If the
speakers are too
far apart relative
to the listener,
some imaging
can be lost.
Refer to figure
14.
Room Placement
Figure 13
Figure 14
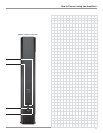
Figure 12
Figure 11
Opening for
Locking Screw
Opening for screw,
allowing close to
wall mounting
Opening for screw,
allowing horizontal
rotation of Column
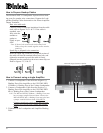
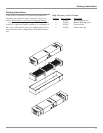
Top and Bottom L Mounting Bracket
ing the supplied
Mounting Screws.
14. Referring to figure
12, measure down
from the just
mounted L Bracket
and install the Bot-
tom L Bracket to-
gether with the
Shim Plate, using the supplied Mounting Screws.
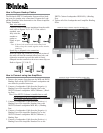
15. With two persons, orient the Column End with the Top
L Bracket above the Mounting Sleeve and carefully
line up the
bracket with
the sleeve.
Lower the
Column onto
the Nylon
Pivot Point
on the Bot-
tom L
Bracket while
at the same
time the Top
L Bracket is
inserted into
the Mounting
Sleeve.
16. Install the
Locking
Screw to-
gether with
the Flat
Washer into
the opening
on the Top L
Bracket to
secure the
Column.
17. Orient the
Loudspeaker
Grille with
the extended
wood trim
pointed to-
wards the Column Base and line it up even with top/
sides of the Column. Align the Grille fastening pins to
the Column Grommets (there are six pins on each
side). Carefully push down to secure the Grille to the
Column.


