8
Introduction to Installation
The XRT28 Loudspeaker System weight is 139.5 pounds
(63.4kg) net. It requires two or more persons to safely
handle during the assembly and placement. The XRT28 is
supplied with a McIntosh Column Base. Follow the in-
structions below for unpacking the Loudspeaker System
and attaching the Column Base.
It is recommended that the Professionals at your McIn-
tosh Dealer, who are skilled in all aspects of installation
and operation, install the XRT28 Loudspeaker System and
any associated audio equipment.
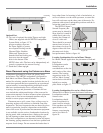
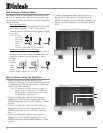
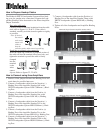
Unpacking the Loudspeaker System
1. Remove the banding material from the shipping carton.
Refer to figure 8.
2. Lift off the top of the
shipping carton and set
it aside.
3. Lift up on the rear of
the Loudspeaker, near
the foam packing ma-
terial at both ends.
Place the entire assembly (Loudspeaker, Loudspeaker
Grille and foam packing material) next to the bottom
shipping carton on a flat surface. Refer to figure 9.
4. Release the Loud-
speaker Grille from the
packing material by
opening the slit in the
packing material lo-
cated on the top center.
Remove the Loud-
speaker Grille from the
protective shipping wrap and set it aside.
5. In a similar manner, lift out the Loudspeaker and set it
aside.
6. Replace the shipping carton top onto the shipping car-
ton bottom. Take the two pieces of the just removed
packing material and lay it down flat onto the top of
the shipping carton.
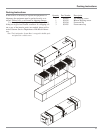
7. Carefully remove the protective shipping bag(s) from
the Loudspeaker Column so as not to mar the Column
Finish or damage the Loudspeaker Drivers.
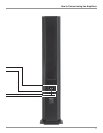
8. Place the Loudspeaker Column on top of the packing
material located on top of the shipping carton making
sure to align the Louspeaker Column Bottom End (the
Glass Name Plate end) to the end of the shipping car-
ton. Refer to figure 10.
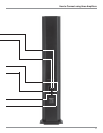
Figure 12
Unpacking the Column Base
10. Lift and remove the bubble wrap packing material
from the base.
11. Locate and remove the bag of hardware and Allen
Wrench Tool taped to the bottom of the base.
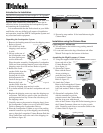
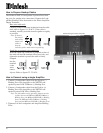
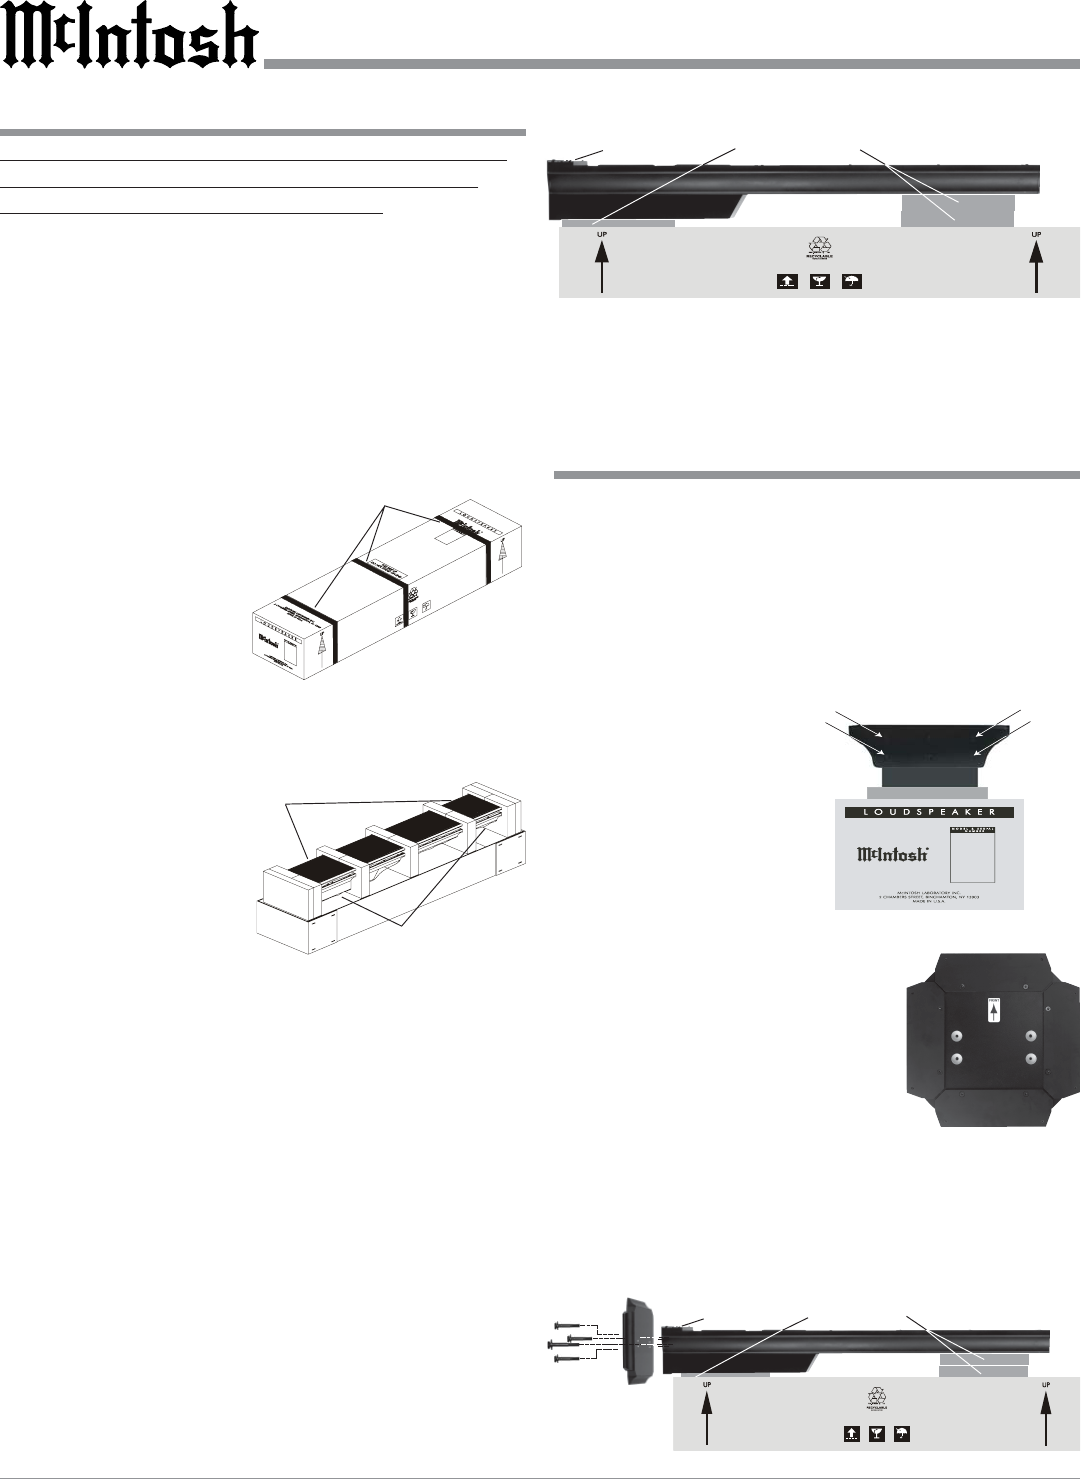
Assembling the High Frequency Column
12. Using the supplied Allen Wrench, remove two screws
from each side of the
Column Bottom. Re-
fer to figure 11.
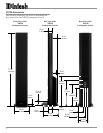
13. Orient the Column
Base with the Decal
Arrow pointing to-
ward the front of the
Loudspeaker Column.
Refer to figure 12.
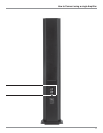
14. Attach the Column
Base to the Loudspeaker Column
using the four supplied machine
bolts and washers. Refer to figure
13.
15. Orient the Loudspeaker Grille
with the extended wood trim
pointed towards the Column Base
and line it up even with the top/
sides of the Column. Align the Grille fastening pins to
the Column Grommets (there are six pins on each
side). Carefully push down to secure the Grille to the
Column. Refer to figure 14.
Installation using the Column Base
Remove Two
Screws
Remove Two
Screws
Figure 11
Figure 8
Cut and remove bands
Figure 9
Lift up here
Lift up here
9. Proceed to step number 10 for installation using the
Column Base.
Figure 10
Glass Panel
Packing material
Glass
Packing material
Figure 13