


ENGLISH
BASIC
CONNECTIONS
OPERATION
ADVANCED
CONNECTIONS
TROUBLESHOOTING
OTHERS
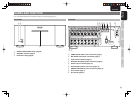
NAMES AND
FUNCTION
BASIC
CONNECTIONS
7
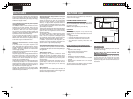
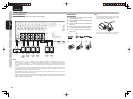
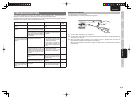
TIPS ON SPEAKER PLACEMENT
How the speakers should be placed depends on the room size and other factors. An example of how the
speakers are normally placed and some placement tips are given here.
Front R
Front L
Front
Center
Surround L
Surround
Back L
Surround R
Surround
Back R
• Front left and right speakers
It is recommended that the front left and right
speakers be positioned at an angle of 45 to 60
degrees from each other as viewed from the listening
position.
• Center speaker
This speaker is placed so that its front panel is in
line with the front panels of the front left and right
speakers or slightly behind them.
Height at which to place the front left and right
speakers and center speaker
Place the three front speakers (left, right and center)
so that their mid-range and high-range units will be
positioned at more or less the same height from the
fl oor as much as possible.
Note:
When placing speakers close to a TV set, use
magnetically shielded speakers for the front left and
right speakers and center speaker.
• Surround left and right speakers
These speakers are needed to play surround sound.
Place them against the walls in line with the listening
position or slightly behind it. Position them so that
the center of the speaker front panels point toward
the center the room.
• Surround back left and right speakers
Place these speakers behind the listening position as
shown in the fi gure.
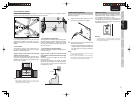
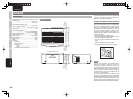
Height at which to place the surround left and
right speakers and surround back left and right
speakers
Place these speakers at a height of 70 cm to 1 meter
above the listener.
By placing the speakers at this height, the sound
source will not be localized at any specifi c position,
and the listener will feel more surrounded and
enveloped by the sound.
70cm 1m
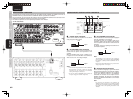
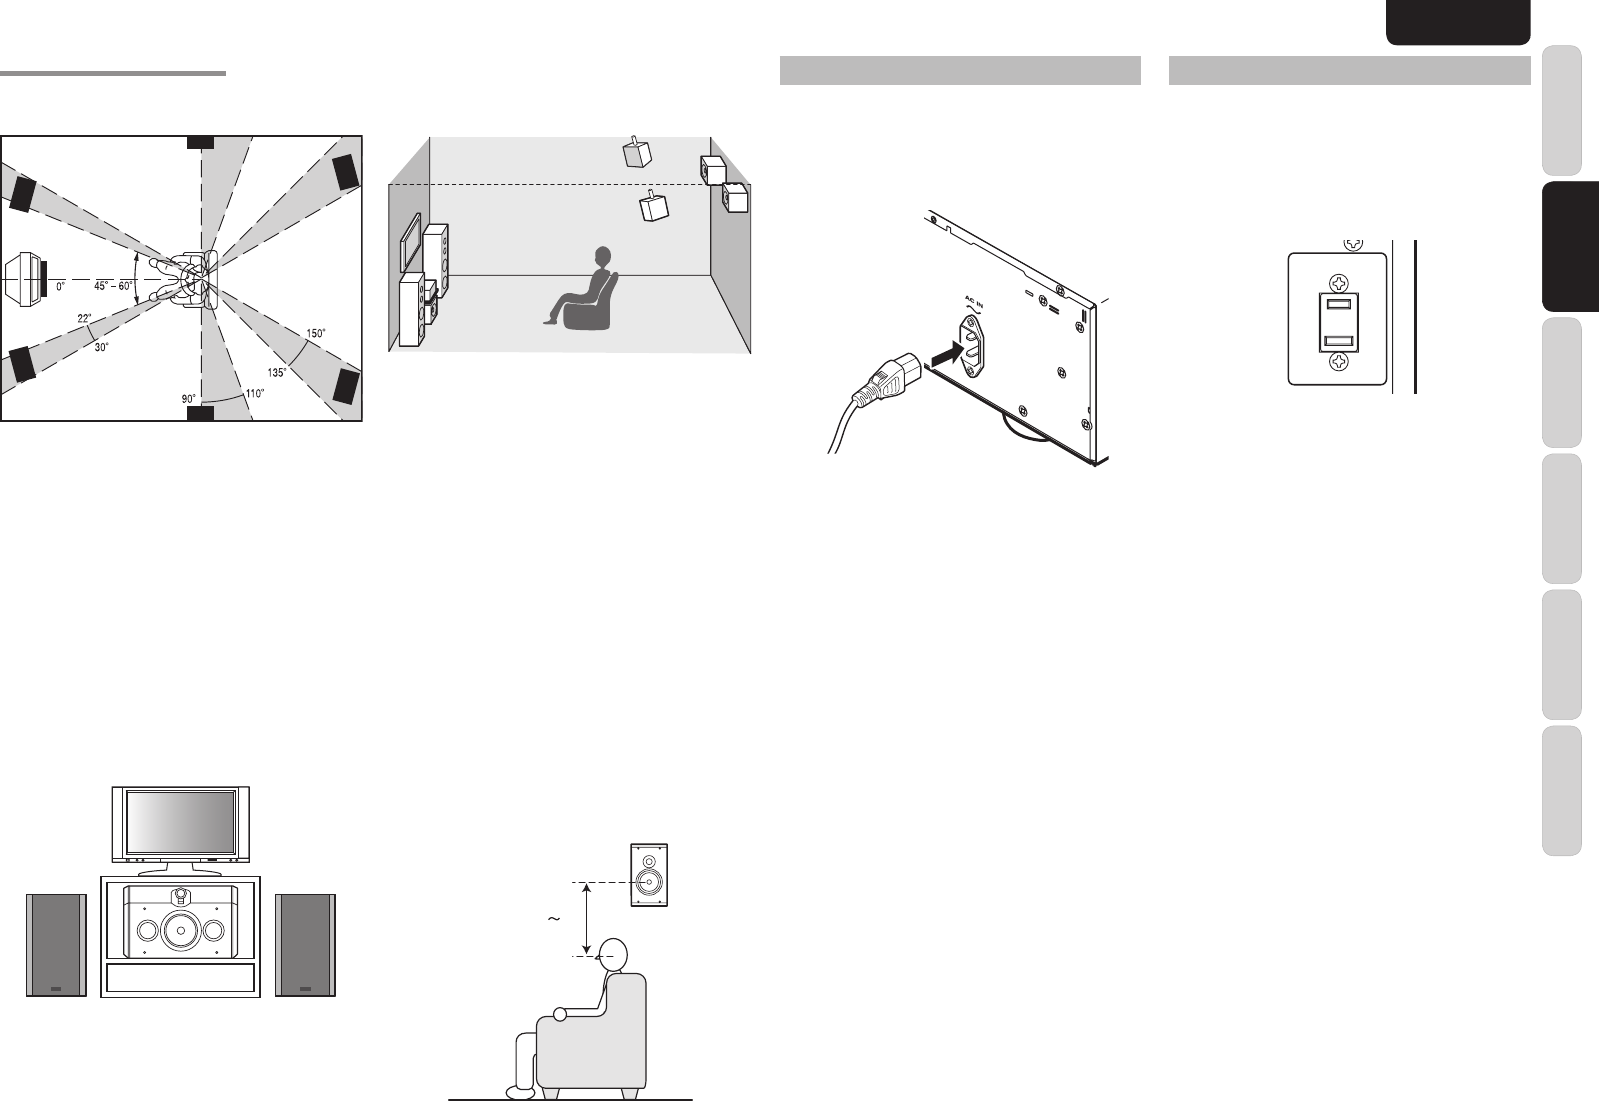
POWER CABLE CONNECTION
Connect the power cable after all the connections
have been completed.
1.
Plug the accessory power cable into the AC IN
socket on the rear panel of the amplifi er.
2.
Connect the plug on the power cable to the wall
socket (AC 120 V, 60 Hz).
* Ensure that the total power consumption of the
amplifi er and other components connected to
the socket does not exceed the capacity of
the socket.
Notes:
• Insert the power plug fi rmly. Noise may be caused
by an incomplete connection.
• Do not connect the amplifi er to the AC outlet of
another product. Product malfunctioning may occur
if the capacity of the AC outlet is exceeded.
USING AC OUTLETS
Power can be supplied from the amplifi er's AC outlet
(UNSWITCHED) to another component up to a
maximum power consumption of 150 W.
The amplifier's AC outlet is an UNSWITCHED
(unswitched) type, which means that the power can
be supplied at all times regardless of whether the
amplifi er power is on or off.
120V 60Hz
120V 60Hz
UNSWITCHED 1.25A 150W
UNSWITCHED 1.25A 150W
AC OUTLET
AC OUTLET
Warning:
Do NOT connect a component that exceeds the
absolute allowable power rating. Doing so may cause
a fi re and/or electric shock.