


9
ENGLISH
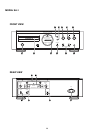
REAR
AA
AA
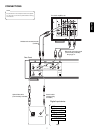
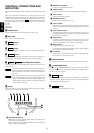
A ANALOG OUTPUT jacks (Unbalanced jack)
Connect to the CD or AUX input jacks of a preamplifier.
Connection method:
Connect to the CD or AUX input jacks of the amplifier. Be sure to connect
the red jack to the R (right) input jack and the white jack to the L (left) input
jack.
* Never connect these jacks to the PHONO input jacks of the amplifier.
BB
BB
B ANALOG OUTPUT jacks (Balanced jack)
Connect to the CD or AUX input jacks of a preamplifier.
Connection method:
Connect to a component equipped with balanced input connector.
CC
CC
C DIGITAL OUTPUT OPTICAL output jack
The digital signal can transmitted in the form of light through an optical
fiber cable and photocoupler. The optical signal transmission features
low signal loss due to cables and complete isolation of the ground loop
so that the very high quality can be reproduced without any digital noise
Connection method:
Connect this jack to aD/A converter, digital sound processor or an
amplifier equipped with a Digital Optical input jack. Remove the caps
from the DIGITAL OUTPUT OPTICAL jack and the Optical input jack of
the connected component and connect the two jacks through an optical
fiber cable.
* Do not bend the optical fiber cable.
* Leave the cap attached when the OPTICAL jack is not used.
* Only the CD signals are output from the DIGITAL OUTPUT OPTICAL
jack. No Super Audio CD signals are output.
DD
DD
D DIGITAL OUTPUT COAXIAL output jack
By connecting this jack to a digital audio component (D/A converter,
digital sound processor, etc.), digital signals from compact discs can be
transmitted directly from the player without first being converted to
analog.
* Only the CD signals are output from the DIGITAL OUTPUT COAXIAL
jack. No Super Audio CD signals are output.
EE
EE
E FILTER (STANDARD/CUSTOM) switch
This is set to STANDARD or CUSTOM depending on the amplifier or
speakers which are to be connected. For details, refer to the section on
the filter switch on page 14.
FF
FF
F AC POWER INPUT jack
Using the provided AC cord, connect to a household AC power outlet.
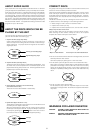
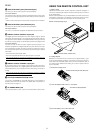
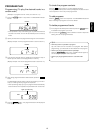
USING THE REMOTE CONTROL UNIT
1. Remote control
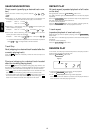
Operate the remote control unit (RC-1SA) within a distance of approx. 5
m from the infrared signal reception window (remote sensor) on the front
of the SACD player.
Remote control operation may not be possible if the remote control unit’s
transmitter is not pointing in the direction of the remote sensor or if there
is an obstruction between the transmitter and the remote sensor.
Remote control operating range
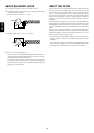
2. Loading batteries
Batteries in this remote control unit have a life of approximately 1 year
under normal operating conditions. If the remote control unit is not going
to be used for an extended period of time, remove the batteries. Also, if
you notice that the batteries are starting to run down, replace them as
soon as possible.
q Remove the battery cover.
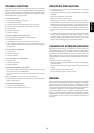
w Insert the batteries with correct +/– orientation.
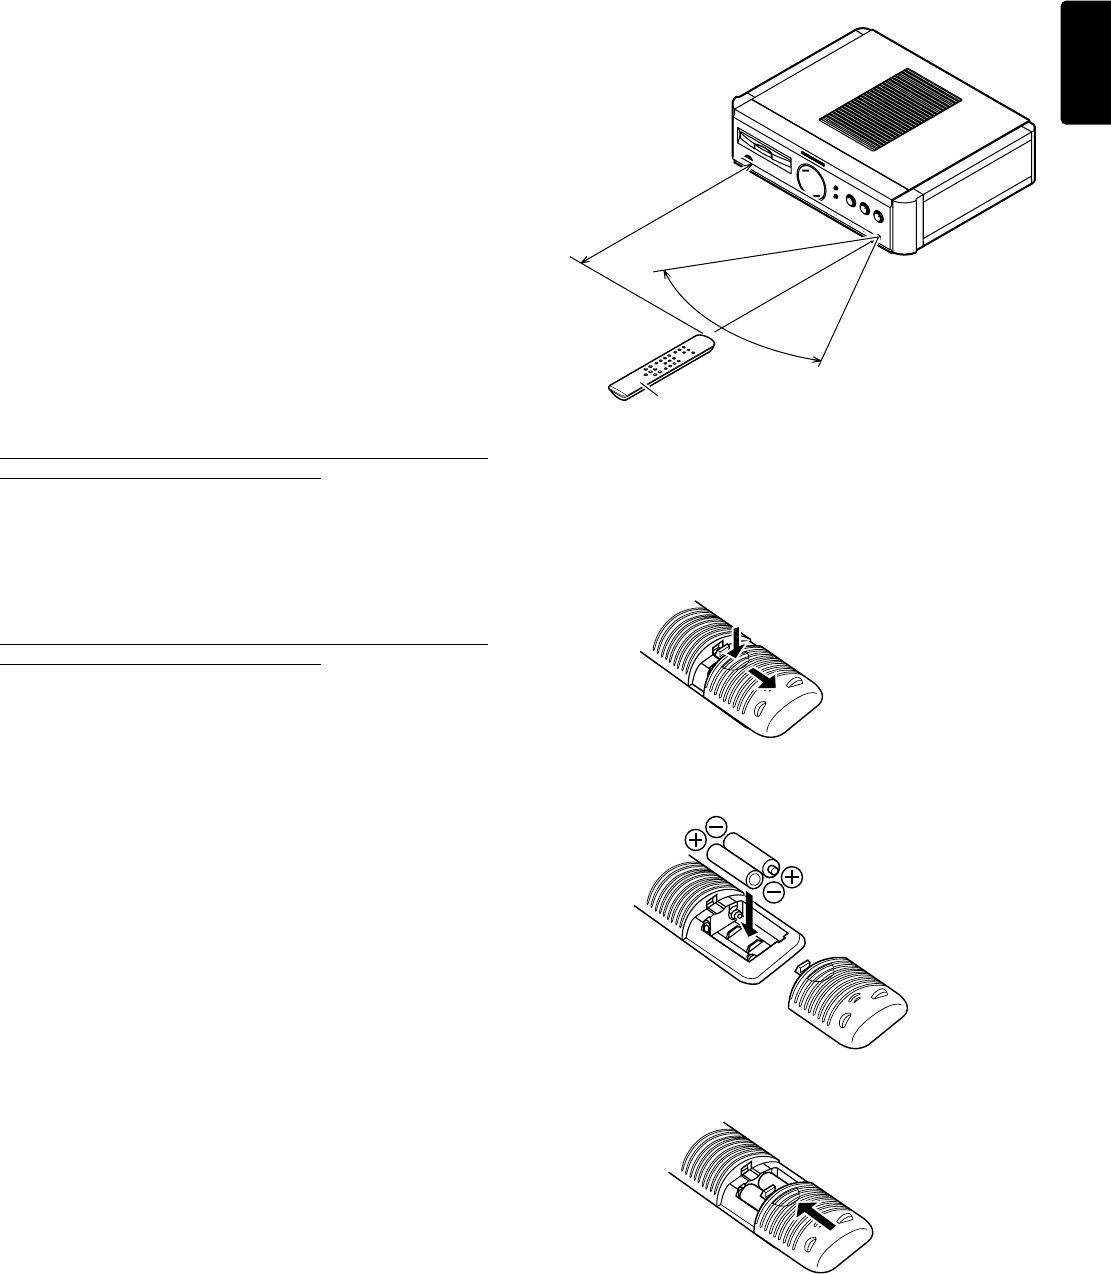
e Close the battery cover until it clicks shut.
Approx. 5m
SA-1
Remote control unit (RC-1SA)
Two AAA-size (R03) batteries
Remote control unit (RC-1SA) Rear side
60°