CONNECTING YOUR PREAMPLIFIER
8
Easy - Connect the mic to the Microphone Input XLR, then connect the Line Output to your
tape machine or console. Read on, there are some things to consider.
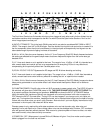
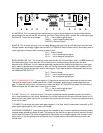
On the back panel are female XLR's labelled MIC INPUT A and MIC INPUT B. The signal
from the MICROPHONES get plugged in here. Here are a few warnings and suggestions.
These XLR connectors also "send" PHANTOM POWER to the mics. Some mics can be
damaged by the 48 volts of phantom power. A few PZMs and a few ribbon mics have been
known to "fry" when fed phantom power. The suggestion is to ALWAYS have PHANTOM
switched off when switching mics, cables, patches that involve mics etc. You ONLY use
phantom power for PRO SOLID STATE "FET' CONDENSOR MICS. Tube mics, dynamic
mics, ribbon mics and battery powered mics should have phantom switched "off". This is
true for all mic pre's. With this MIC PRE you "PULL THE TOGGLE to SWITCH PHAN-
TOM". It is a locking toggle to prevent "accidents". The second great reason for not using
phantom if you don't have to is that - if you change a connection (patching) with phantom
on, then the pre amp will be fed a quick burst of 48 volts (when it normally is amplifying
about a hundredth of a volt), which can then be monitored - usually once. After you have
replaced your speakers, you have learned a valuable lesson about turning down the volume of
the monitors before changing mics or mic patches. This is a good idea with phantom on or
off. Consider a variation of this - any mic connection just a little bit bad,will be extra noisy
with phantom turned on. This goes for cables, patchbays, patch cords etc. Suggestion #2 -
Avoid running mic signals through patchbays. Some patchbays "ground" all the "sleeves"
which can add a ground loop into your delicate mic signal. Suggestion #3 - Set up the Mic
Pre in the studio near the mic and use a short mic cable. Why ? Microphones often have
"light duty" line drivers and you can lose an audible amount of signal in long cables. You can
get the best fidelity by having the Mic Pre close to the mic at the "cost" of having to walk
into the studio to adjust a level control. You also avoid almost all of that phantom power /
patching problem because now you are patching a regular line level signal only.
TheMIC INPUT XLR PIN OUT is :
PIN 1 = CIRCUIT GROUND
PIN 2 = HOT or positive going phase
PIN 3 = LOW or negative going phase
The LINE OUTPUT XLR PIN OUT is:
PIN 1 = CIRCUIT GROUND
PIN 2 = HOT or positive going phase
PIN 3 = LOW or negative going phase
This is a simple balanced output. It will feed balanced inputs but not unbalanced inputs
"correctly". When it is plugged into an unbalanced input, expect a 6 dB loss of output level.
Use the 1/4" unbalanced output to drive unbalanced inputs. The best way to drive an
unbalanced input with the balanced XLR is not to connect to PIN 3 at the output XLR - just
use PIN 1 (ground) and PIN 2 (signal). Better to have PIN 3's signal float than short which
will distort quietly and you may not notice the 6 dB loss.


