


continued
ᮣ
6
9. Carefully slide the loudspeaker out and away from the inner and outer cartons.
The loudspeaker is still upside down, and the foam pads marked TOP and
BOTTOM are still on the loudspeaker.
two people needed
10. Set the inner and outer cartons aside.
11. Locate the foam pad labeled BOTTOM: this pad protects the bottom of the
loudspeaker.
12. Remove the foam pad labeled BOTTOM.
13. Open the band that secures the protective sleeve around the loudspeaker.
14. Gently slide the sleeve down, toward the foam pad labeled TOP.
If you are installing feet on the Resolution 1 or Resolution 2 loudspeaker, skip to
Step 17.
15. Carefully invert the loudspeaker so that the bottom of the loudspeaker cabinet
is on the floor.
16. Remove the foam pad labeled TOP, and remove the protective sleeve.
2 people needed
You are ready to position the Resolution 3 in the listening area. See Placement, on
page 8.
To install feet on the Resolution 1 or Resolution 2 loudspeakers:
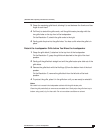
17. Locate the spikes, rubber feet and locking washers, in the small cardboard
box marked “accessories”.
18. Choose the set of feet you want to use on your loudspeaker.
Each Resolution 1 and Resolution 2 loudspeaker is provided with two sets of
feet: four spikes and four rubber feet. The sharp, pointed spikes are ideal for
carpeted floors. The rubber feet protect tile and wood floors.
19. Thread the washers onto the feet.
Krell Resolution 1, 2, 3, and C Loudspeakers
(SECTION TWO: Unpacking and Placement continued)