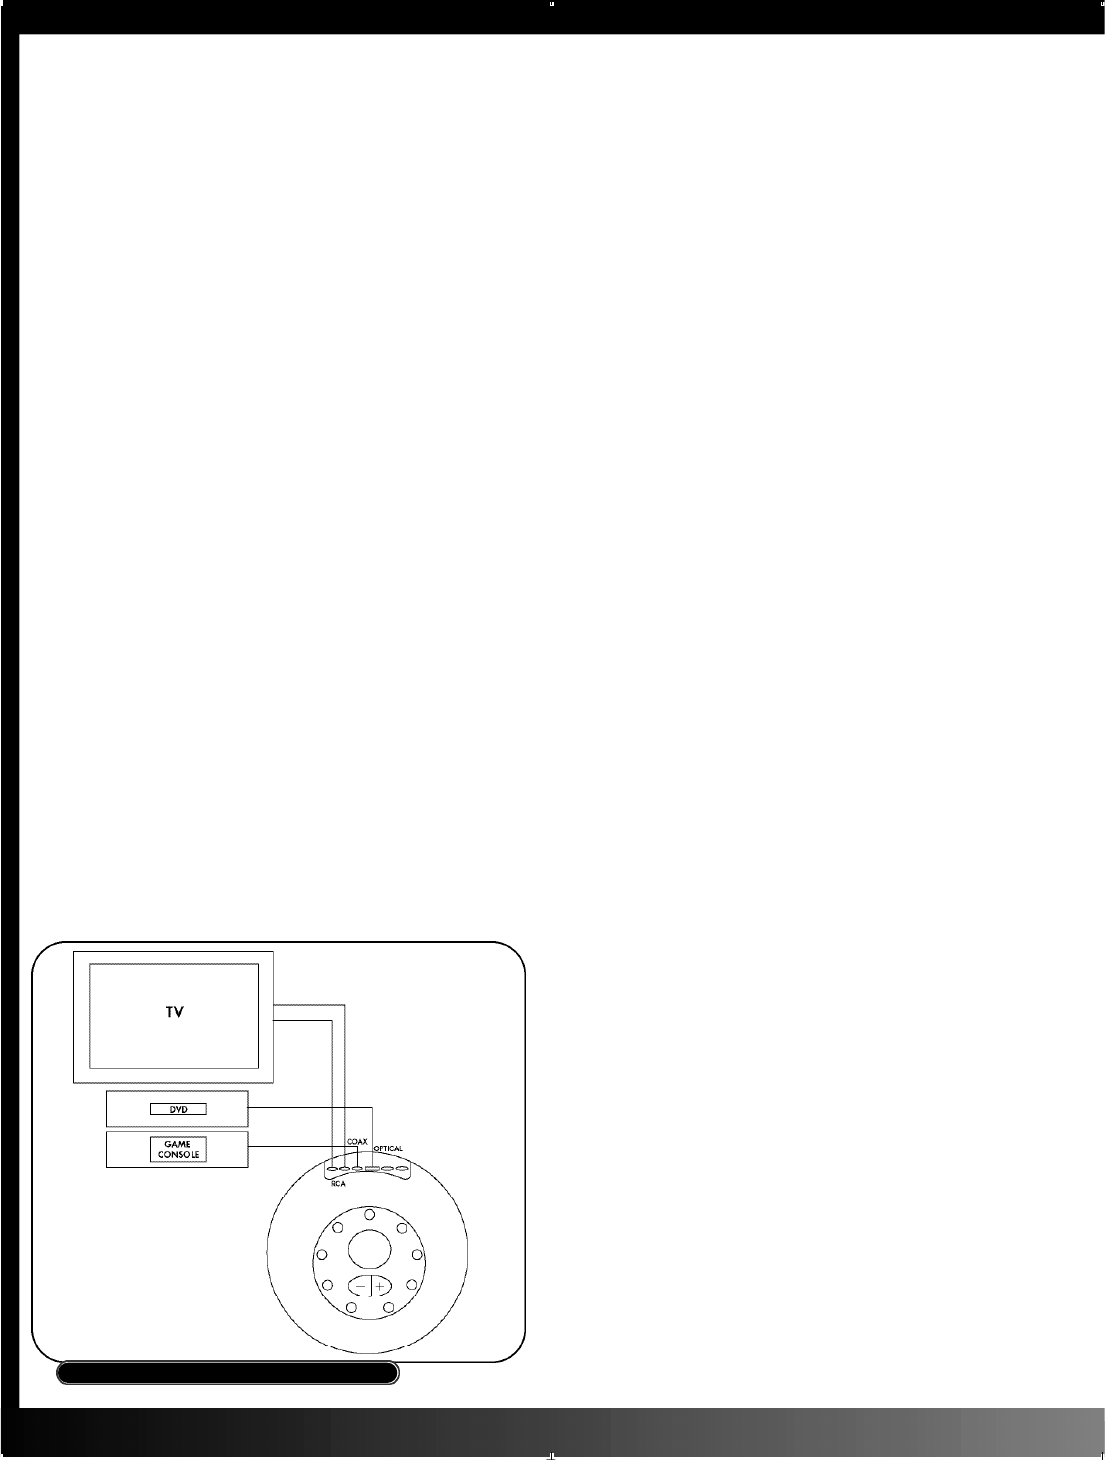
Power Connections
The last setup steps are the power connections (see
Fig. 2). Plug the DC supply cord into the jack
labeled "Decoder Supply" on the subwoofer cabi-
net. Next, plug the other end into the jack labeled
"DC 7V IN" on the back of the GMX control mod-
ule. Plug the subwoofer’s power cord into a wall
outlet or AC power strip. Your GMX D-5.1 is now
ready to ru m b l e .
The Control Module
E v e rything you need to run the GMX D-5.1 is on the
face of the control module. The function and opera-
tion of each control is listed below (see Fig. 4A):
1 ) D i s p l a y. Indicates master volume setting and level
trim during setup.
2) Volume Pads. P r ess the (+) and (-) buttons to raise
or lower the volume. These buttons are also used to
adjust the levels of the speakers in the system re l a t i v e
to one another (channel balance).
3) P o w e r. Tu r ns the system on and off. The red LED
indicates standby mode.
4) I n p u t . P r essing this button selects one of the inputs.
Choosing an input will cause its indicator LED above
the button to light up.
5) S u rro u n d . P r essing this button selects one of the
available audio modes. Modes that can be used will
depend on the input and type of signal.
• Dolby Digital Signals: If you have selected one of
the digital inputs, it will automatically switch to the
a p p r opriate Dolby Digital mode when a Dolby
Digital signal is present. The Dolby Digital indicator
LED (above the Surround button) will light. Dolby
Digital modes are available only when a Dolby
Digital signal is present at the selected digital input;
no surround changes may be made to a discre t e
Dolby Digital 5.1 signal. The Surround button will be
active in Dolby Digital mode only when the signal is
two-channel stereo, as described immediately below.
• S t e reo Signals: If you have selected the analog
input or a digital input receiving a PCM signal, such
as from a CD, you have a choice of four modes:
S t e r eo, 5-Channel Stereo, Dolby Pro Logic II Cinema
and Music. The Dolby Pro Logic II modes can also
be applied to a Stereo Dolby Digital signal. Switch
modes by pressing the Surround button until you
reach the one you want, as indicated by the LEDs
above the button. Stereo is indicated when no LEDs
a r e lit.
6 ) Te s t . This button turns the channel test signal on
and off. When on, the LED above the button will light
and you will hear noise for several seconds fro m
each satellite speaker in turn. The signal will ro t a t e
f r om speaker to speaker in this fashion until you turn
it off. This signal has two uses:
• Making sure that all speakers are connected and
w o r k i n g .
• Helping you set channel balance. Because the five
satellites in the GMX D-5.1 are identical, you will usu-
ally get correct channel balance automatically. To find
out, turn the test signal on and listen; it should be
equally loud from each speaker. If not, you can use
the CTR and SURR buttons
(described below) together
with the volume pads to
adjust the level of the sur-
round speakers up or down
relative to the front left and
right.
The adjustment level trim is
f r om -9dB to +9dB, with
default settings of "0." Note:
Possible gain range settings
for each channel are -9dB to +9dB and will be
retained as the main volume approaches 60dB.
H o w e v e r, new settings made at high volumes will
only be allowed as the total reaches 60dB. In other
w o rds, if the main volume reads 55dB, the boost will
be limited to +5dB, and if main volume is set to 60dB
(maximum), no boost is available.
7) Dyn. Comp. Toggles through the three modes of
the Dolby Digital dynamic compression function.
Dynamic compression reduces the level diff e re n c e
between loud and soft sounds. This can be useful
when you are having trouble hearing dialogue clear-
ly or when you want to minimize disturbance of oth-
ers by very loud sounds. Available modes are "Half,"
"Full," and "Off"; the selected mode will be indicated
by the LEDs above the button. "Off" selects no com-
p r ession, whereas "Full" selects maximum compre s -
sion. This function is available only when the system is
p r ocessing a Dolby Digital input.
8) S u b . Allows adjustment of the subwoofer’s re l a t i v e
level. To use, press the button until the indicator LED
lights. Use the volume pads to raise or lower the bass
level until you get the balance of lows to highs that
you want. The central display will show how much
boost or cut you have applied, in decibels (dB).
P r essing the button again until the LED goes out will
lock the setting and re t u r n the volume pads to master
mode, controlling overall level. To re t u r n to the origi-
nal setting, just turn the control on again and adjust
the level until the display shows "0." Note: This also
c o n t r ols the "SWS Link" output level (see "SWS Link"
s e c t i o n ) .
9) S u r r. Allows adjustment of the surround speakers’
level relative to that of the front left and right. To use,
p r ess the button until the indicator LED lights. Use the
volume pads to raise or lower the surround level until
you get the balance that you want. The central dis-
play will show "SR" or "SL" to indicate adjustment of
the Surround Right or Surround Left output channel,
and then switch to indicate how much boost or cut
you have applied in decibels (dB). Pressing the button
once will allow you to adjust the surround right chan-
nel. Pressing the button a second time will allow you
to adjust the surround left channel. Pressing the button
again until the LED goes out will lock the setting and
re t u r n the volume pads to master mode, contro l l i n g
overall level. To re t u rn to the original setting, just turn
the control on again and adjust the level until the dis-
play shows "0."
FIGURE 4B


