Installation
non-Japanese cars Removing
the
hard rubber frame
Metal
mounting
strap
(commercially available)
Firewall or metal support
\
Bend the tabs
of
the
mounting
sleeve
with
a
screwdriver or similar utensil
and attach it in place.
Self-tapping screw
(commercially available)
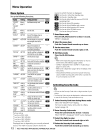
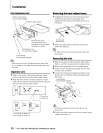
1 Engage the catch pins on the removal tool and
remove the
two
locks
on the upper level.
Upper the frame and pull
it
forward
as
shown in
the figure.
Accessory@
Removal tool
2 When the upper level
is
removed, remove the
lower
two
locations.
~
~
• The frame can be removed from the
bottom
side in
the
same manner.
~
•
Be
careful
to
avoid injury from the catch pins on the
removal tool.
5
Pull
the unit
all
the way
out
with your hands, being
careful
not
to drop it.
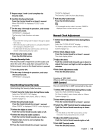
1
Refer
to the section <Removing the hard rubber
frame> and then remove the hard rubber frame.
2 Remove the screw (M4 x
8)
on the back panel.
3 Insert the
two
removal tools deeply into the slots
on each
side,
as
shown.
4 Lower the removal tool toward the bottom, and
pullout
the unit halfway while pressing towards
the inside.
Screw (M4X8)
(commercially available)
/ Accessory@
&'"
Removing
the
Unit
ars
ars
,-
+-
T@
@N
@ @
IT/N
N
T
L-.
/1
TToyota
c
N:
Nissan c
!?
-=r
smm
MAX.
~~8mm
MAX.
H@
I-
..
H~
0Smm
05mm
Accessory@
..
.for Nissan car
Accessory@...forToyota car
Screw (M4X8)
(commercially available)
Make sure
that
the
unit
is
installed securely in place. If
the
unit
is
unstable,
it
may malfunction (for example, the sound
may skip).
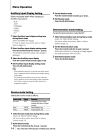
1
Refer
to the section <Removing the hard rubber
frame> and then remove the hard rubber frame.
2 Align the holes
in
the unit (two locations on each
side)
with the vehicle mounting bracket and secure
the unit with the accessory
screws.
~
Japanese cars
~
~
20
I KDC-X492/KDC-MP438U/KDC-MP408U/KDC-MP338


