16
SLEEP
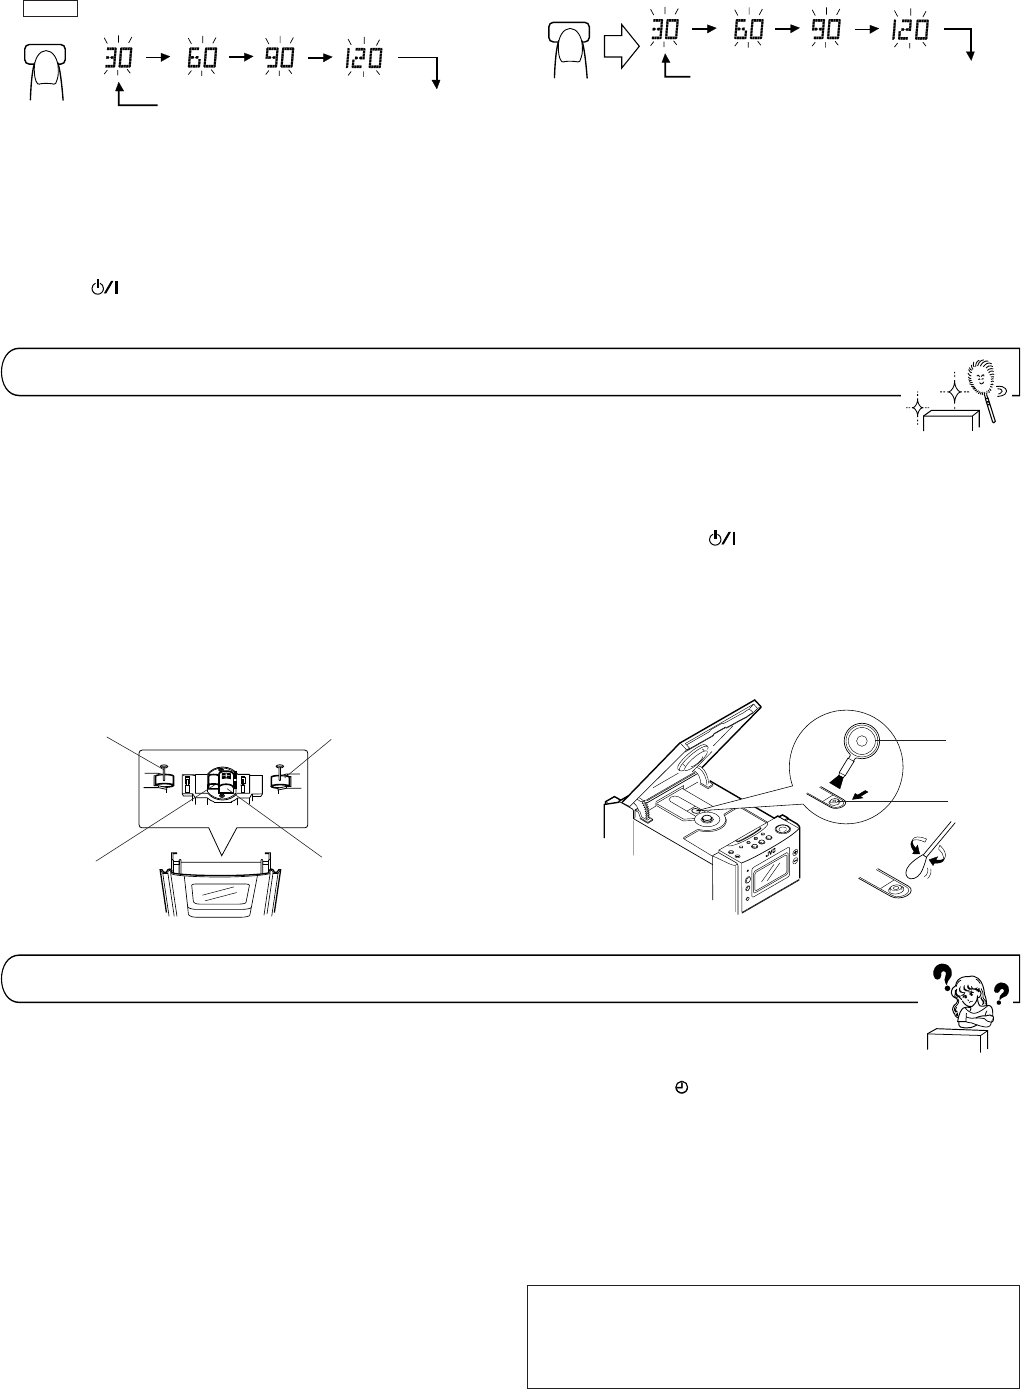
● Sleep time settings of 30, 60, 90 or 120 minutes can be set. When you
release the SLEEP button, the source is displayed after 5 sec.
● The sleep timer operation will start and the power will be switched off
after the specified time.
● Checking the sleep time
When the SLEEP button is pressed, the remaining sleep time is dis-
played. If it is pressed again, a new sleep time can be set.
● To cancel the sleep timer operation
Press the button to switch the power off or press the SLEEP
button until the sleep time indicator disappears.
● Any source can be selected for sleep timer operation and timer play-
back. For example;
• CD play for sleep timer operation and broadcast reception for timer
playback.
• Tape playback for sleep timer operation and CD play for timer play-
back.
However, when broadcast reception is selected for both sleep timer
operation and timer playback, the station you heard at night will be tuned
to the following morning.
Source mode display (Releasing the sleep mode)
SLEEP is shown in the display.
SLEEP
Source mode display (Releasing the sleep mode)
Sleep timer operations (using the remote control unit)
A. Use this when you want to fall asleep while listening to a tape,
broadcast or CD.
1 Set to the required source and tune (broadcast) or play back (CD or
tape).
2 Press the SLEEP button to set the sleep time.
B. To fall asleep while listening to a tape, broadcast or CD and to
perform timer playback the following morning
1 Set the timer. (Refer to “Setting the timer” on page 14.)
2 Set to the required source (broadcast, tape or CD).
3 Press the SLEEP button to set the sleep time.
TROUBLESHOOTING
What appears to be trouble is not always serious. First make sure....
● Power cannot be turned on.
* Is the power cord unplugged?
● No sound from the speakers.
* Are headphones connected?
CD Player Section
● The CD player does not play.
* Is the CD upside down?
* Is the CD dirty?
● A certain portion of the CD does not play correctly.
* Is the CD scratched?
Cassette Deck Section
● Playback sound is at a very low level.
* Is the head dirty?
● The ONE TOUCH REC button does not function.
* Have the safety tabs of the cassette been broken off?
Tuner Section
● Reception is noisy.
* Try adjusting the antenna.
Timer Section
● Timer operation does not start.
* Is the current time set correctly?
* Is the timer mode ( ) displayed?
Remote Control
● Remote control is impossible.
* Are the batteries in the remote control exhausted?
* Is the remote sensor section exposed to bright light (direct sunlight,
etc.)?
Note:
Before making an important recording, be sure to make a test record-
ing first to check that the deck, etc. is working correctly.
●When the above remedies do not help
Many operations of this unit are performed by the control of a
microprocessor. If none of the buttons function, unplug the power
cord, wait for a while, then plug it back in. Reset the correct val-
ues for the clock and timer.
Cleaning is important!
When the tape is running, magnetic powder and dust naturally accu-
mulate on the heads, capstan and pinch roller. When they become too
dirty...
● Sound quality deteriorates.
● The output sound level drops.
● Previously recorded tape is not completely erased.
● Recording is not performed satisfactorily.
Therefore, you should clean the heads, etc. after every 10 hours of use
for optimal recording conditions.
Cleaning the heads, capstan and pinch roller
Open the cassette holder.
Clean the heads, pinch roller and capstan.
For effective cleaning, use a cleaning kit available from an audio store.
After cleaning, be sure that the cleaning fluid has dried completely be-
fore loading a cassette.
MAINTENANCE
Cautions:
1. Keep magnets and metallic objects away from the
head.
If the head becomes magnetized, noise will increase and the sound
will deteriorate. Demagnetize the head every 20–30 hours of use
with a head eraser (available from an audio store). (When demag-
netizing the head, the button should be set to STANDBY.)
2. Do not use anything other than alcohol for cleaning.
Thinner and benzine will damage the rubber pinch roller.
Cleaning the lens
If the lens in the CD pickup is dirty, dropout, etc., could degrade sound.
Open the CD holder and clean the lens as shown.
● Use a blower (available from a camera store) to blow dust off the lens.
● If there are fingerprints, etc. on the lens, gently wipe clean with a
cotton swab.
Capstan shaft(s)
Pinch roller(s)
Combination record/play head
Erase head
Lens
Blower
UX-T550(B)_body.pm6 12/12/00, 3:11 PM16


