


Page 9
English
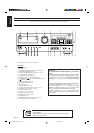
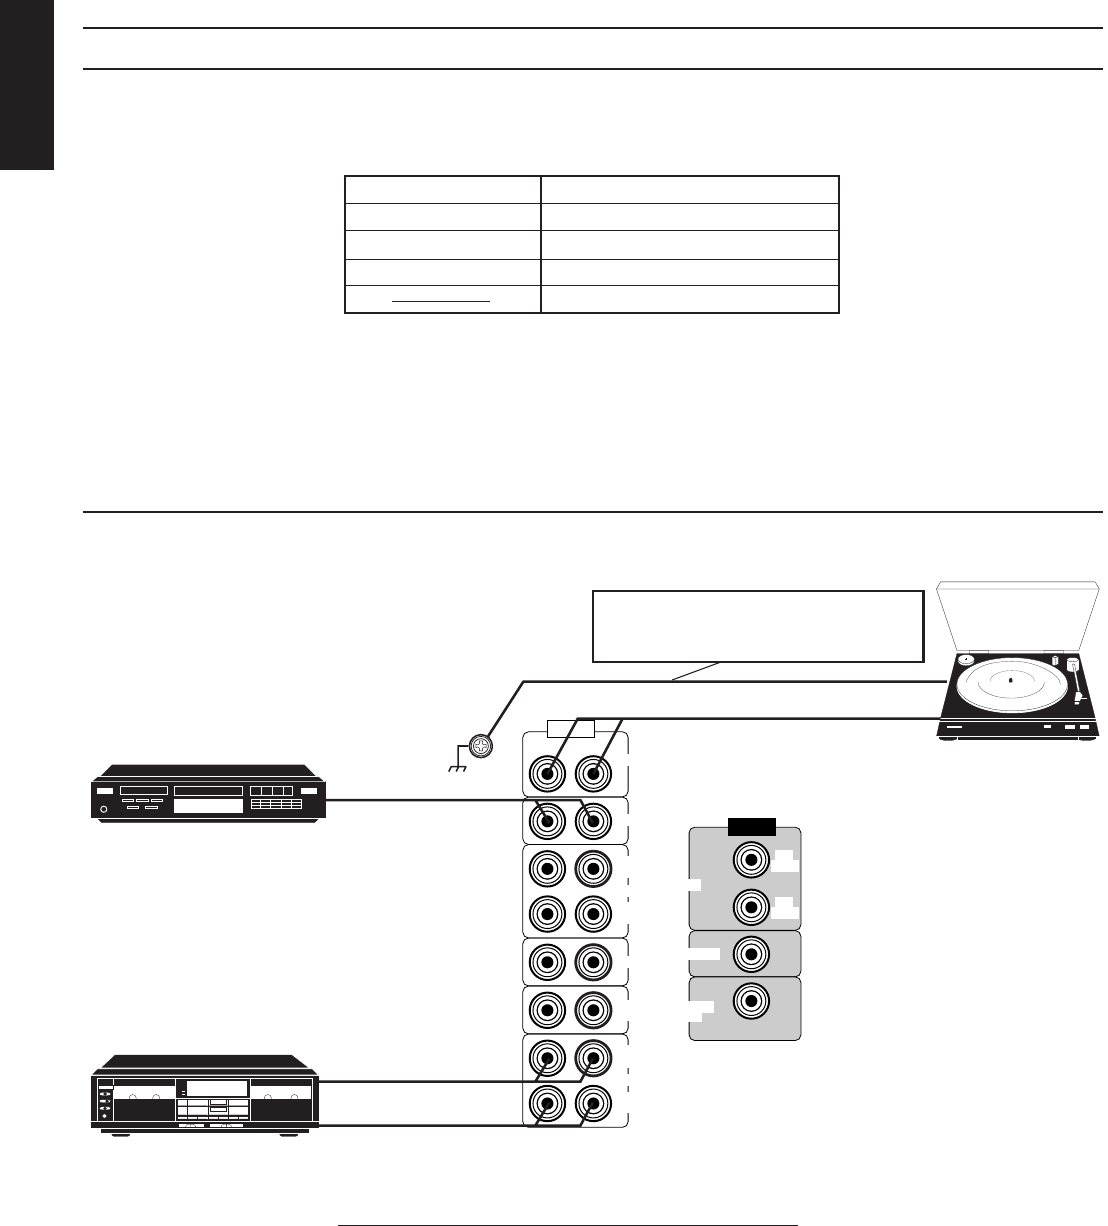
GND
RIGHT LEFT
VCR
IN
(PLAY)
OUT
(REC)
CD
PHONO
AUDIO
TAPE
IN
(PLAY)
OUT
(REC)
VCR
OUT
(REC)
VIDEO
IN
(PLAY)
VIDEO 1
MONITOR
OUT
VIDEO 1
TV
SOUND
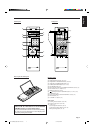
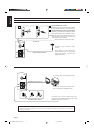
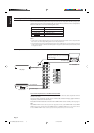
Connecting Audio/Video Components
You can connect the following audio/video components to this receiver using cables with RCA pin plugs (not
supplied). Refer also to the manuals supplied with your components. If you want to connect a component not
listed in the table below, refer to the manual supplied with it.
Notes:
• If you connect a sound-enhancing device such as a graphic equalizer between the source components and
this receiver, the sound output through this receiver may be distorted.
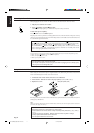
• Any turntables incorporating a small-output cartridge such as an MC (moving-coil type) must be connected
to this receiver through a commercial head amplifier or step-up transformer. Direct connection may result
in insufficient volume.
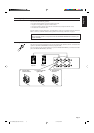
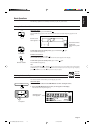
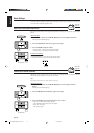
Audio component connections
Audio Components Video Components
• Turntable • TV
• CD player • VCR(s)
• Cassette deck • Video disc player
• Video camera
To audio output
To audio input
To audio output
If a ground wire is provided for your turntable,
connect the cable to the screw marked GND
on the rear panel.
To audio output
CD player
Cassette deck
Turntable
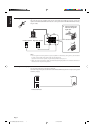
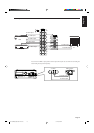
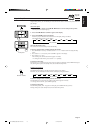
If your audio components have a COMPU LINK-3 terminal
The COMPU LINK remote control system allows you to control other JVC audio components from the
receiver or vice versa.
Connect your audio components and the receiver with the cable (monaural mini-plug supplied with those
components) as well as the connection above.
For detailed information about the connection and the COMPU LINK-3 remote control system, see page 41.
Note:
The COMPU LINK-3 remote control system is the upgraded version of the COMPU LINK-1 and COMPU
LINK-2. Even if your component has the COMPU LINK-1 or COMPU LINK-2 jacks, you can still connect
it in the COMPU LINK-3 remote control system, but some functions may not work correctly.
RX-730RBK(EF)0054-001A.En.01-28 97.7.25, 6:26 PM9